> ## Documentation Index
> Fetch the complete documentation index at: https://docs.labellerr.com/llms.txt
> Use this file to discover all available pages before exploring further.
# Client Review Using Grid View
> Learn how clients can efficiently review and manage annotated files in Labellerr using the grid view, with quick accept or reject options.
This feature allows clients to view files in a grid view, enabling users to quickly accept or reject files with just one click. Below, we provide step-by-step guidance on how to use this functionality.
### 1. Access the Annotated file
* Labeling must be completed within the **Label** section.
* Once labeling is done, files should be submitted.
* Files must be accepted by a reviewer. All reviewer-accepted files will then appear in the **In Client Review** section.
* Next, navigate to the **Files** section by clicking on it.
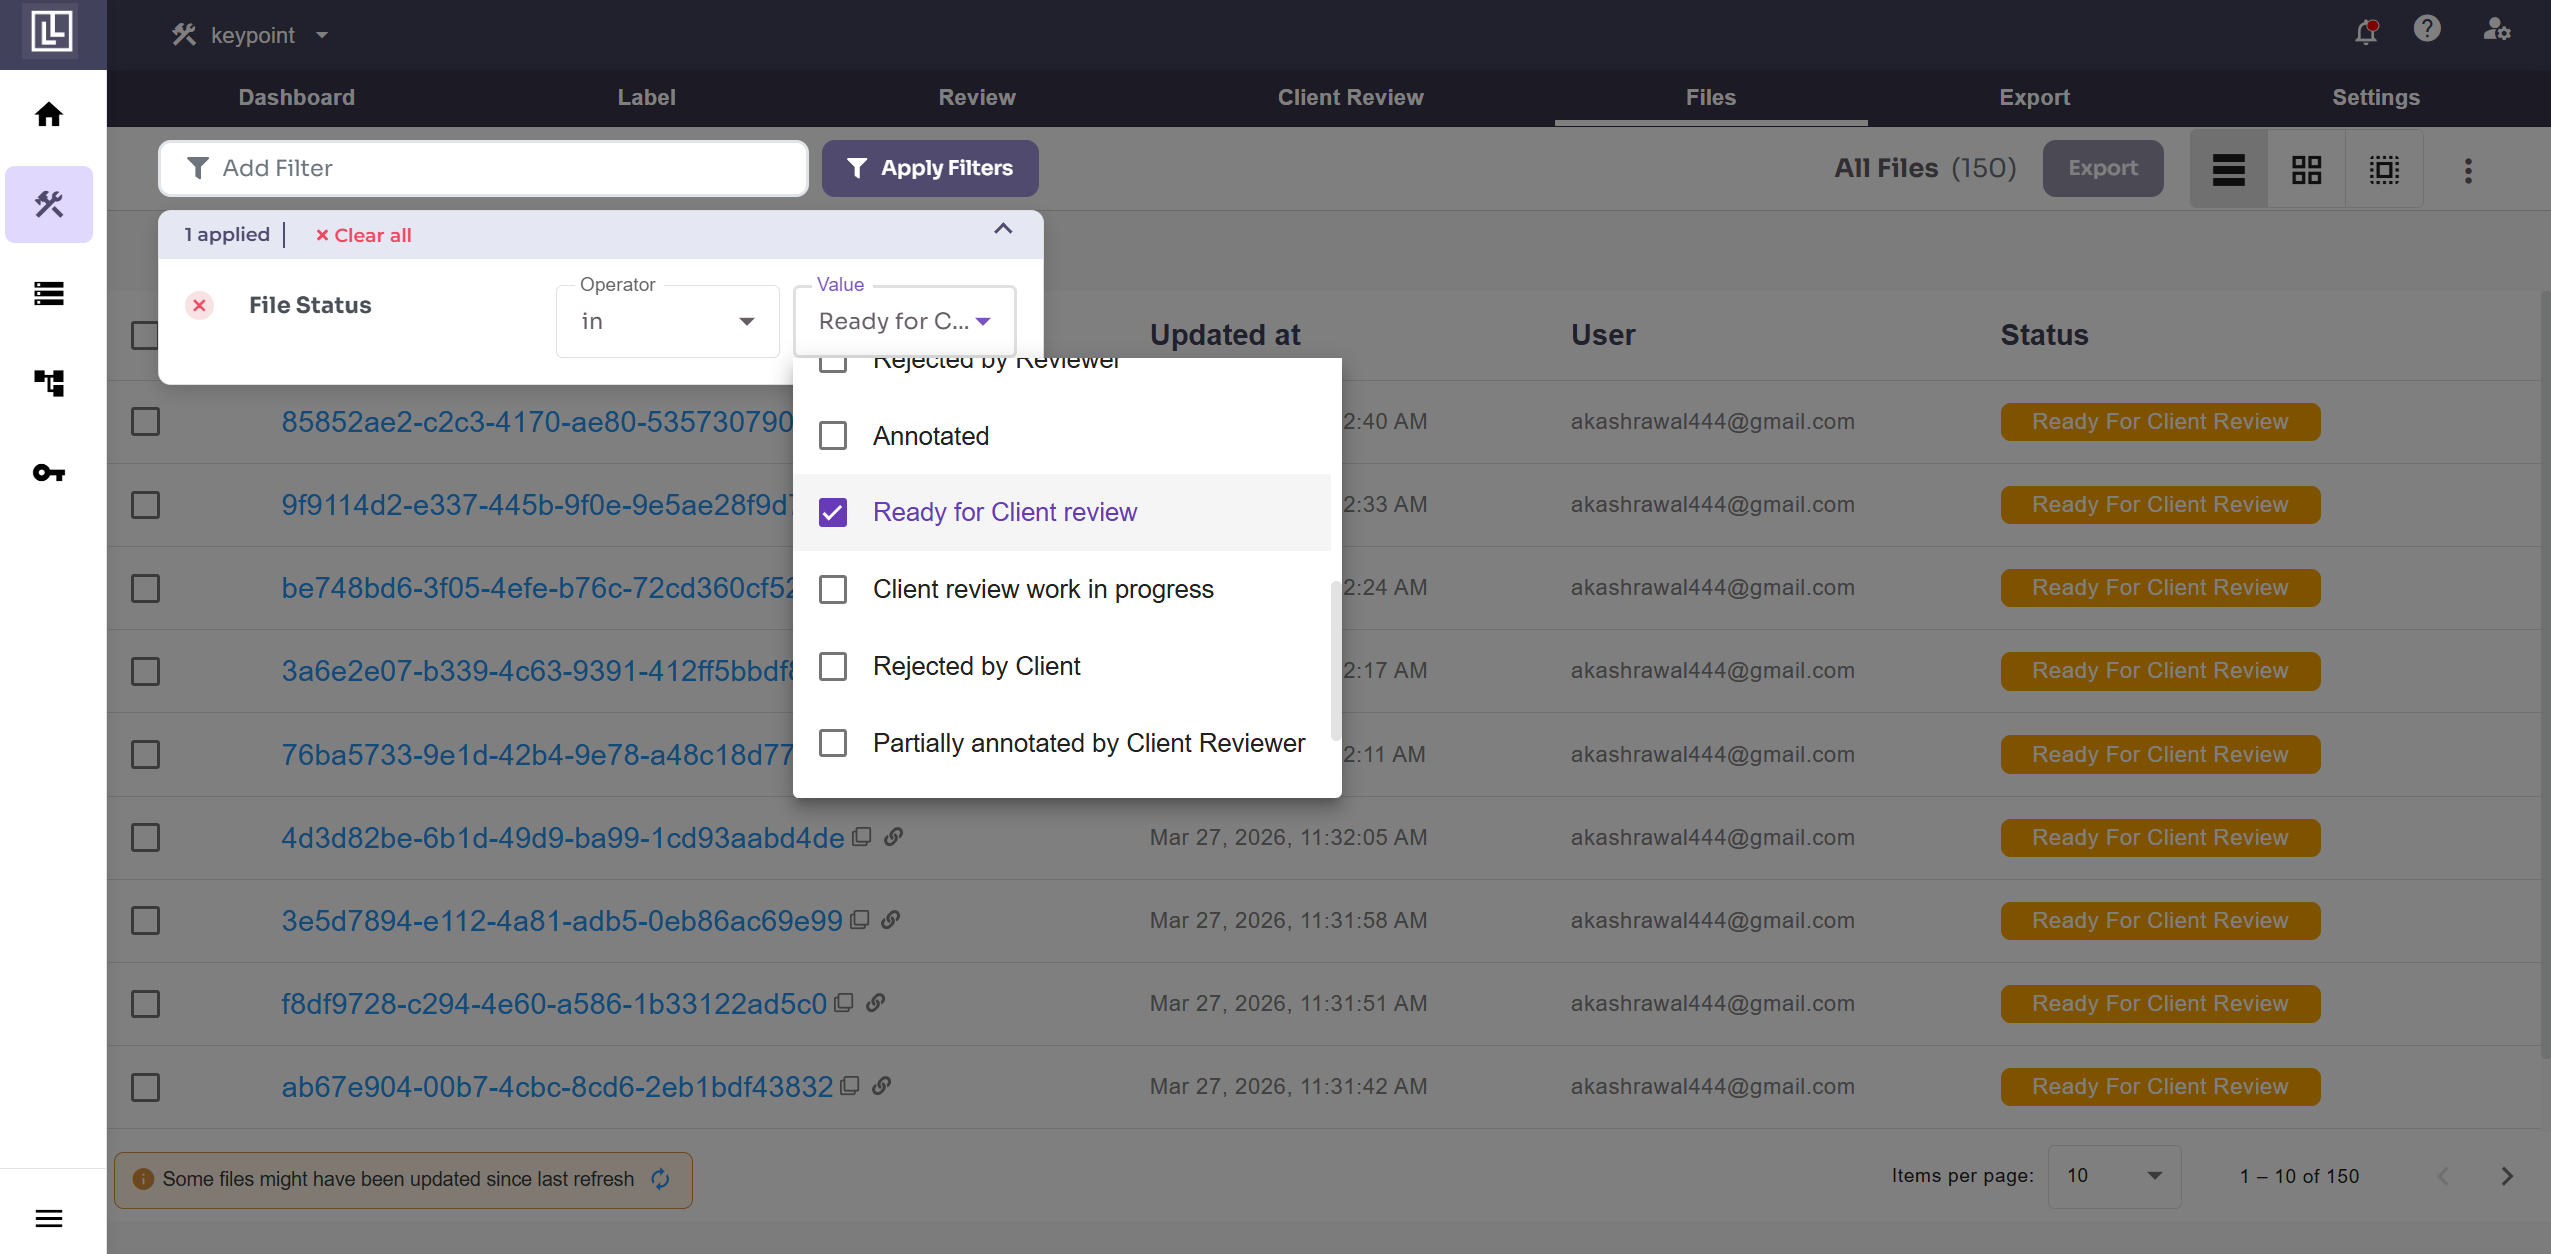
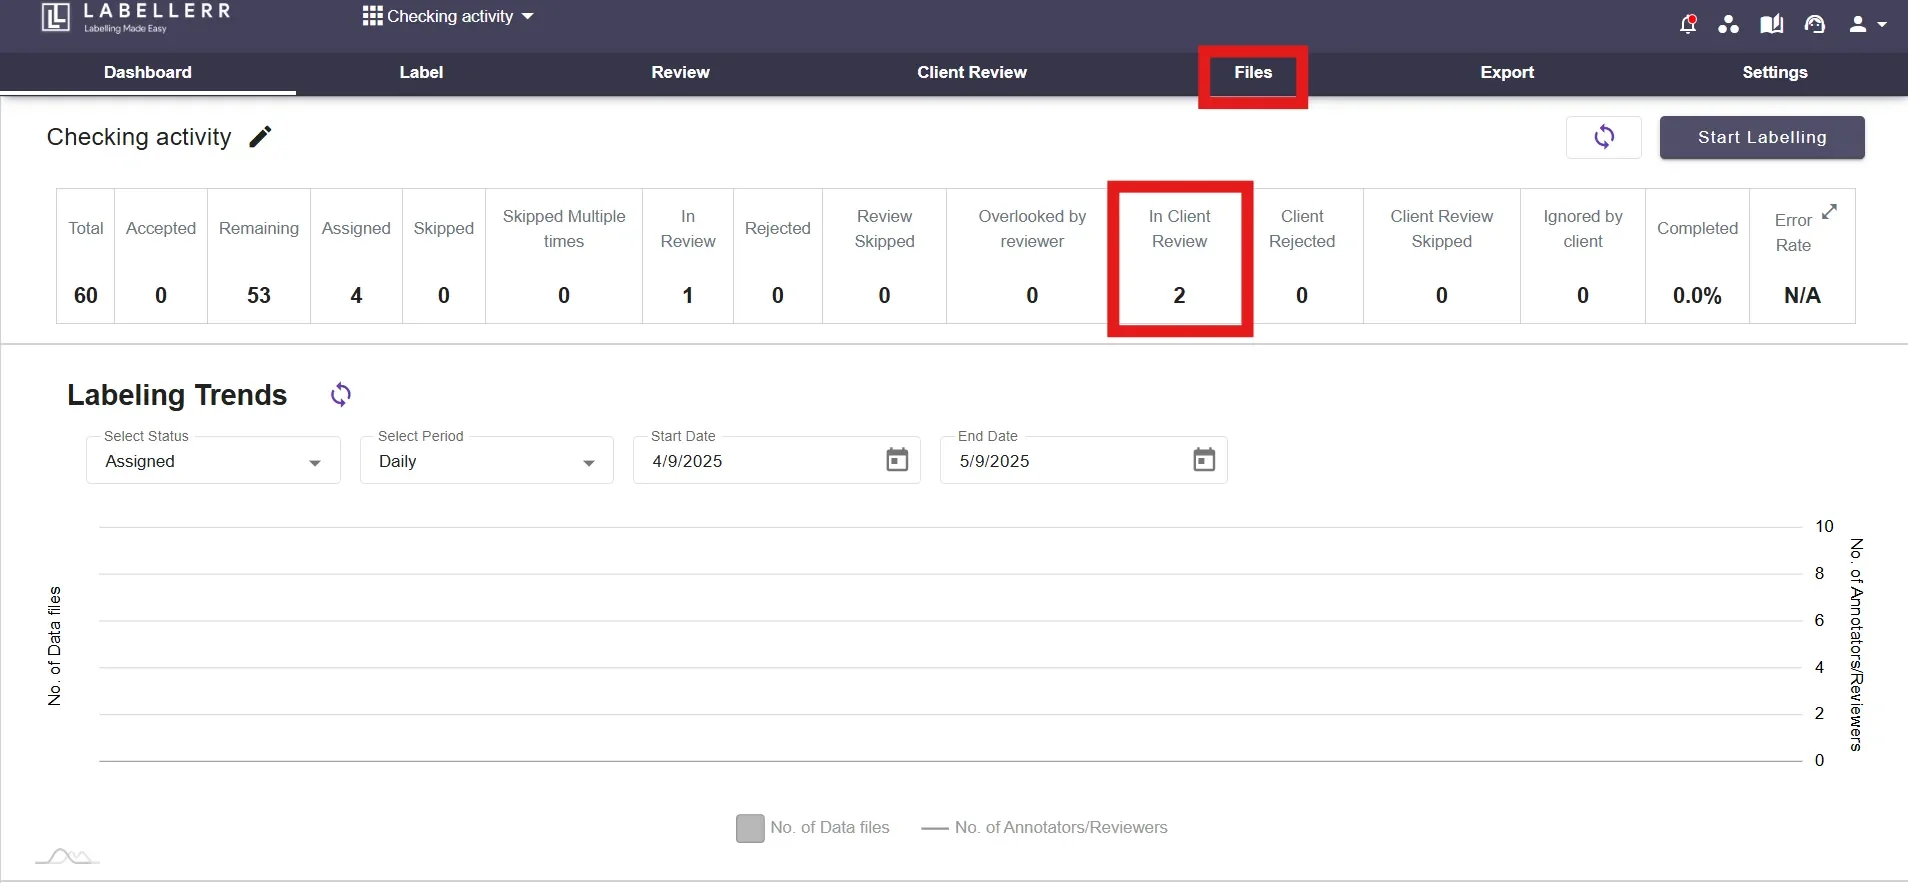 * At the top of the page, in the **File Filters** section, you'll find the File status bar. Select the File status than select the '**Ready for Client Review**' filter to display relevant files. You may also apply other filters as needed to narrow down your search and click on the **Apply Filters**.
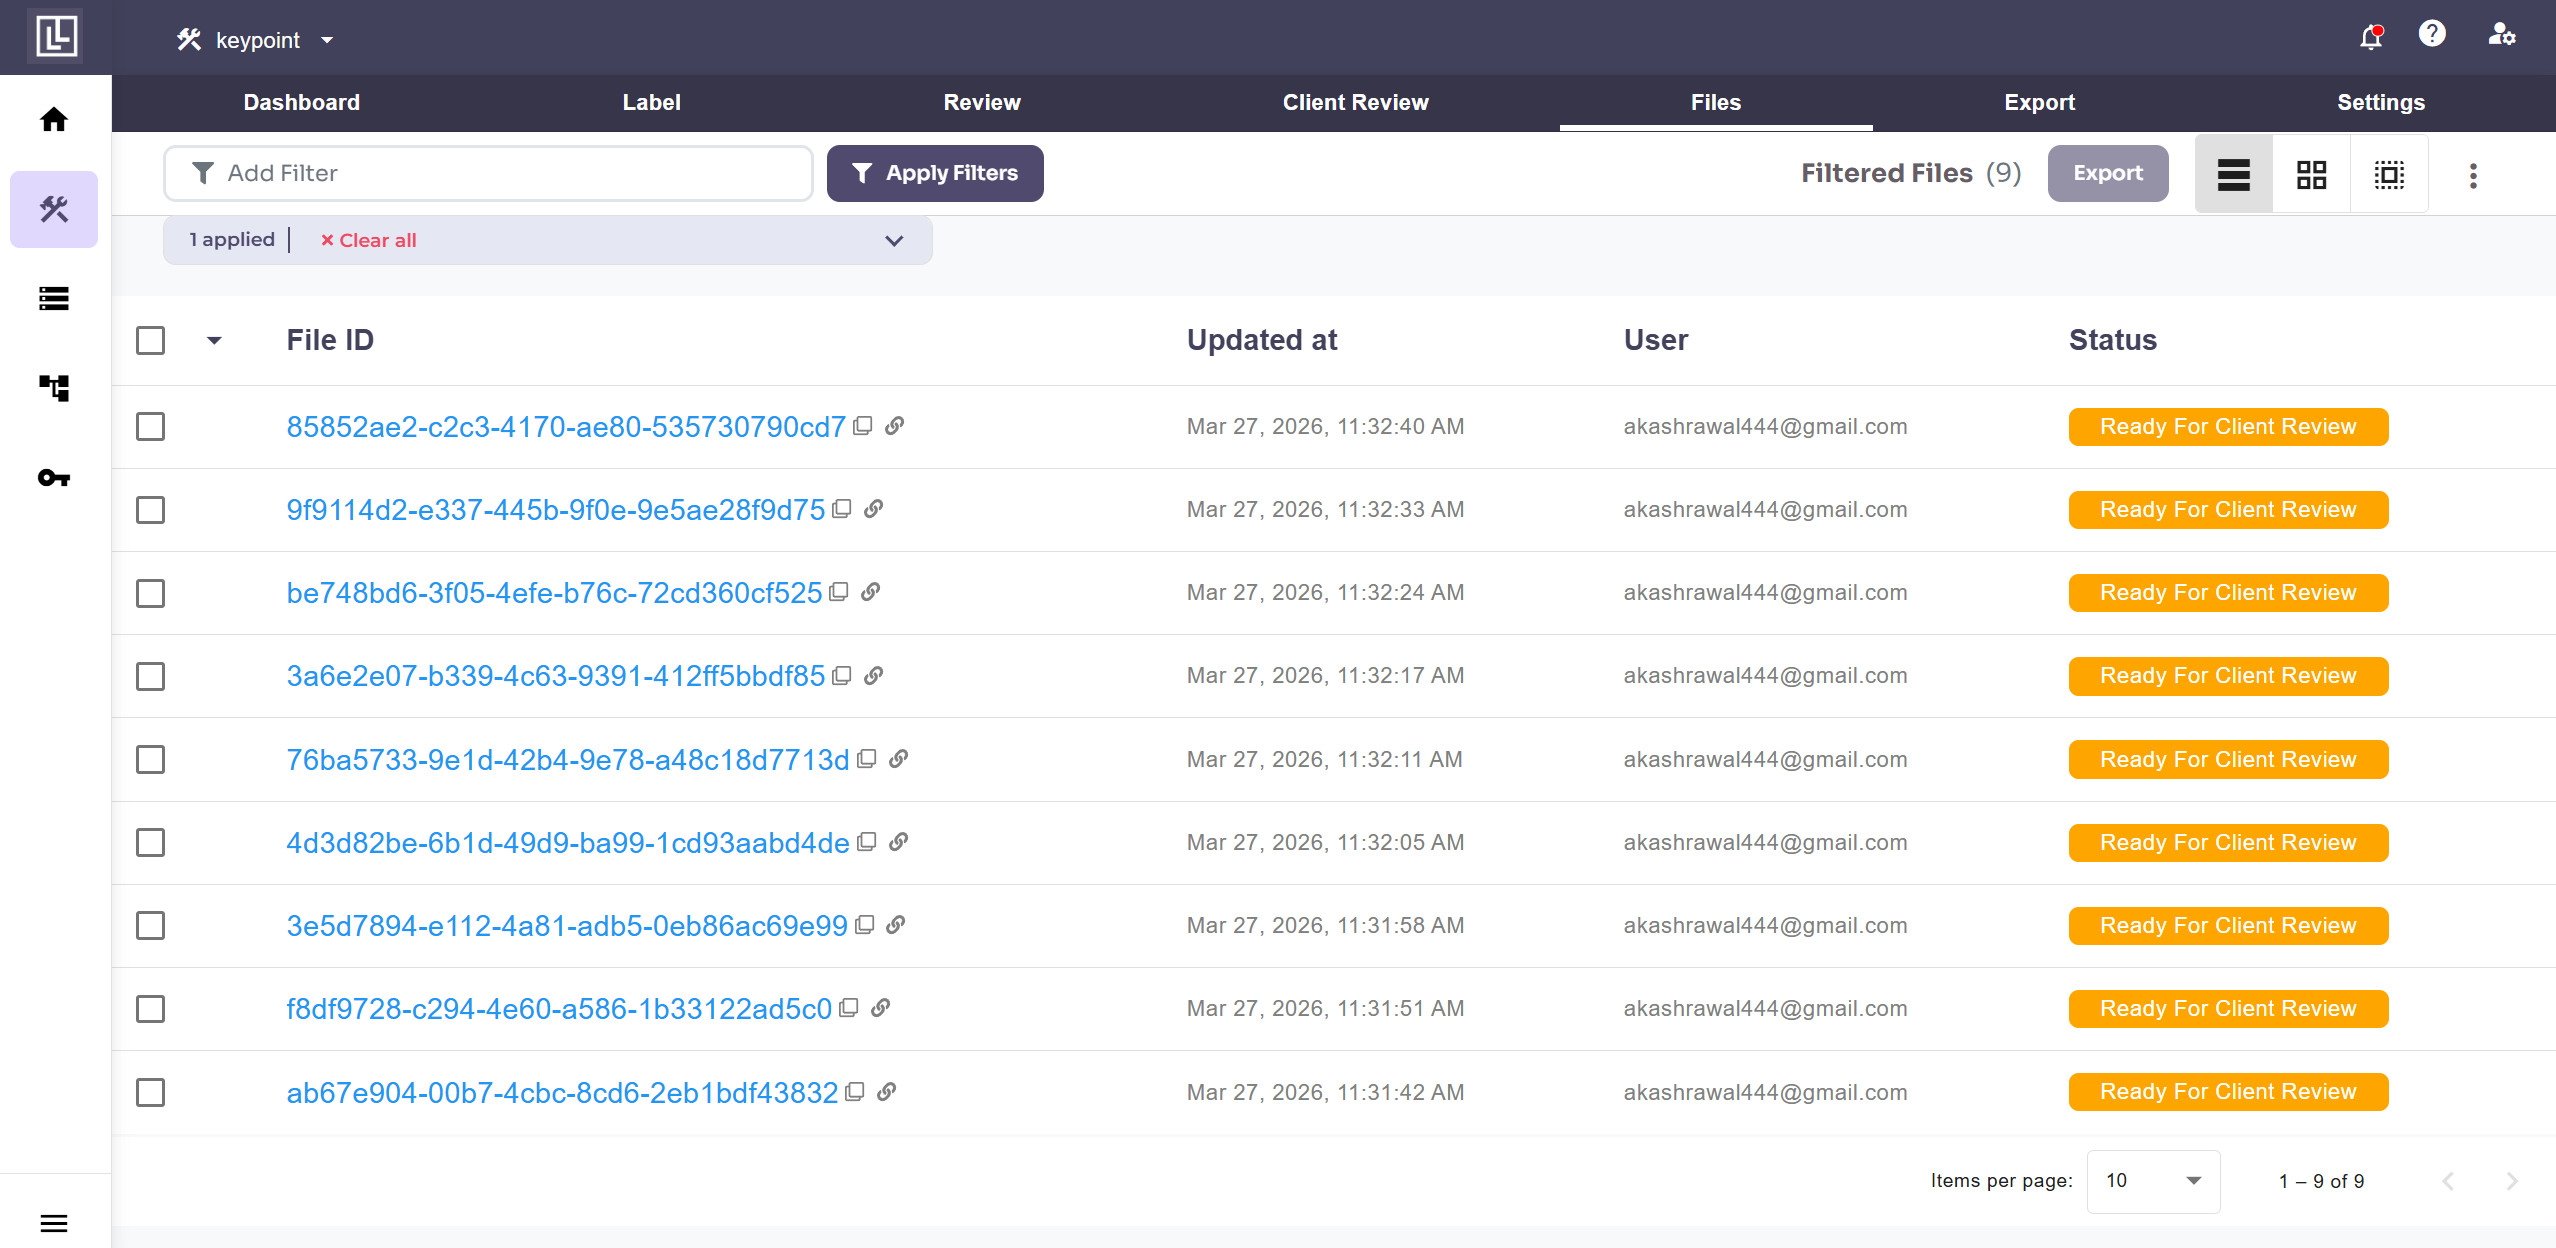
 Once the filter is applied, all your submitted files will be visible in the list, allowing you to view them easily in one place.
 ### 2. Review files in Grid View
Once the files appear, hover over the icon on the top right bar to reveal the '**Grid View**' option, then click it to switch to grid view.
### 2. Review files in Grid View
Once the files appear, hover over the icon on the top right bar to reveal the '**Grid View**' option, then click it to switch to grid view.
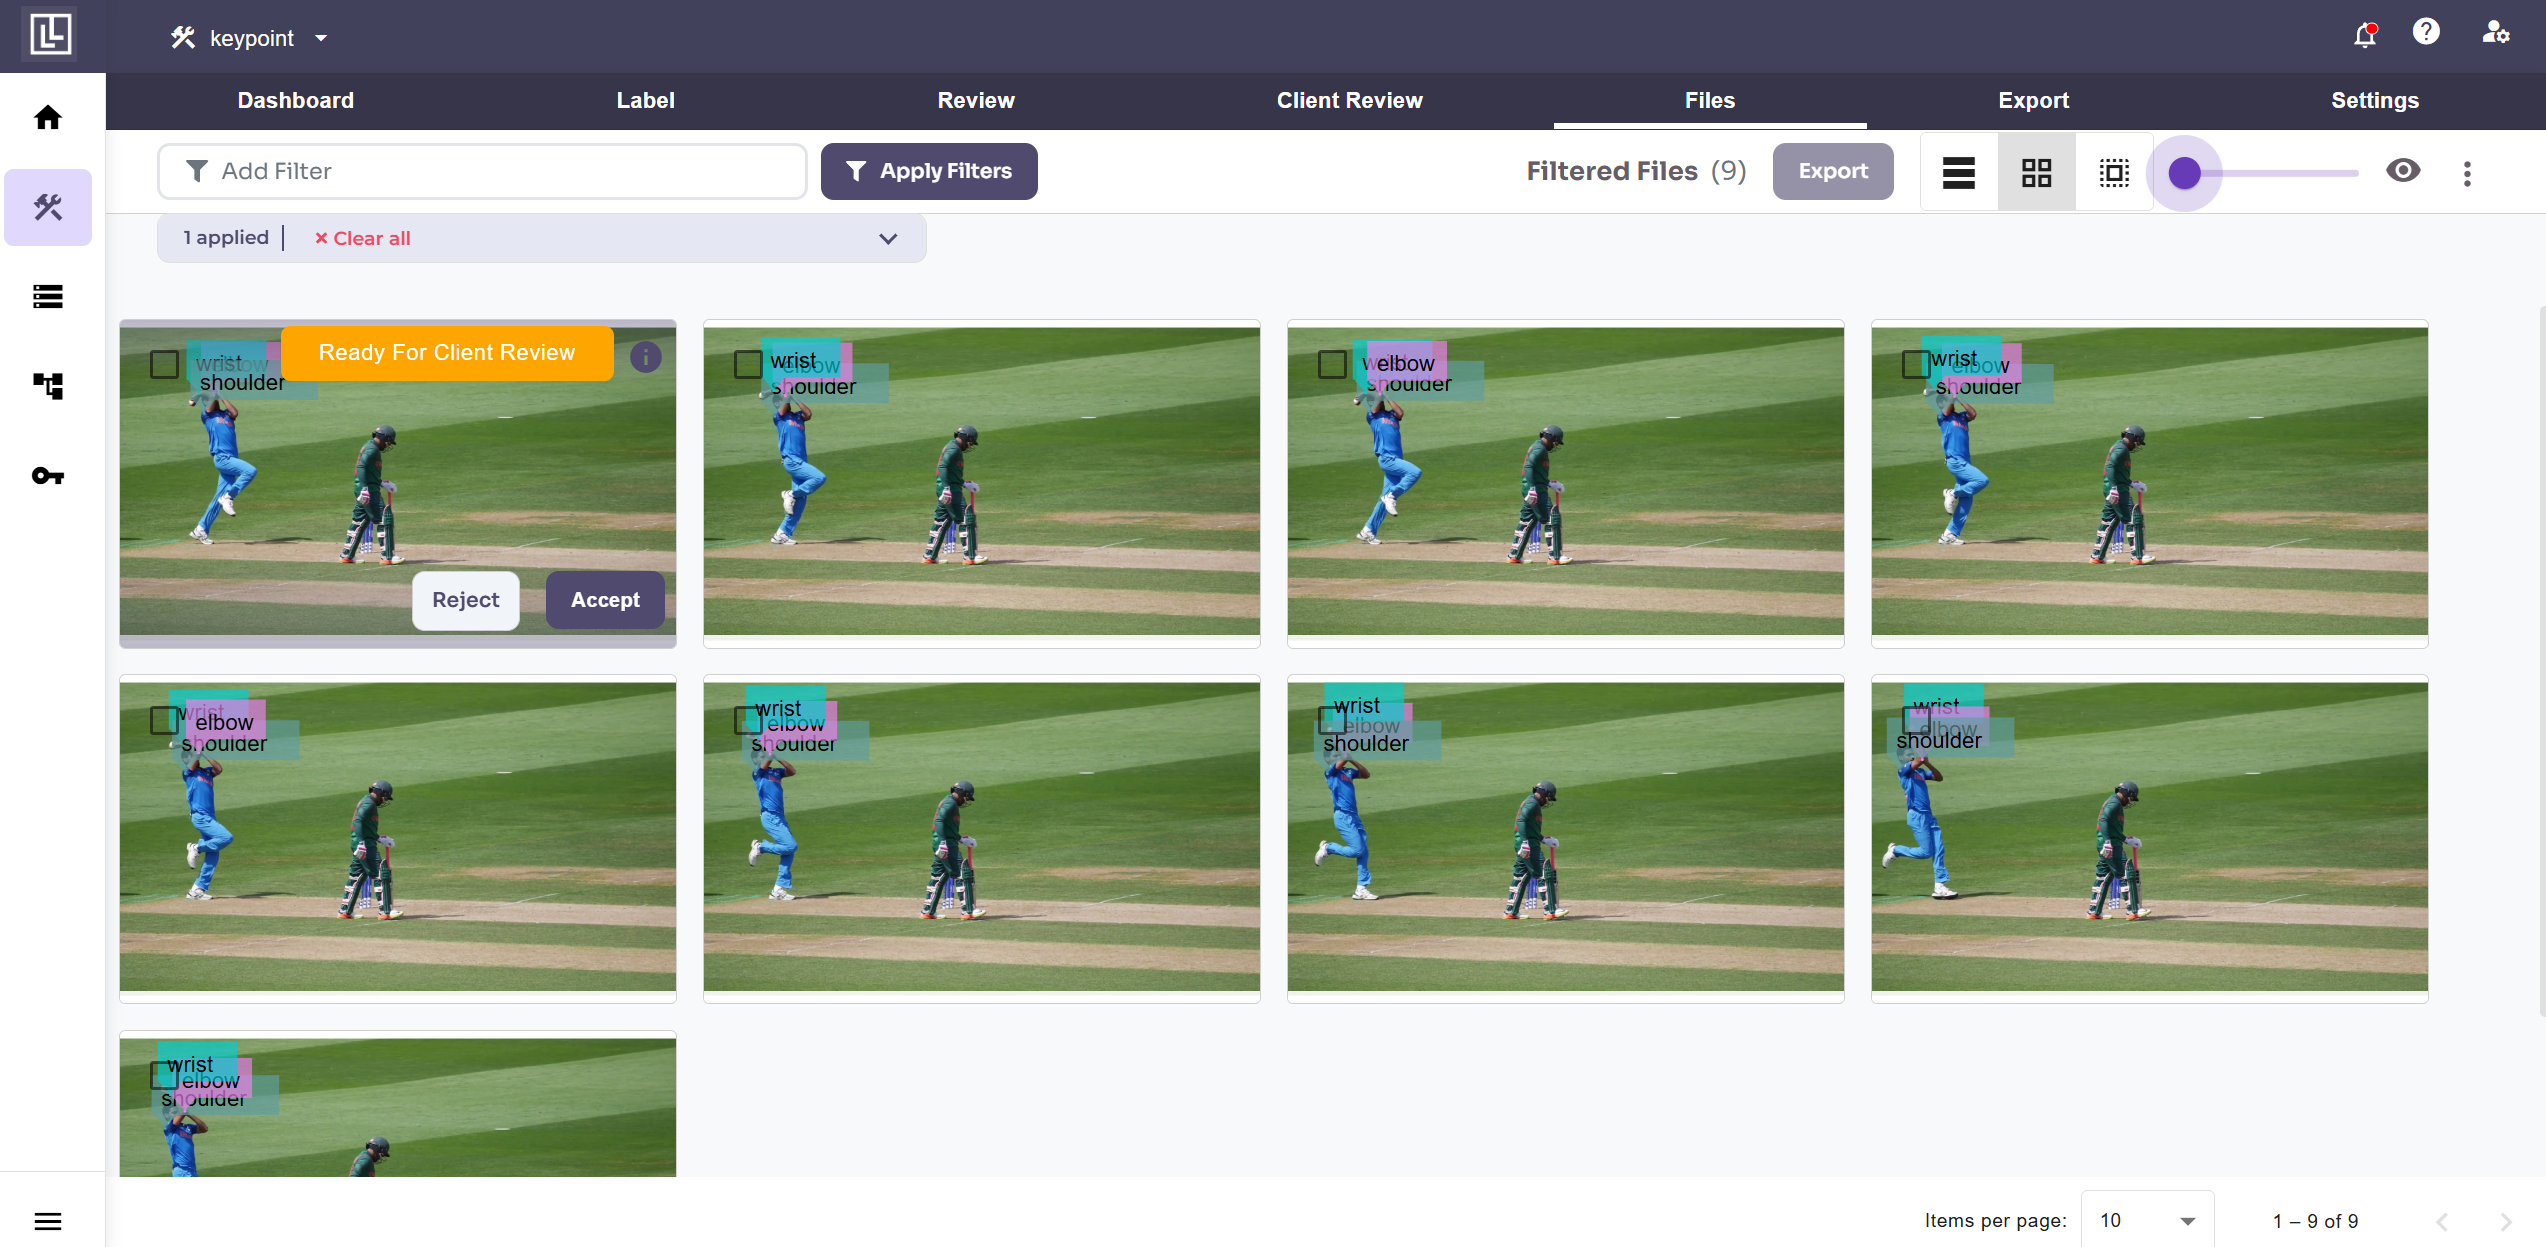 You can now zoom in and out of the image using the slider, making it easier to view your annotated file clearly and in detail, so users can confidently accept or reject the file.
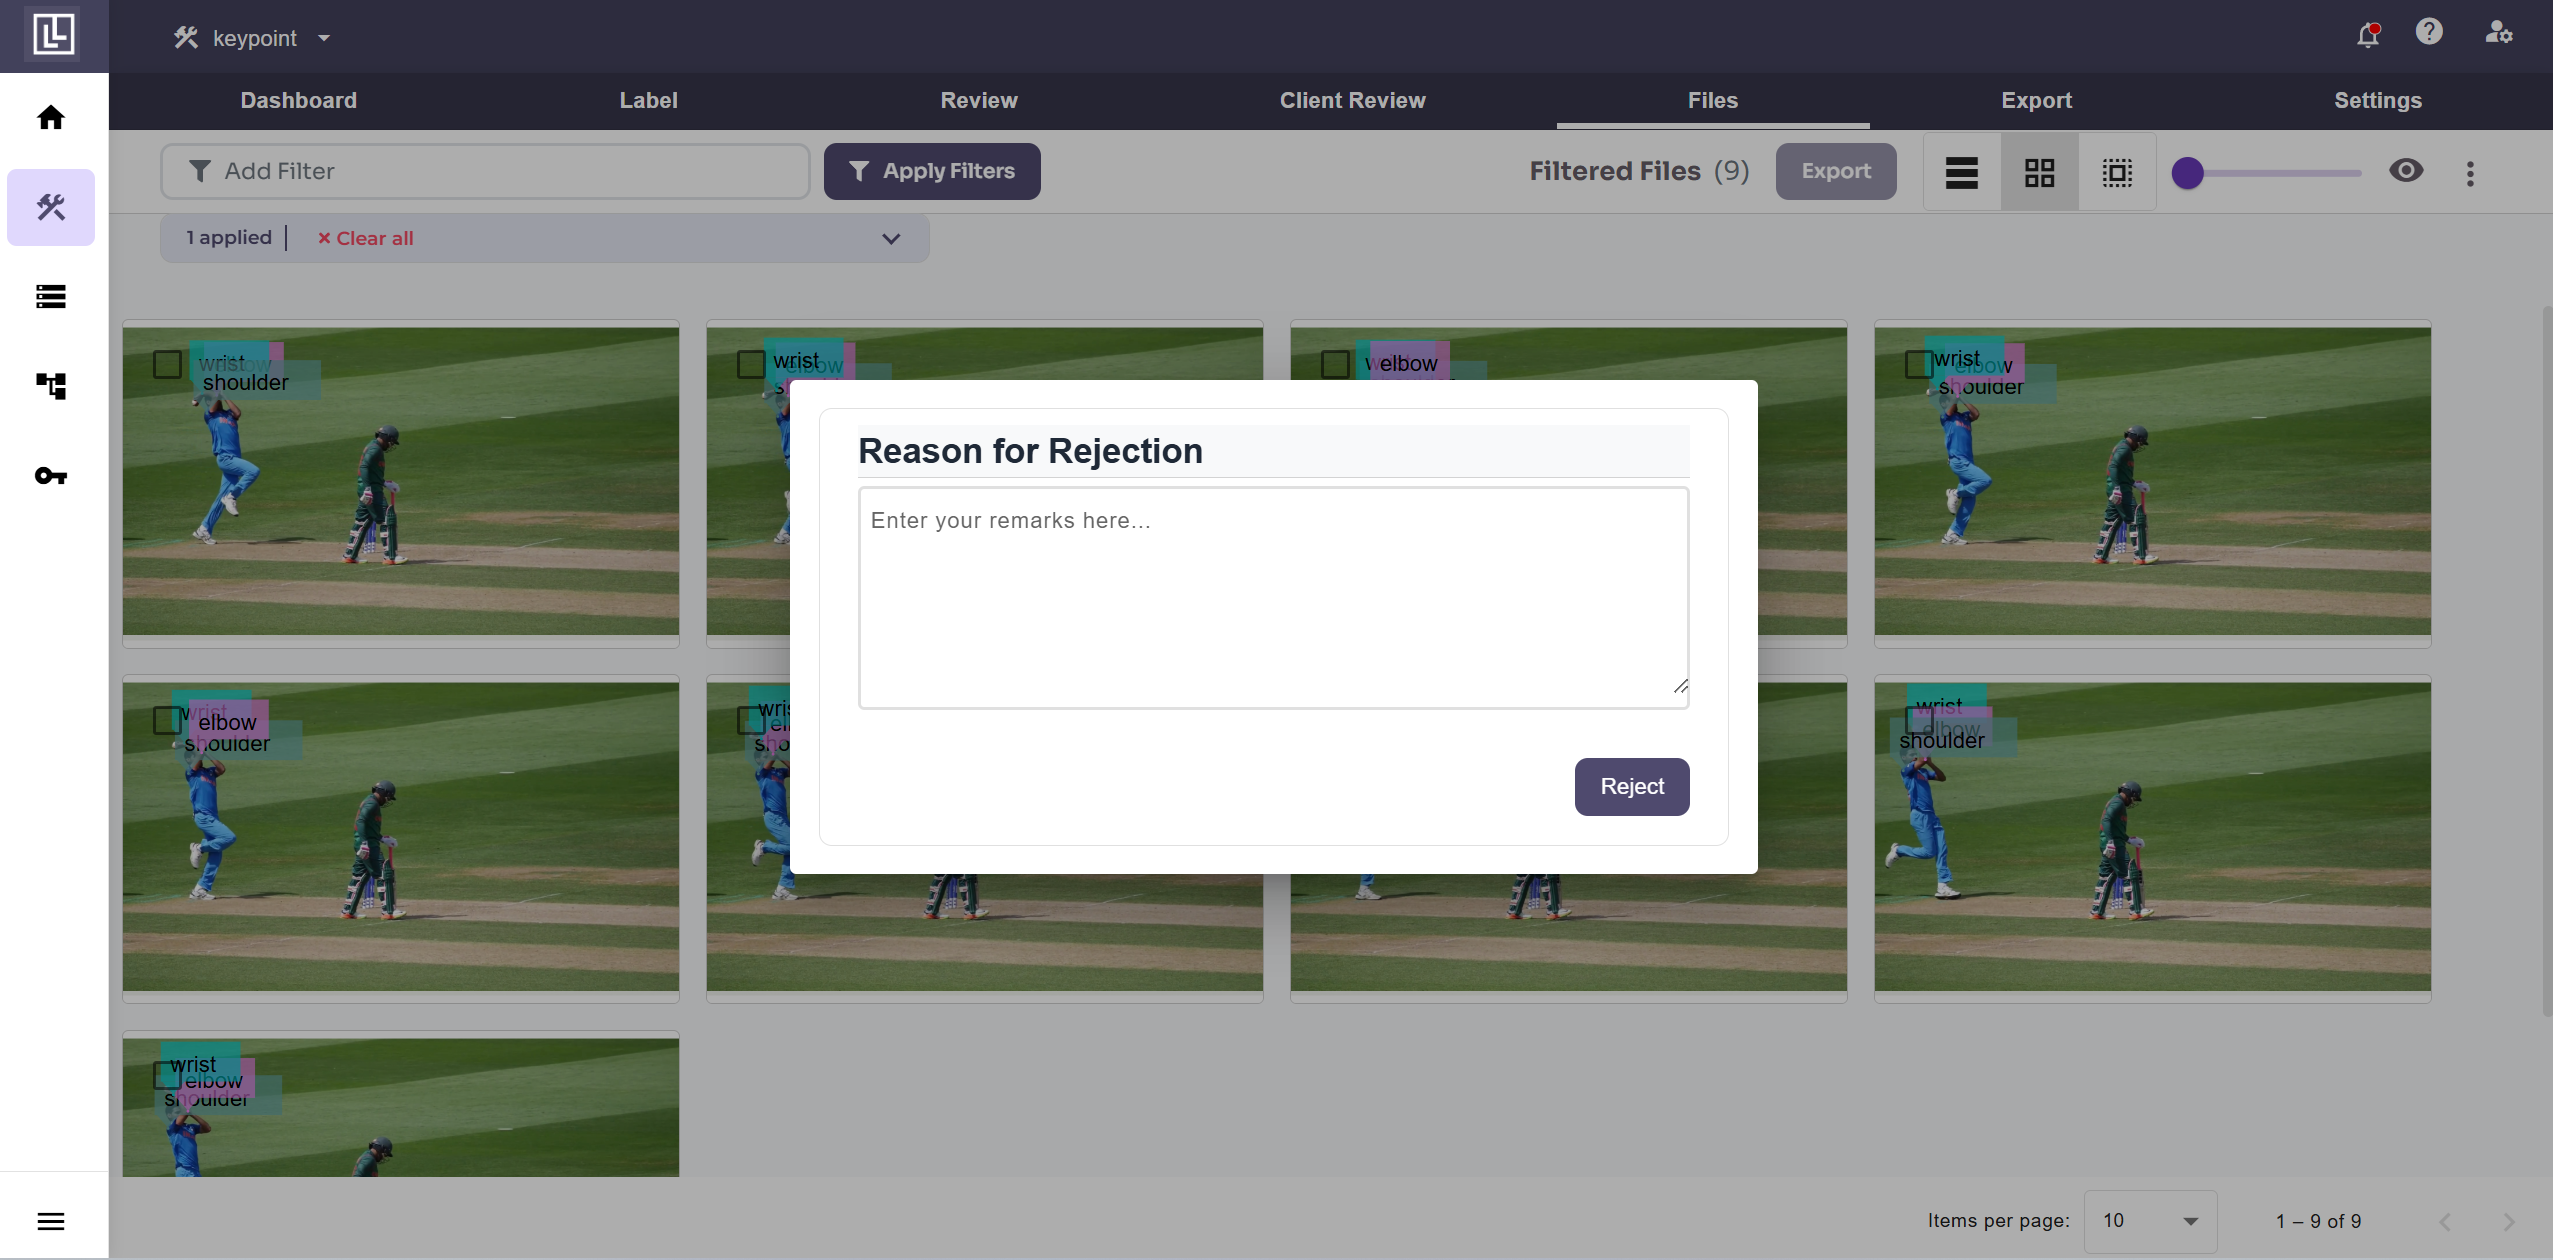
### 3. Reject a file by adding relevant remarks
This feature adds remarks before rejection, ensuring clarity, transparency, and constructive feedback for better communication.
You can now zoom in and out of the image using the slider, making it easier to view your annotated file clearly and in detail, so users can confidently accept or reject the file.
### 3. Reject a file by adding relevant remarks
This feature adds remarks before rejection, ensuring clarity, transparency, and constructive feedback for better communication.
 For further assistance contact [support@tensormatics.com](mailto:support@tensormatics.com)