> ## Documentation Index
> Fetch the complete documentation index at: https://docs.labellerr.com/llms.txt
> Use this file to discover all available pages before exploring further.
# Start Labelling
> A guide for both new and experienced users to understand the labelling process, annotation tools, sample editing, and screen elements in Labellerr.
For those new to Labellerr, this guide would assist in understanding the Labelling process with annotations and for experienced annotators, this guide would help them get familiarized with Labellerr. The guide also covers sample editing tools such as brightness, crop etc and detailed explanations of how each of the annotations is used.
This guide covers the complete labelling workflow in Labellerr:
* **Accessing the Labelling Screen** - Getting started with annotation interface
* **Basics of Labelling** - Fundamental concepts and processes
* **Annotation Tools** - How to use different annotation types effectively
* **Delete, Hide and Unhide** - Managing annotations during workflow
* **Labelling Screen Elements** - Understanding the interface components
* **Image Editing Icons** - Tools for image manipulation and enhancement
## How to access the Labelling screen?
This is how the Dashboard screen appears. “A” is where you select the project that needs labelling. “B” is the Status Bar and “C” Is where you can start labelling.
For more on the Status bar, check out the [Status Bar Elements](/getting-started/status-bar-elements) guide.
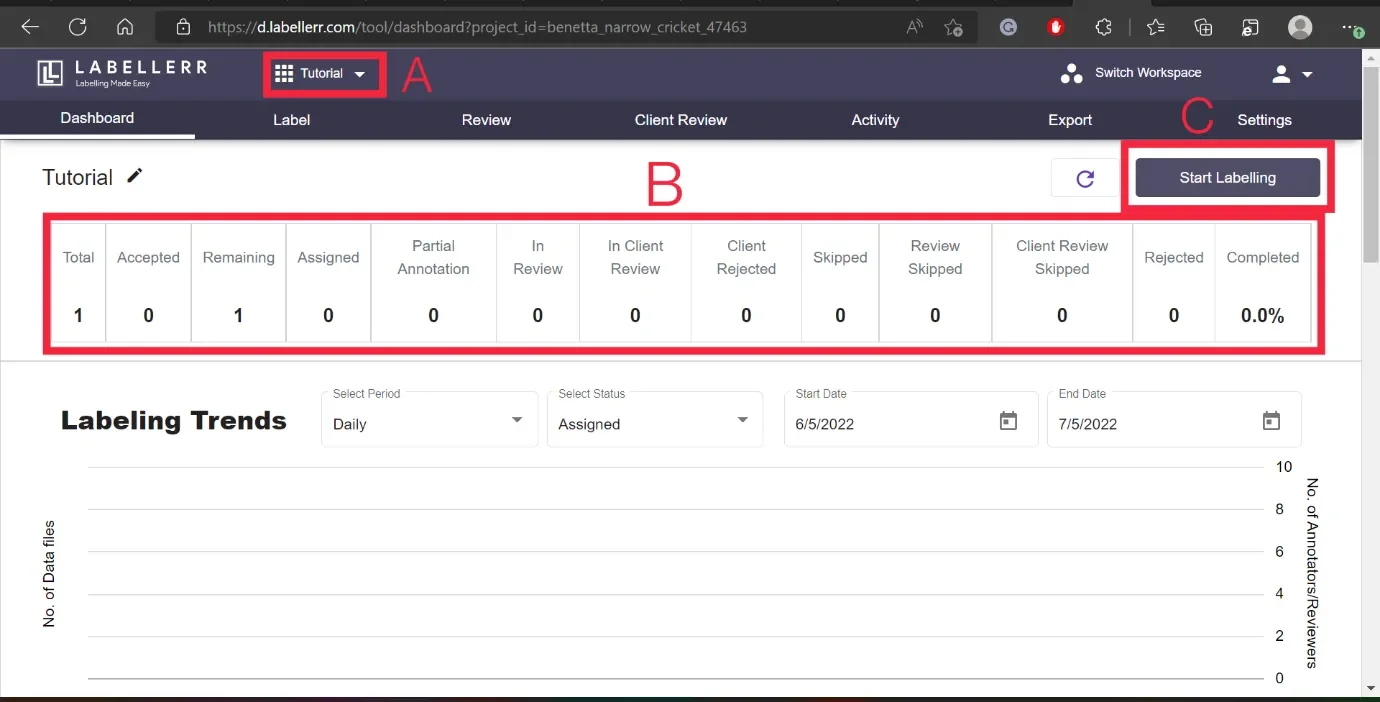 To start labelling simply click on “C”, **Start Labelling** OR select the ‘**Label**’ tab from the **Task Bar**
### Labelling Screen
This is the screen that will appear once labelling is commenced. The Labelling Screen displays Annotations, Questions, Sample editing tools along with some basic elements.
To start labelling simply click on “C”, **Start Labelling** OR select the ‘**Label**’ tab from the **Task Bar**
### Labelling Screen
This is the screen that will appear once labelling is commenced. The Labelling Screen displays Annotations, Questions, Sample editing tools along with some basic elements.
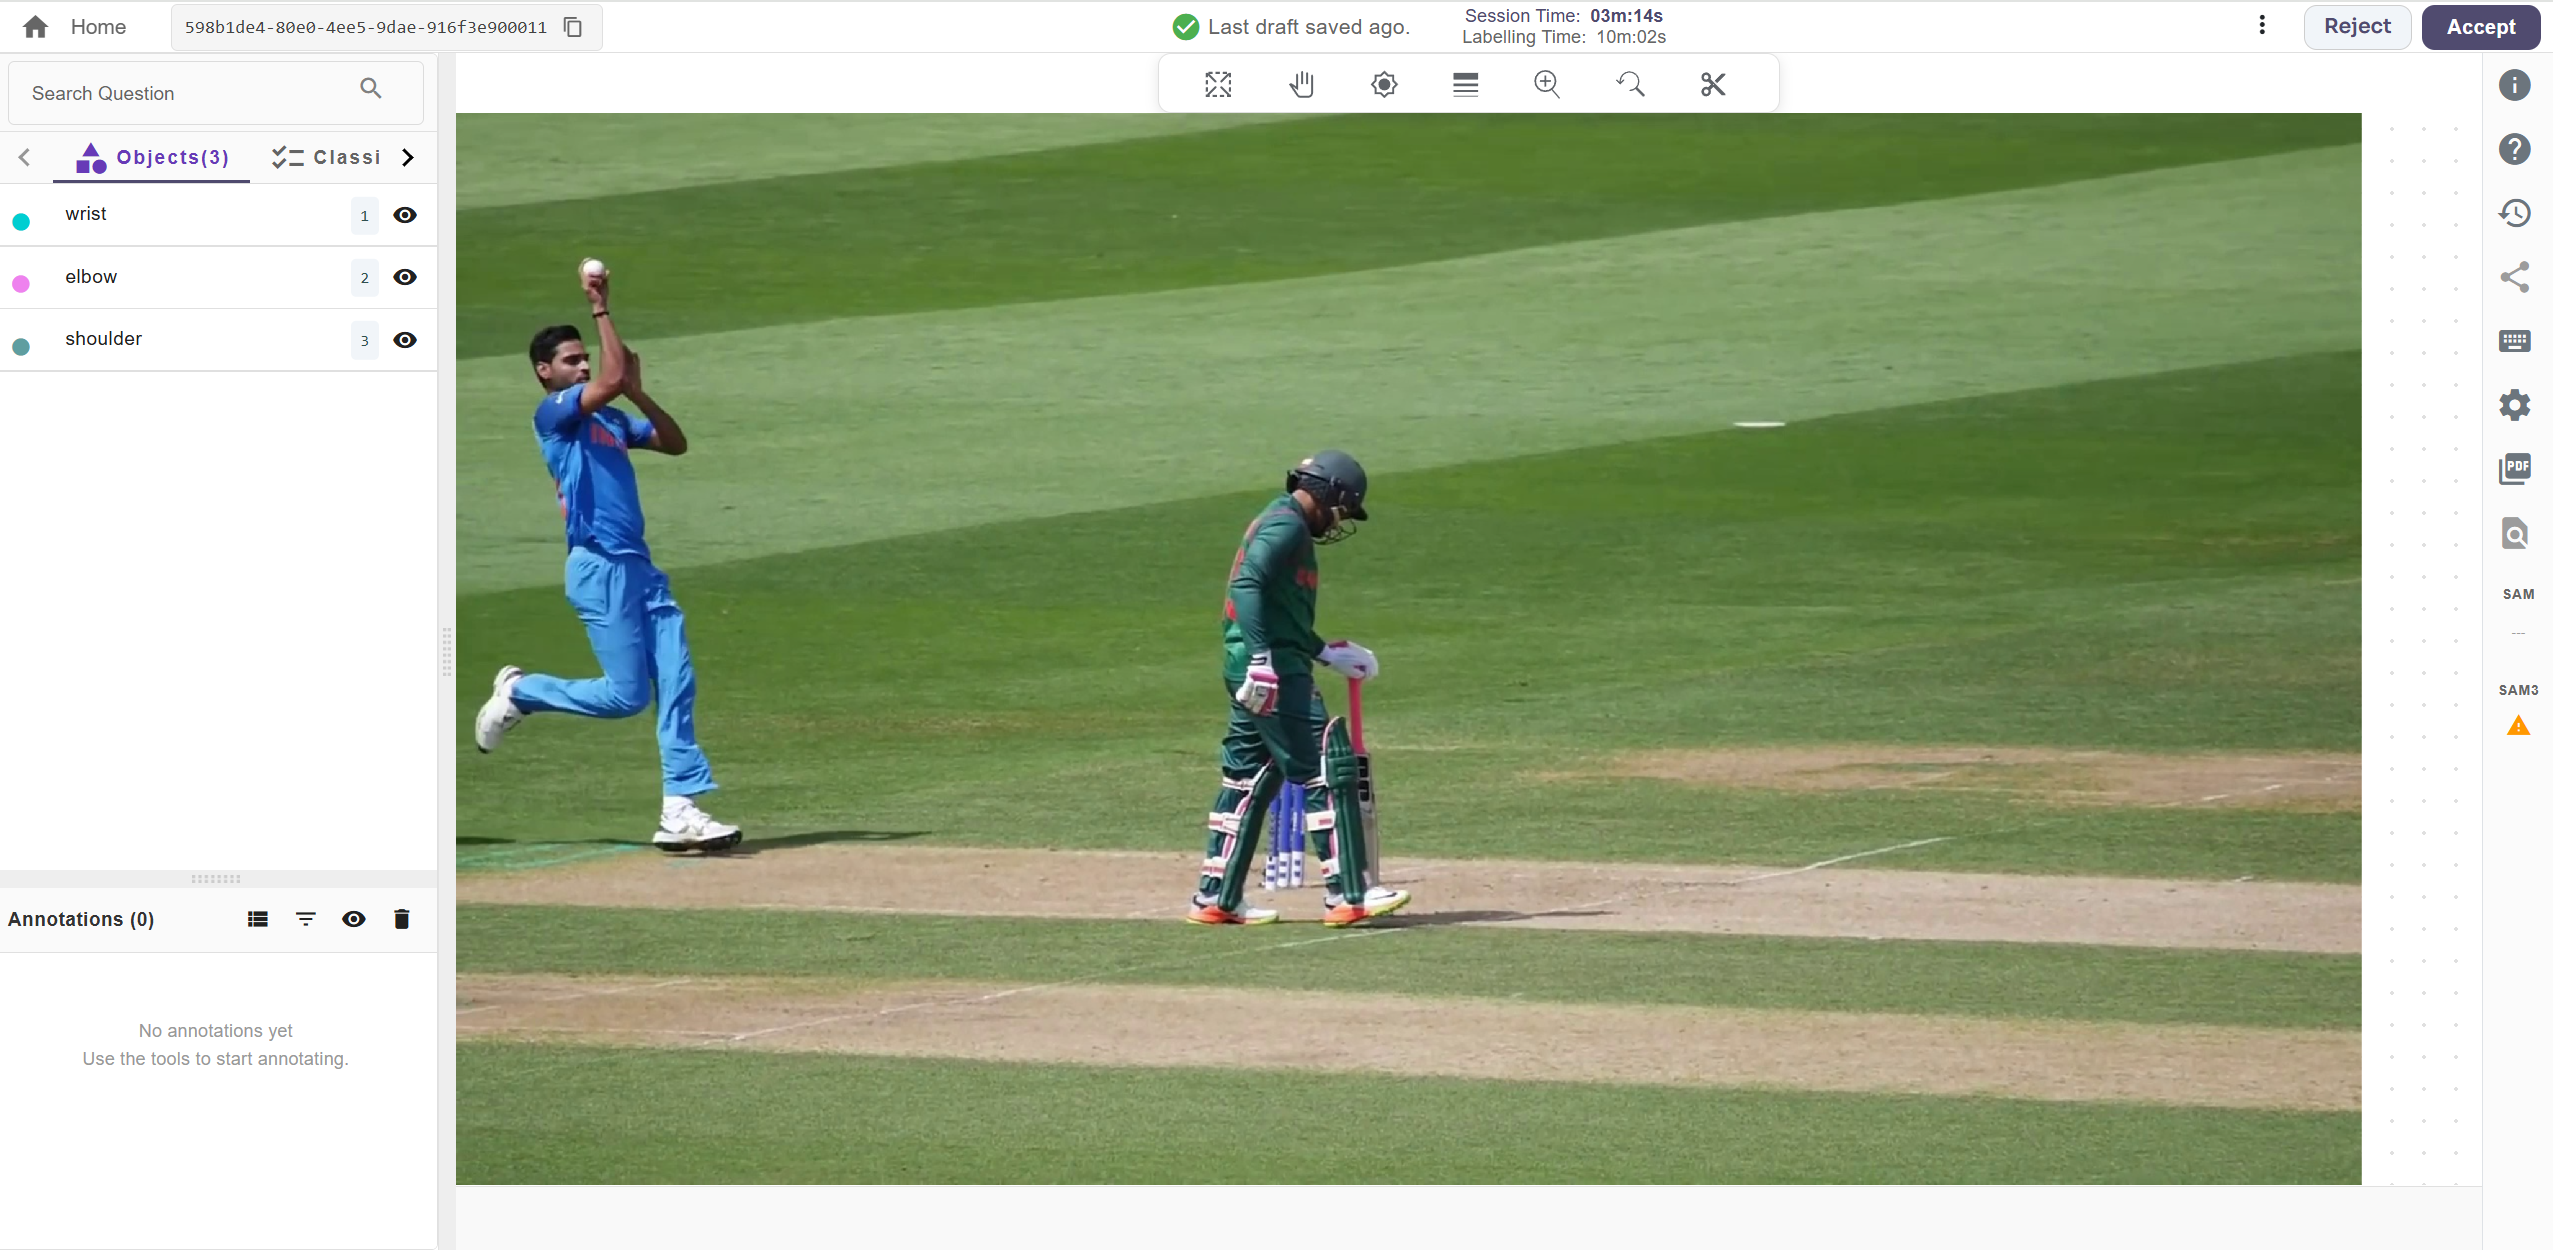 For More on labelling Screen Elements, Check out the [Labelling Screen Elements Guide](/actions/labelling-screen-elements).
### Annotations
There are six main annotations that you can use on Labellerr
1. **Bounding Box**
2. **Polygon**
3. **Dot**
4. **Polyline**
5. **Keypoint**
For more on how to use annotations, check out the [How to Use Annotations](/actions/annotations-guide) guide.
An annotation can also be edited based on classification, **Deleted** and **Hidden** easily. **Delete** can be used instead of **clear all answers** option if a single annotation is to be removed. **Hidden** is used when there is overlapping of different annotations. To avoid mistakes, some annotations can be hidden.
For more on deleting and hiding annotations, check out the [Delete, Hide and Unhide annotations](/actions/delete-hide-unhide) guide.
Additionally, some editing tools for the samples are available. Move, Brightness, Crop, Selection tool and Zoom are the available tools. They are present on the upperr-center of the sample.
For More on labelling Screen Elements, Check out the [Labelling Screen Elements Guide](/actions/labelling-screen-elements).
### Annotations
There are six main annotations that you can use on Labellerr
1. **Bounding Box**
2. **Polygon**
3. **Dot**
4. **Polyline**
5. **Keypoint**
For more on how to use annotations, check out the [How to Use Annotations](/actions/annotations-guide) guide.
An annotation can also be edited based on classification, **Deleted** and **Hidden** easily. **Delete** can be used instead of **clear all answers** option if a single annotation is to be removed. **Hidden** is used when there is overlapping of different annotations. To avoid mistakes, some annotations can be hidden.
For more on deleting and hiding annotations, check out the [Delete, Hide and Unhide annotations](/actions/delete-hide-unhide) guide.
Additionally, some editing tools for the samples are available. Move, Brightness, Crop, Selection tool and Zoom are the available tools. They are present on the upperr-center of the sample.
 For more on Image editing tools, check out the [Image Editing Icons Guide (Actions)](/actions/image-editing-icons) guide.
To predict the description/brief/keywords about the image using Generative AI, visit the [Image Captioning Using Generative AI](/features/image-captioning) guide.
For further assistance contact [support@tensormatics.com](mailto:support@tensormatics.com)
For more on Image editing tools, check out the [Image Editing Icons Guide (Actions)](/actions/image-editing-icons) guide.
To predict the description/brief/keywords about the image using Generative AI, visit the [Image Captioning Using Generative AI](/features/image-captioning) guide.
For further assistance contact [support@tensormatics.com](mailto:support@tensormatics.com)