> ## Documentation Index
> Fetch the complete documentation index at: https://docs.labellerr.com/llms.txt
> Use this file to discover all available pages before exploring further.
# Auto Label Jobs by Active Learning
> Learn how to use active learning and zero-shot learning in Labellerr to autolabel datasets efficiently, select informative samples, and manage auto label jobs.
In Labellerr, we have implemented active learning to autolabel datasets by selecting the most informative samples for labeling, complemented by zero-shot learning. The results in the datasets are excellent. Here's how to perform auto label jobs on Labellerr:
### To create a new job or view the status and details of past jobs, including attached model details and predictions, follow these steps:
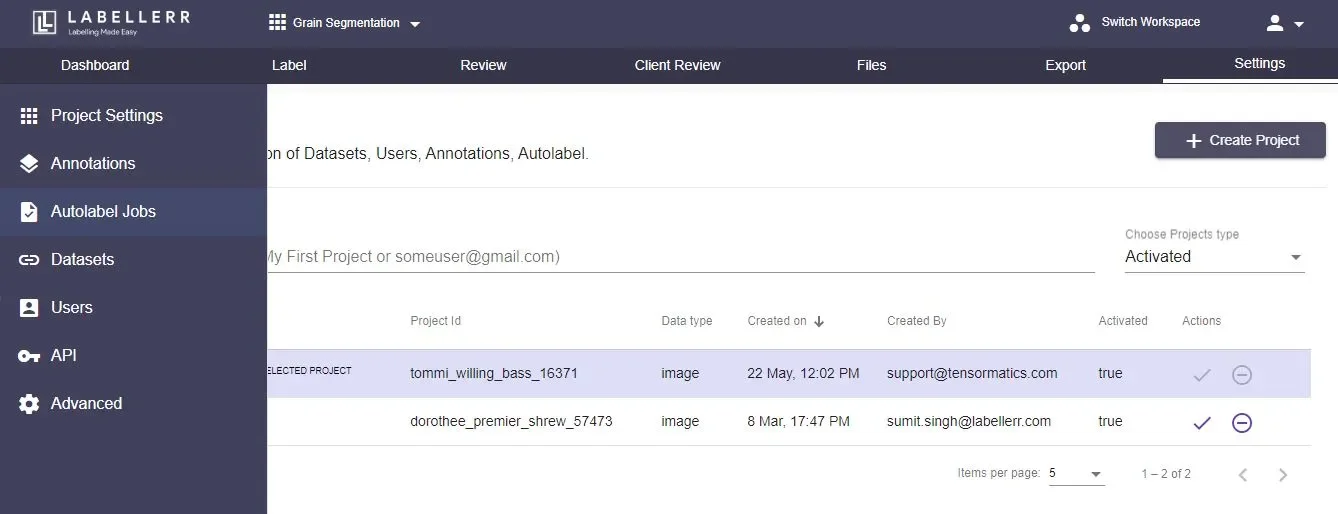
1. Go to '**Settings**' on the dashboard and select '**Autolabel Jobs**'.
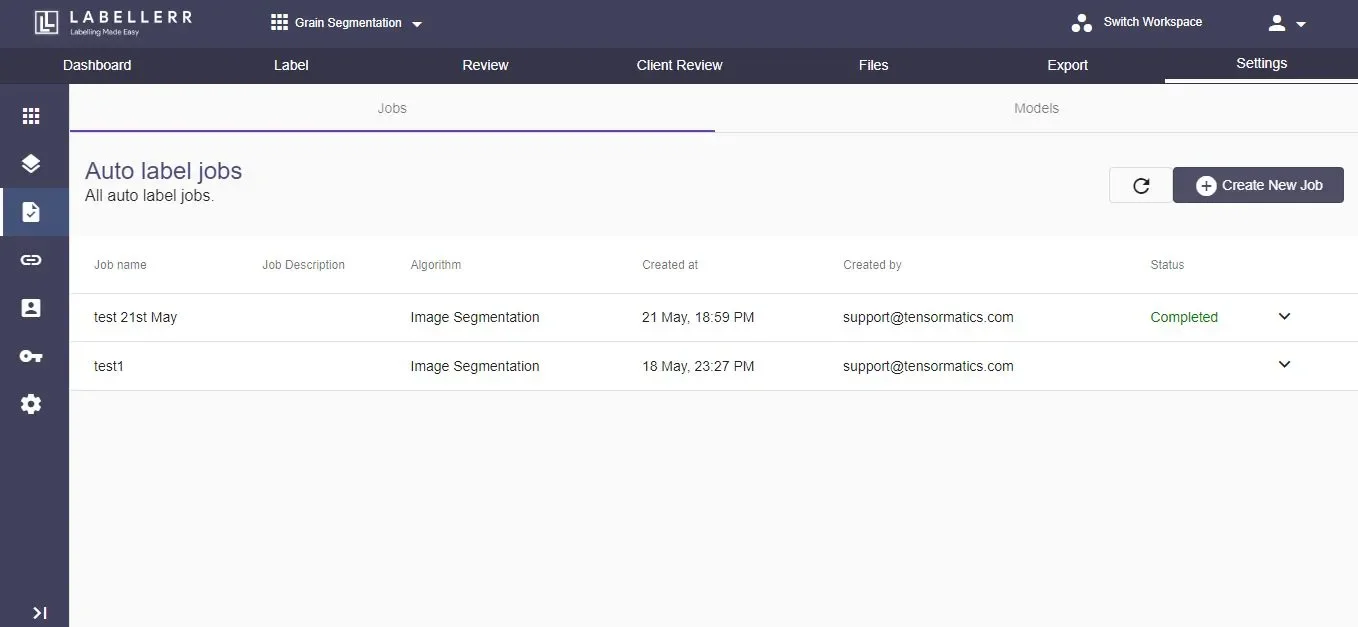
2. You will see previously created jobs and their details. To create a new job, select '**Create New Job**'.
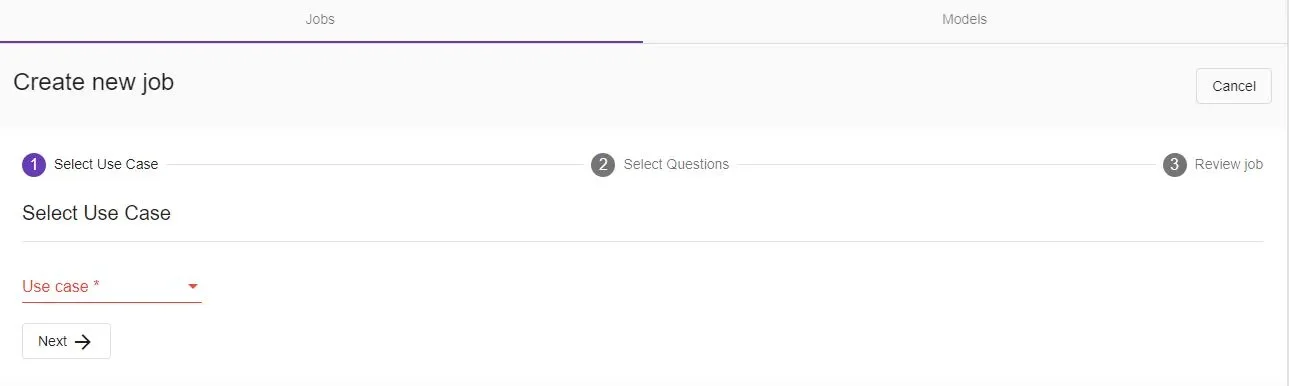
3. First, select the **use case**, such as the type of annotation like bounding box, image segmentation, etc.
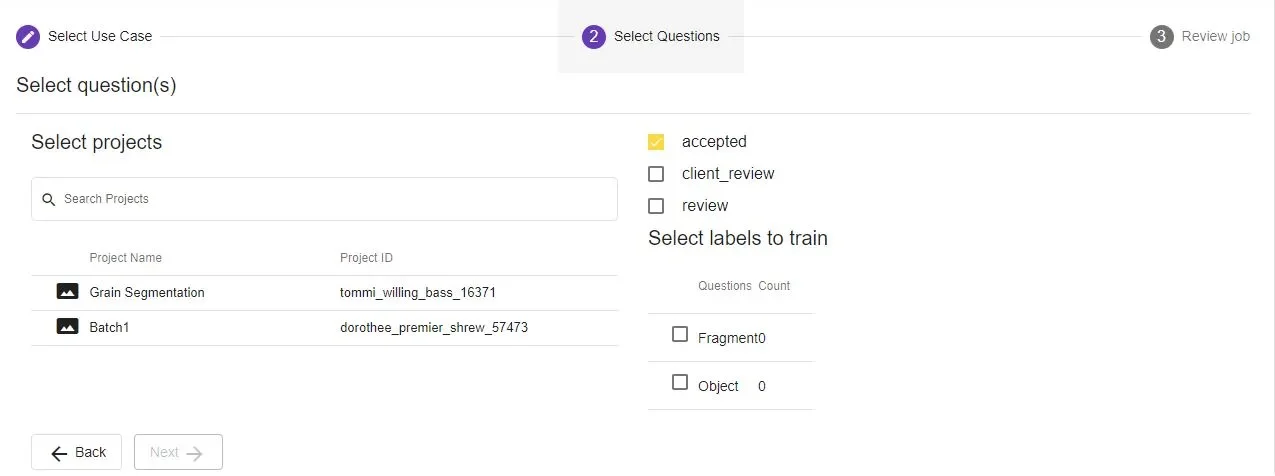
4. Next, you can select current and previous batches/projects with labeled data.
Options on the right side include 'accept', 'review', and 'client\_review'—these indicate the statuses of annotated files in current or past projects that can be used as labeled data for labeling new data. Select '**Select labels to train**' to choose the labels needed for the current project. After selecting the required options, click '**Next**'.
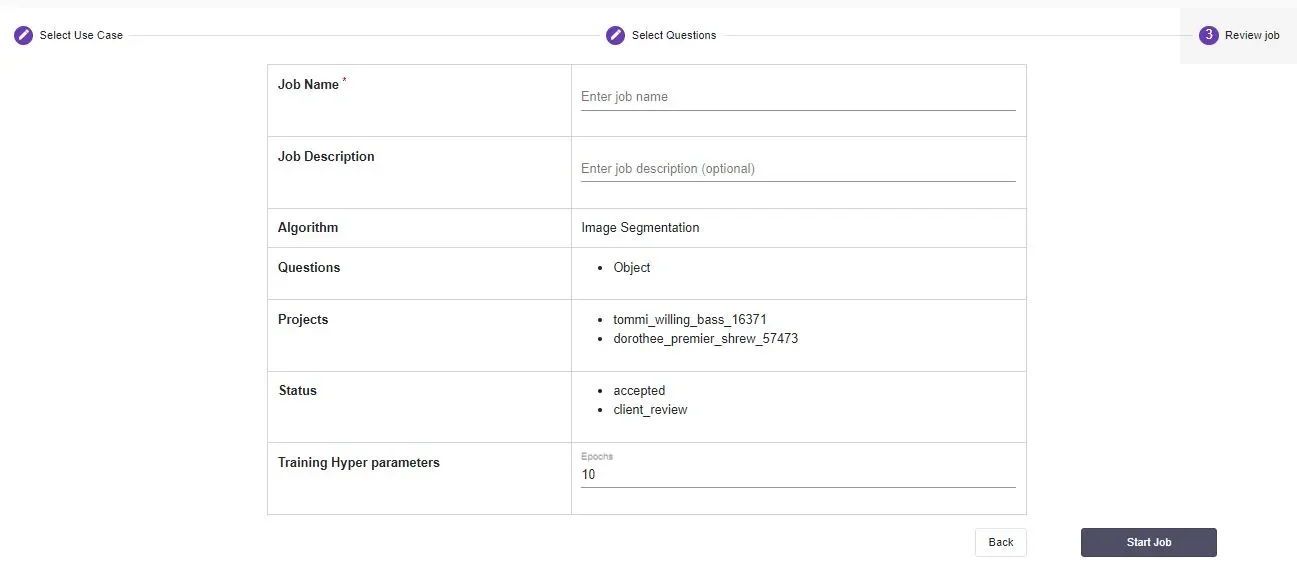
5. Review the job details, enter the Job name and description, and specify the number of training hyperparameters (epochs) required to execute the job.
An epoch is when all the training data is used at once and is defined as the total number of iterations of all the training data in one cycle for training the machine learning model.
Click '**Start Job**'. The job will begin, and the details will be displayed on your autolabel screen while the job is in progress.
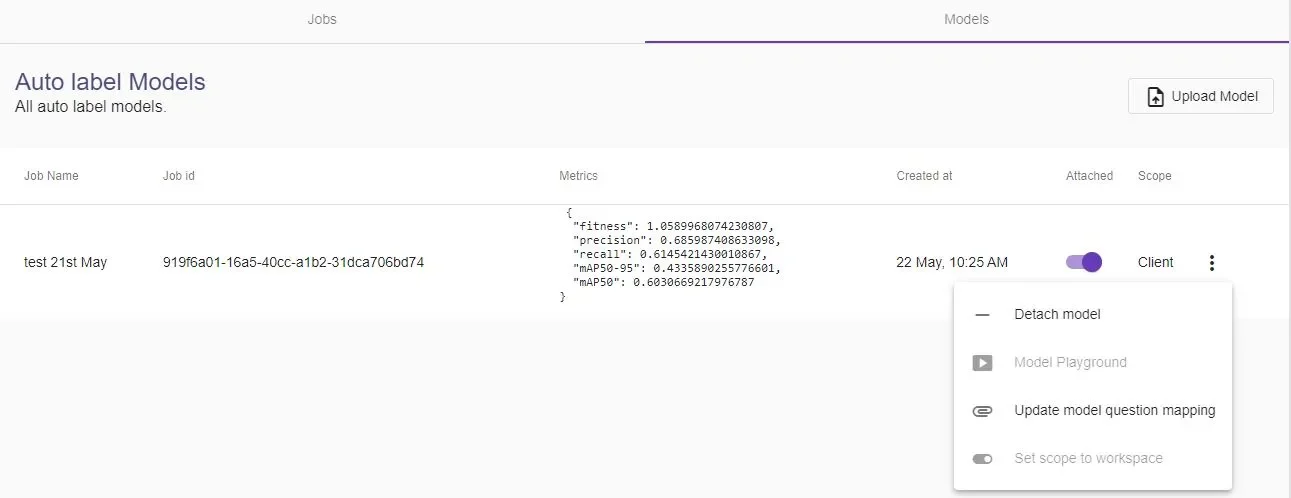
6. Attach a model to the completed job in the '**Models**' section to run autolabeling. You can view job details, metrics, and model attachment status here.
7. Additional options are available by clicking the three-dot button. You have the option to detach the model from the job.
### To run Autolabel and see the results on a set of files, follow these steps:
After completing this process, you can run autolabeling on individual files or on the entire dataset at once.
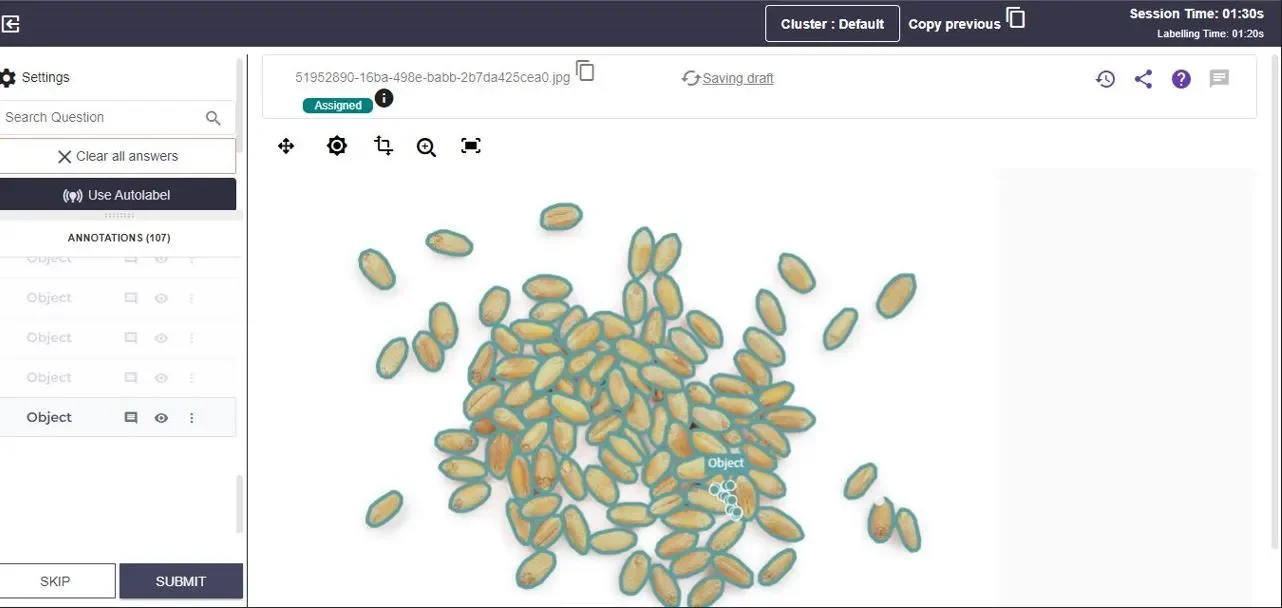
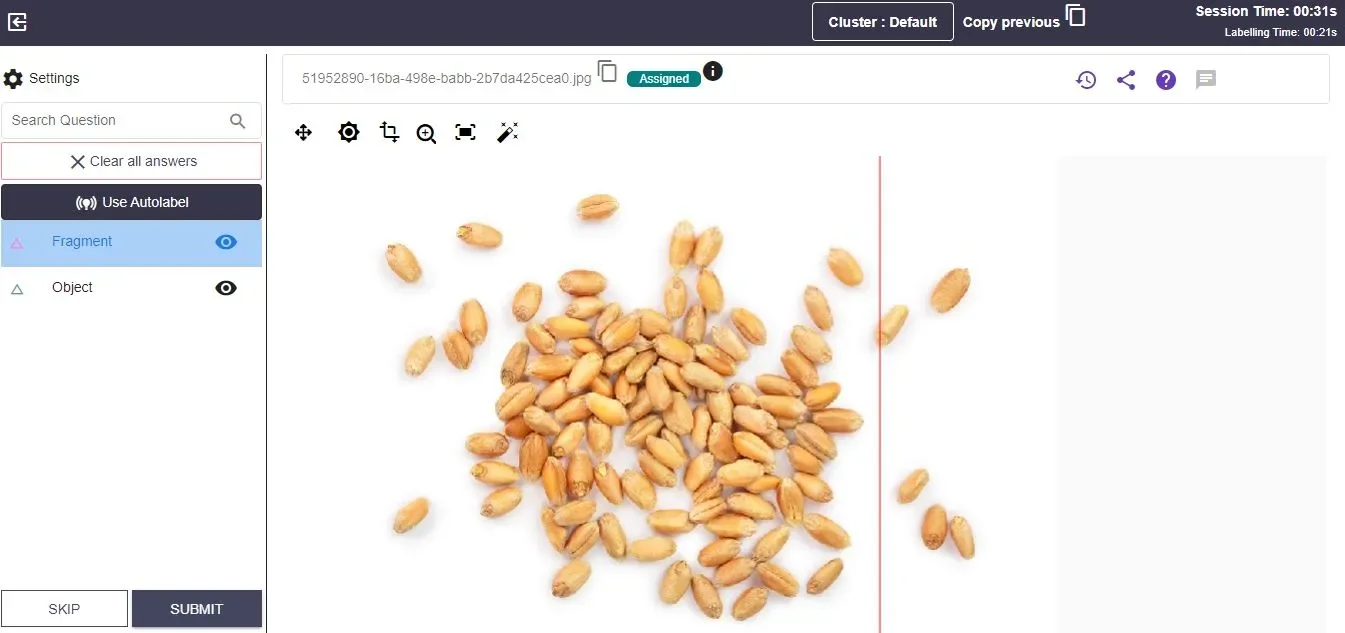
1. Go to the labeling screen by clicking '**Label**' on the dashboard and select '**Use Autolabel**'.
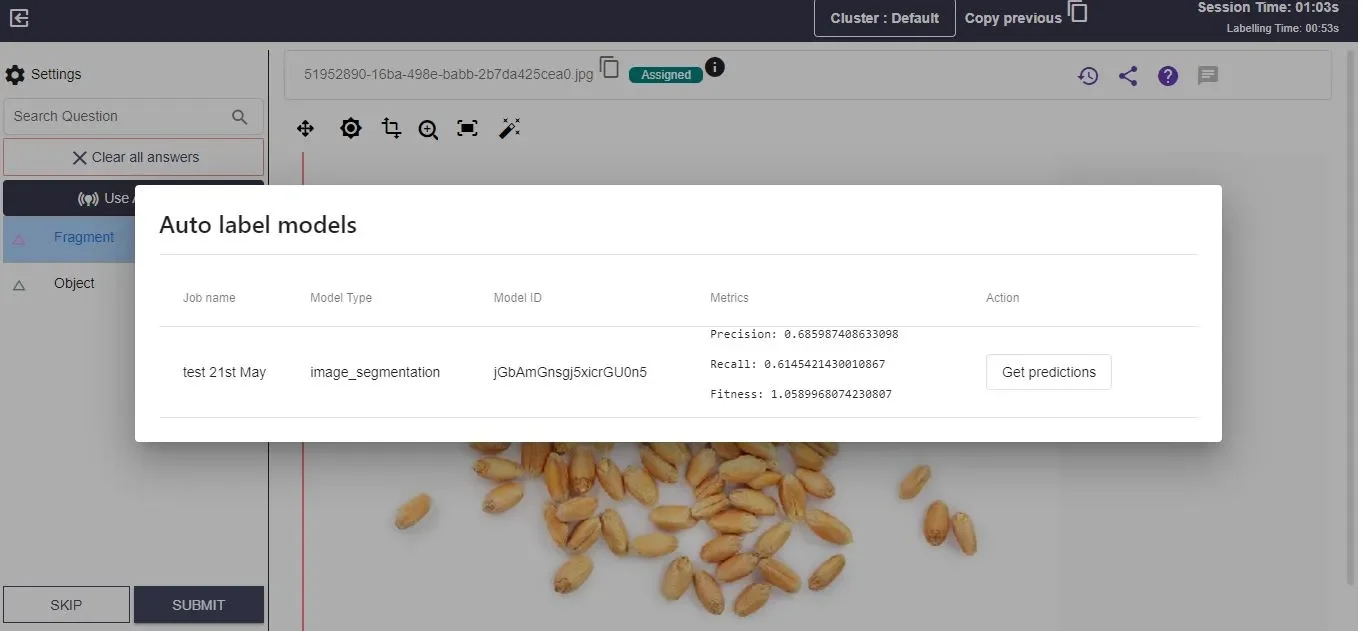
2. The autolabel model details will be displayed in a popup. Click '**Get Predictions**'.
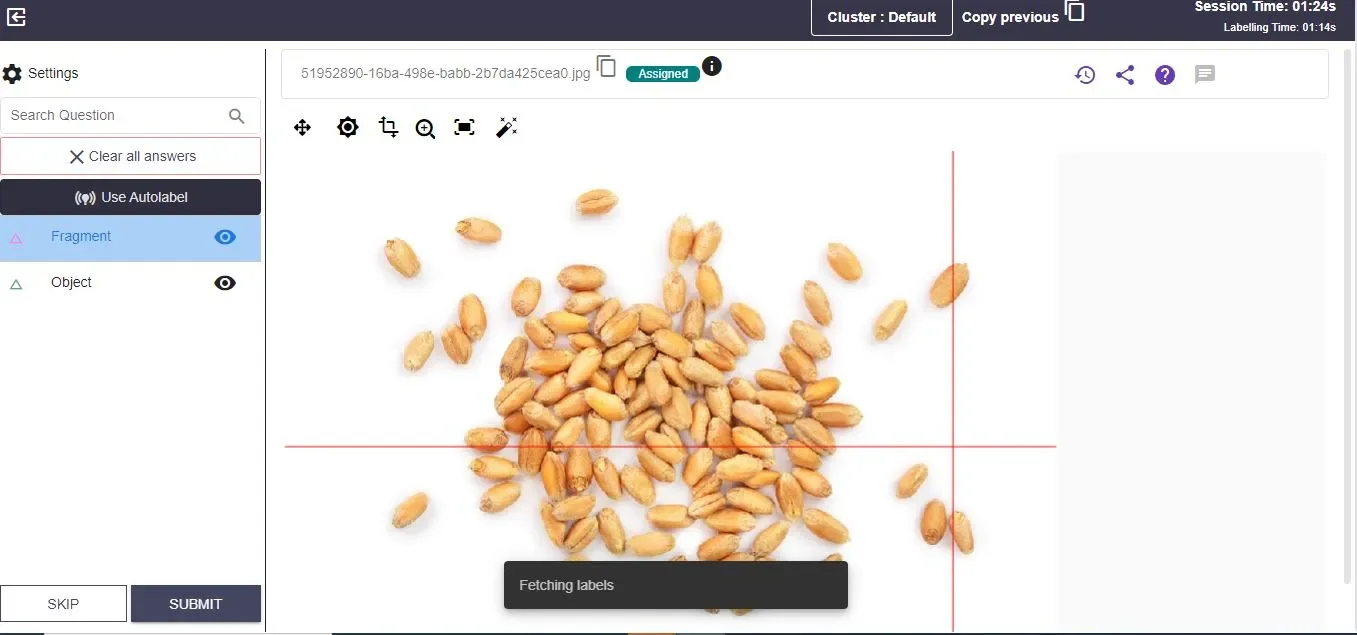
3. Fetching labels will start, showing 'fetching labels' while in progress.
4. After fetching, the results will be displayed on your screen, showing the labeled objects.
See the video tutorial.
 2. You will see previously created jobs and their details. To create a new job, select '**Create New Job**'.
 3. First, select the **use case**, such as the type of annotation like bounding box, image segmentation, etc.
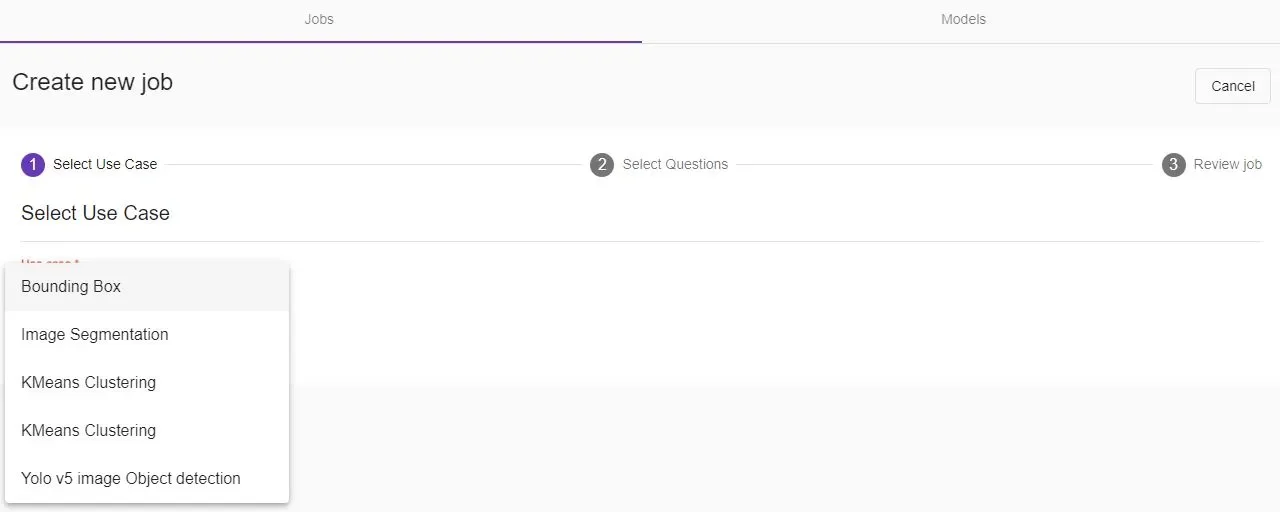 4. Next, you can select current and previous batches/projects with labeled data.
Options on the right side include 'accept', 'review', and 'client\_review'—these indicate the statuses of annotated files in current or past projects that can be used as labeled data for labeling new data. Select '**Select labels to train**' to choose the labels needed for the current project. After selecting the required options, click '**Next**'.
4. Next, you can select current and previous batches/projects with labeled data.
Options on the right side include 'accept', 'review', and 'client\_review'—these indicate the statuses of annotated files in current or past projects that can be used as labeled data for labeling new data. Select '**Select labels to train**' to choose the labels needed for the current project. After selecting the required options, click '**Next**'.
 5. Review the job details, enter the Job name and description, and specify the number of training hyperparameters (epochs) required to execute the job.
 6. Attach a model to the completed job in the '**Models**' section to run autolabeling. You can view job details, metrics, and model attachment status here.
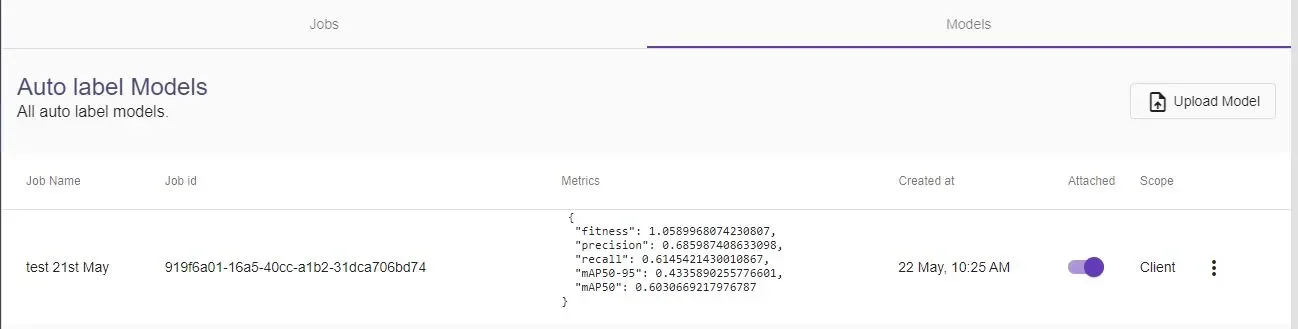 7. Additional options are available by clicking the three-dot button. You have the option to detach the model from the job.
 ### To run Autolabel and see the results on a set of files, follow these steps:
After completing this process, you can run autolabeling on individual files or on the entire dataset at once.
1. Go to the labeling screen by clicking '**Label**' on the dashboard and select '**Use Autolabel**'.
### To run Autolabel and see the results on a set of files, follow these steps:
After completing this process, you can run autolabeling on individual files or on the entire dataset at once.
1. Go to the labeling screen by clicking '**Label**' on the dashboard and select '**Use Autolabel**'.
 2. The autolabel model details will be displayed in a popup. Click '**Get Predictions**'.
 3. Fetching labels will start, showing 'fetching labels' while in progress.
 4. After fetching, the results will be displayed on your screen, showing the labeled objects.