> ## Documentation Index
> Fetch the complete documentation index at: https://docs.labellerr.com/llms.txt
> Use this file to discover all available pages before exploring further.
# How to Connect Google Cloud Storage with Labellerr
> Learn how to establish a secure connection between your Google Cloud Storage bucket and Labellerr using IAM Service Account for data access.
Welcome to the User Guide for connecting a Google Cloud Storage (GCS) bucket with Labellerr, a powerful SaaS product for data annotation and labeling. In this guide, we will walk you through the process of establishing a connection between your GCS bucket and Labellerr, leveraging IAM User Access within the same Google Cloud account.
To establish the connection between your GCS bucket and Labellerr, we will utilize IAM (Identity and Access Management). IAM is a Google Cloud service that enables you to manage access to your Google Cloud resources securely.
By creating an IAM user with appropriate permissions, you can grant Labellerr the necessary access to your GCS bucket while ensuring the security of your data.
Please note that the procedures outlined in this guide pertain to connecting a GCS bucket and LABELLERR within the same Google Cloud account.
## Quick Reference
### GCS URI Format
```
Format: gs://bucket-name/path/to/folder/
Example: gs://my-gcs-bucket/annotations/dataset-001/
```
### Required Permissions Summary
| Permission | Purpose |
| ---------------------------------- | ----------------------------- |
| `storage.objects.get` | Read files from bucket |
| `storage.objects.list` | List files in bucket |
| `storage.buckets.get` | Get bucket metadata |
| `storage.buckets.update`(Optional) | Update bucket settings (CORS) |
| Permission | Purpose |
| ------------------------ | ----------------------------- |
| `storage.objects.create` | Write/upload annotation files |
| `storage.objects.delete` | Delete files if needed |
Export permissions are required **in addition** to import permissions.
### S3 vs GCS Comparison
| Feature | AWS S3 | Google Cloud Storage |
| ------------------ | ------------------------ | -------------------- |
| URI Format | `s3://bucket/path/` | `gs://bucket/path/` |
| Authentication | Access Key + Secret Key | Service Account JSON |
| Import Permissions | 5 permissions | 4 permissions |
| Export Permissions | +2 permissions | +2 permissions |
| CORS Setup | Via IAM policy or manual | Via bucket settings |
**Using AWS S3 instead?** See our [AWS S3 Connection Guide](/getting-started/connect-aws-s3) for S3 setup instructions.
To connect data with GCS in Labellerr:
## Prerequisites
**Go to the IAM & Admin Console:**
* Open the Google Cloud Console
* Navigate to **IAM & Admin > Roles**
**Create a Custom Role:**
* Click on **+ CREATE ROLE**
* Enter a **Title, ID,** and **Description** for the role
* Click **CONTINUE**
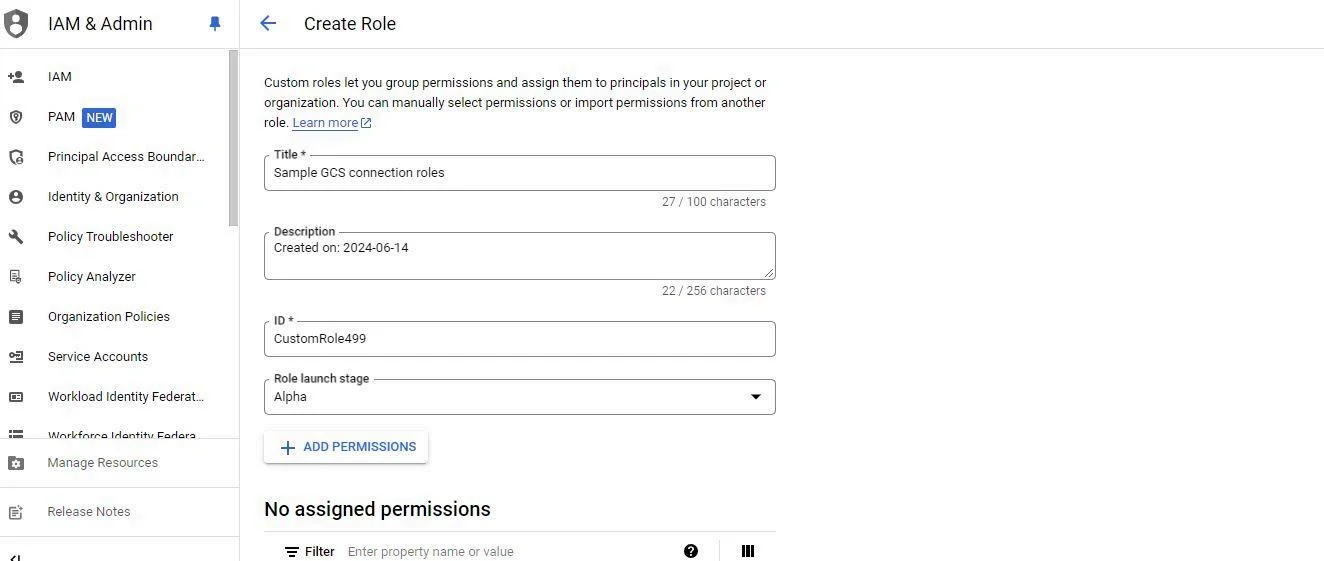 **Add Permissions:**
* In the **Permissions** section, add the necessary permissions
For accessing a GCS bucket, you typically need:
1. `storage.buckets.get`
2. `storage.buckets.update`
3. `storage.objects.get`
4. `storage.objects.list`
* Click **CONTINUE**
* Review the role details
* Click **CREATE**
**Add Permissions:**
* In the **Permissions** section, add the necessary permissions
For accessing a GCS bucket, you typically need:
1. `storage.buckets.get`
2. `storage.buckets.update`
3. `storage.objects.get`
4. `storage.objects.list`
* Click **CONTINUE**
* Review the role details
* Click **CREATE**
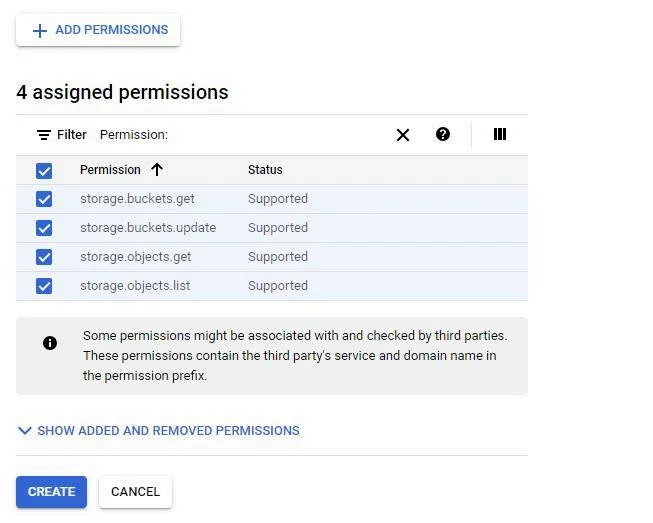 **Go to the Service Accounts Console:**
* In the Google Cloud Console, navigate to **IAM & Admin** > **Service Accounts**
**Go to the Service Accounts Console:**
* In the Google Cloud Console, navigate to **IAM & Admin** > **Service Accounts**
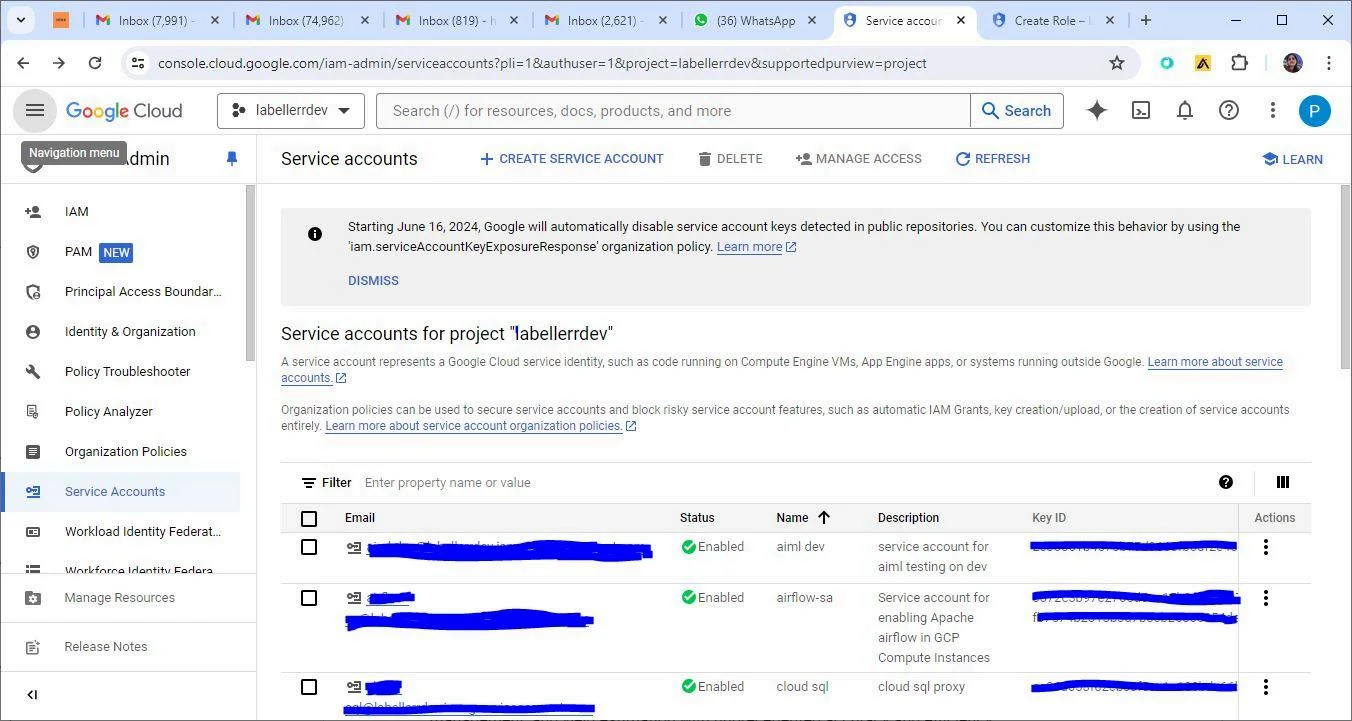 **Create a Service Account:**
* Click on + CREATE SERVICE ACCOUNT
* Enter a Service account name and Description
* Click CREATE AND CONTINUE
**Grant Access to Project:**
* In the Grant this service account access to project section, add the role created in the previous step
* Click **CONTINUE**
**Create a Service Account:**
* Click on + CREATE SERVICE ACCOUNT
* Enter a Service account name and Description
* Click CREATE AND CONTINUE
**Grant Access to Project:**
* In the Grant this service account access to project section, add the role created in the previous step
* Click **CONTINUE**
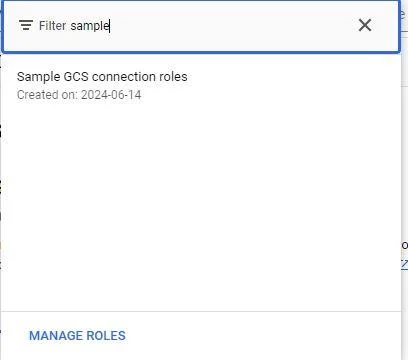 **Grant Users Access to this Service Account (Optional):**
* If needed, add users who can manage this service account
* Click DONE
**Select Service Account:**
* In the Service Accounts console, find the service account you created
* Click the ⋮ (three vertical dots) next to the service account and select Manage keys
**Grant Users Access to this Service Account (Optional):**
* If needed, add users who can manage this service account
* Click DONE
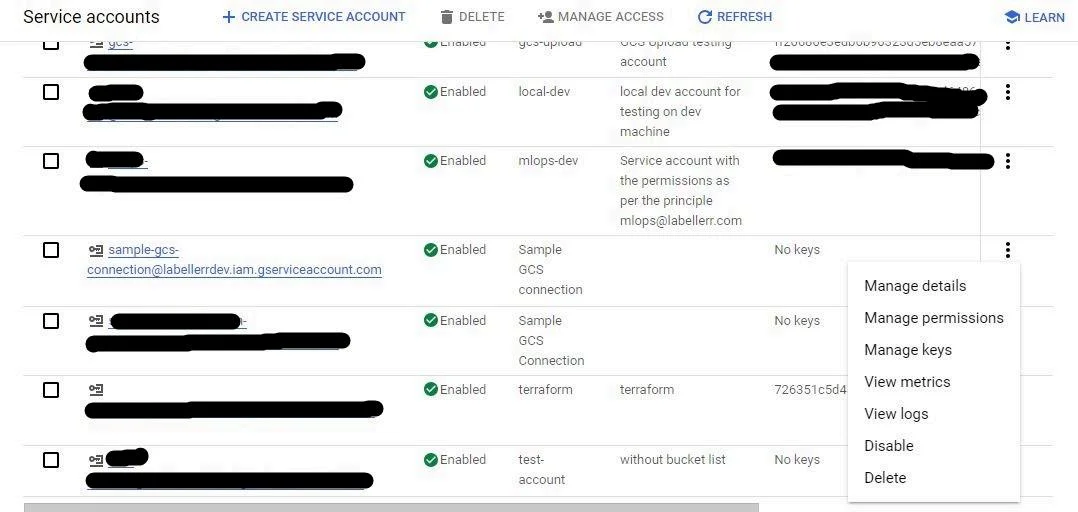
**Select Service Account:**
* In the Service Accounts console, find the service account you created
* Click the ⋮ (three vertical dots) next to the service account and select Manage keys
 **Create Key:**
* Click ADD KEY > Create new key
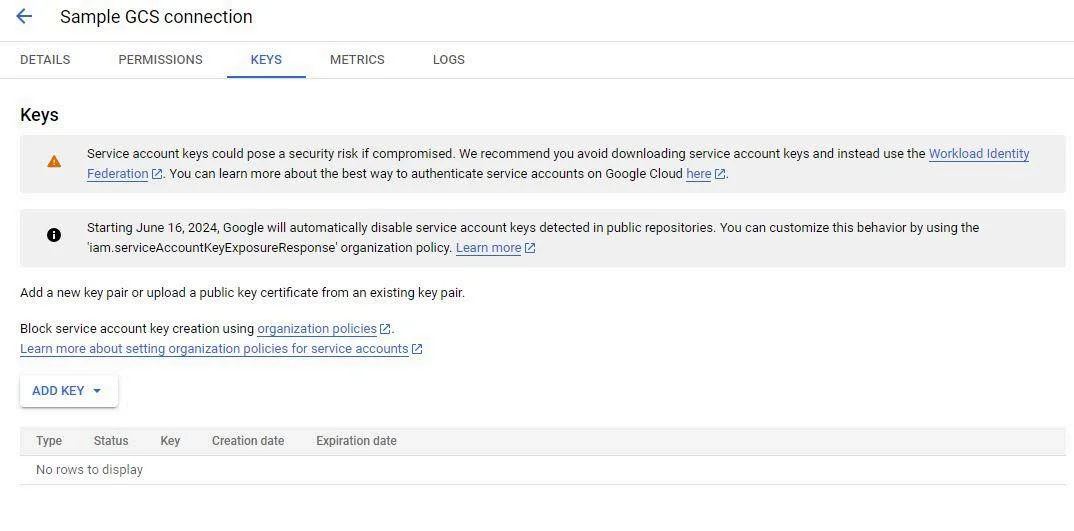
**Create Key:**
* Click ADD KEY > Create new key

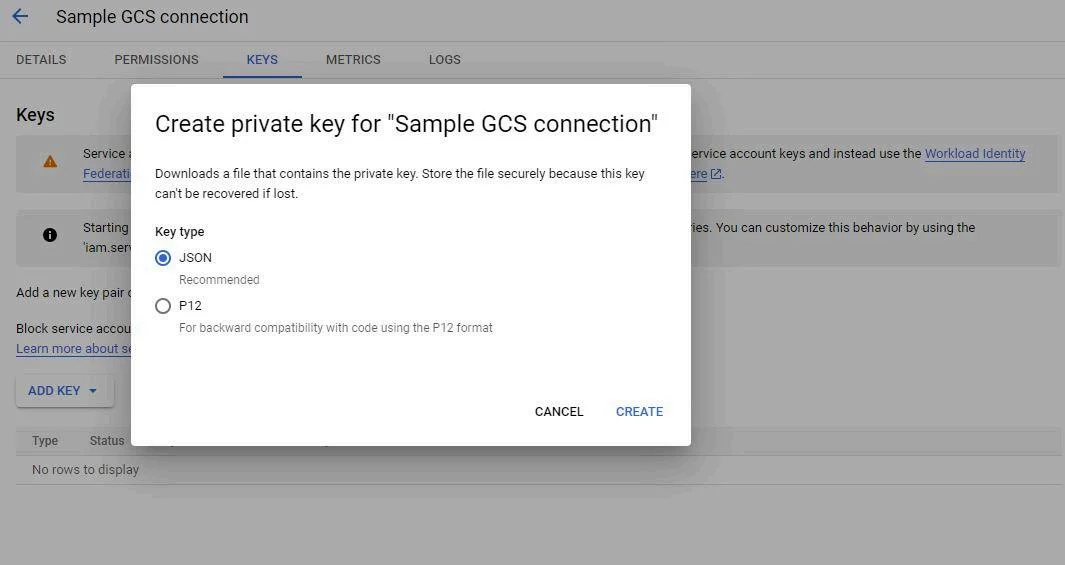 * Click CREATE
* A JSON key file will be downloaded. Keep this file secure as it contains the credentials needed to access the GCS bucket
1. **Go to the Cloud Storage Console:** Navigate to Cloud Storage > Buckets in the Google Cloud Console
2. **Select Your Bucket:** Click on the name of your private bucket. You will see the bucket details, including its Name, Location, and other information
3. **Open Permissions:** Click on the Permissions tab
4. **Add Member:**
* Click ADD
* In the New members field, enter the service account email
* Select the role you created earlier
* Click SAVE
Click 'Google Cloud Storage' from the sources list and then 'Create New Connection'. There are two options to connect your data through 'Private Bucket' and 'Public Bucket'.
* Click CREATE
* A JSON key file will be downloaded. Keep this file secure as it contains the credentials needed to access the GCS bucket
1. **Go to the Cloud Storage Console:** Navigate to Cloud Storage > Buckets in the Google Cloud Console
2. **Select Your Bucket:** Click on the name of your private bucket. You will see the bucket details, including its Name, Location, and other information
3. **Open Permissions:** Click on the Permissions tab
4. **Add Member:**
* Click ADD
* In the New members field, enter the service account email
* Select the role you created earlier
* Click SAVE
Click 'Google Cloud Storage' from the sources list and then 'Create New Connection'. There are two options to connect your data through 'Private Bucket' and 'Public Bucket'.
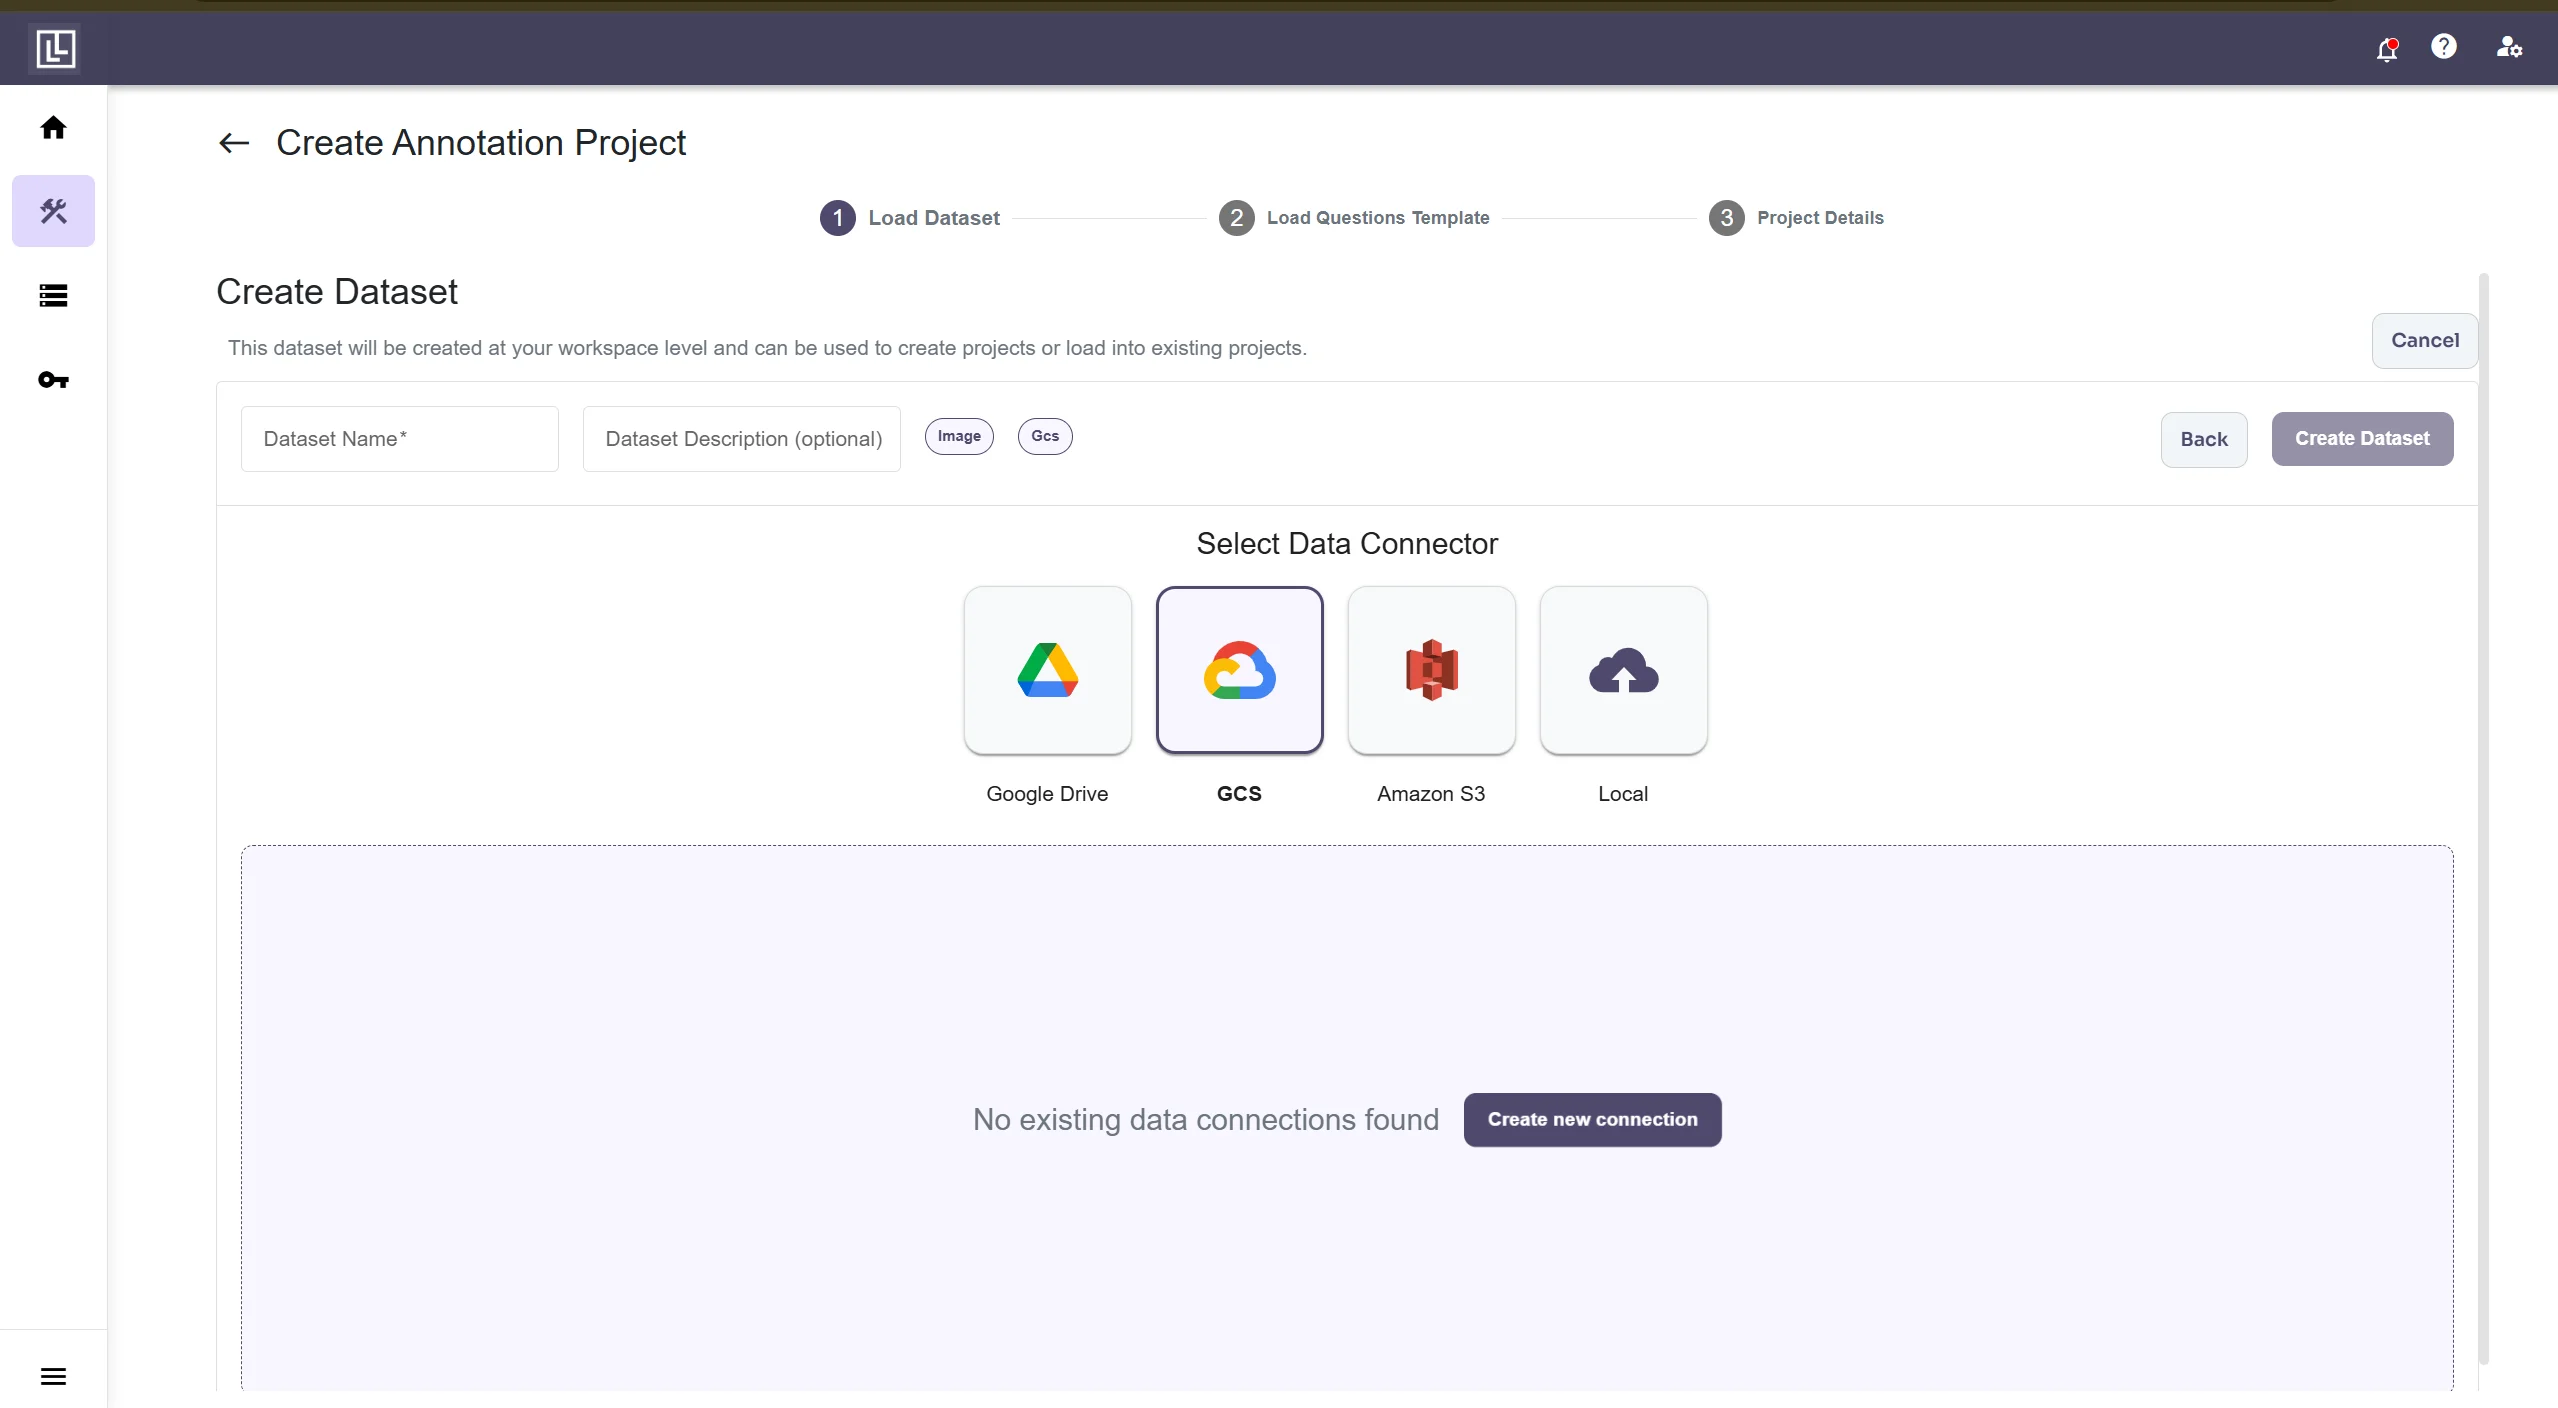
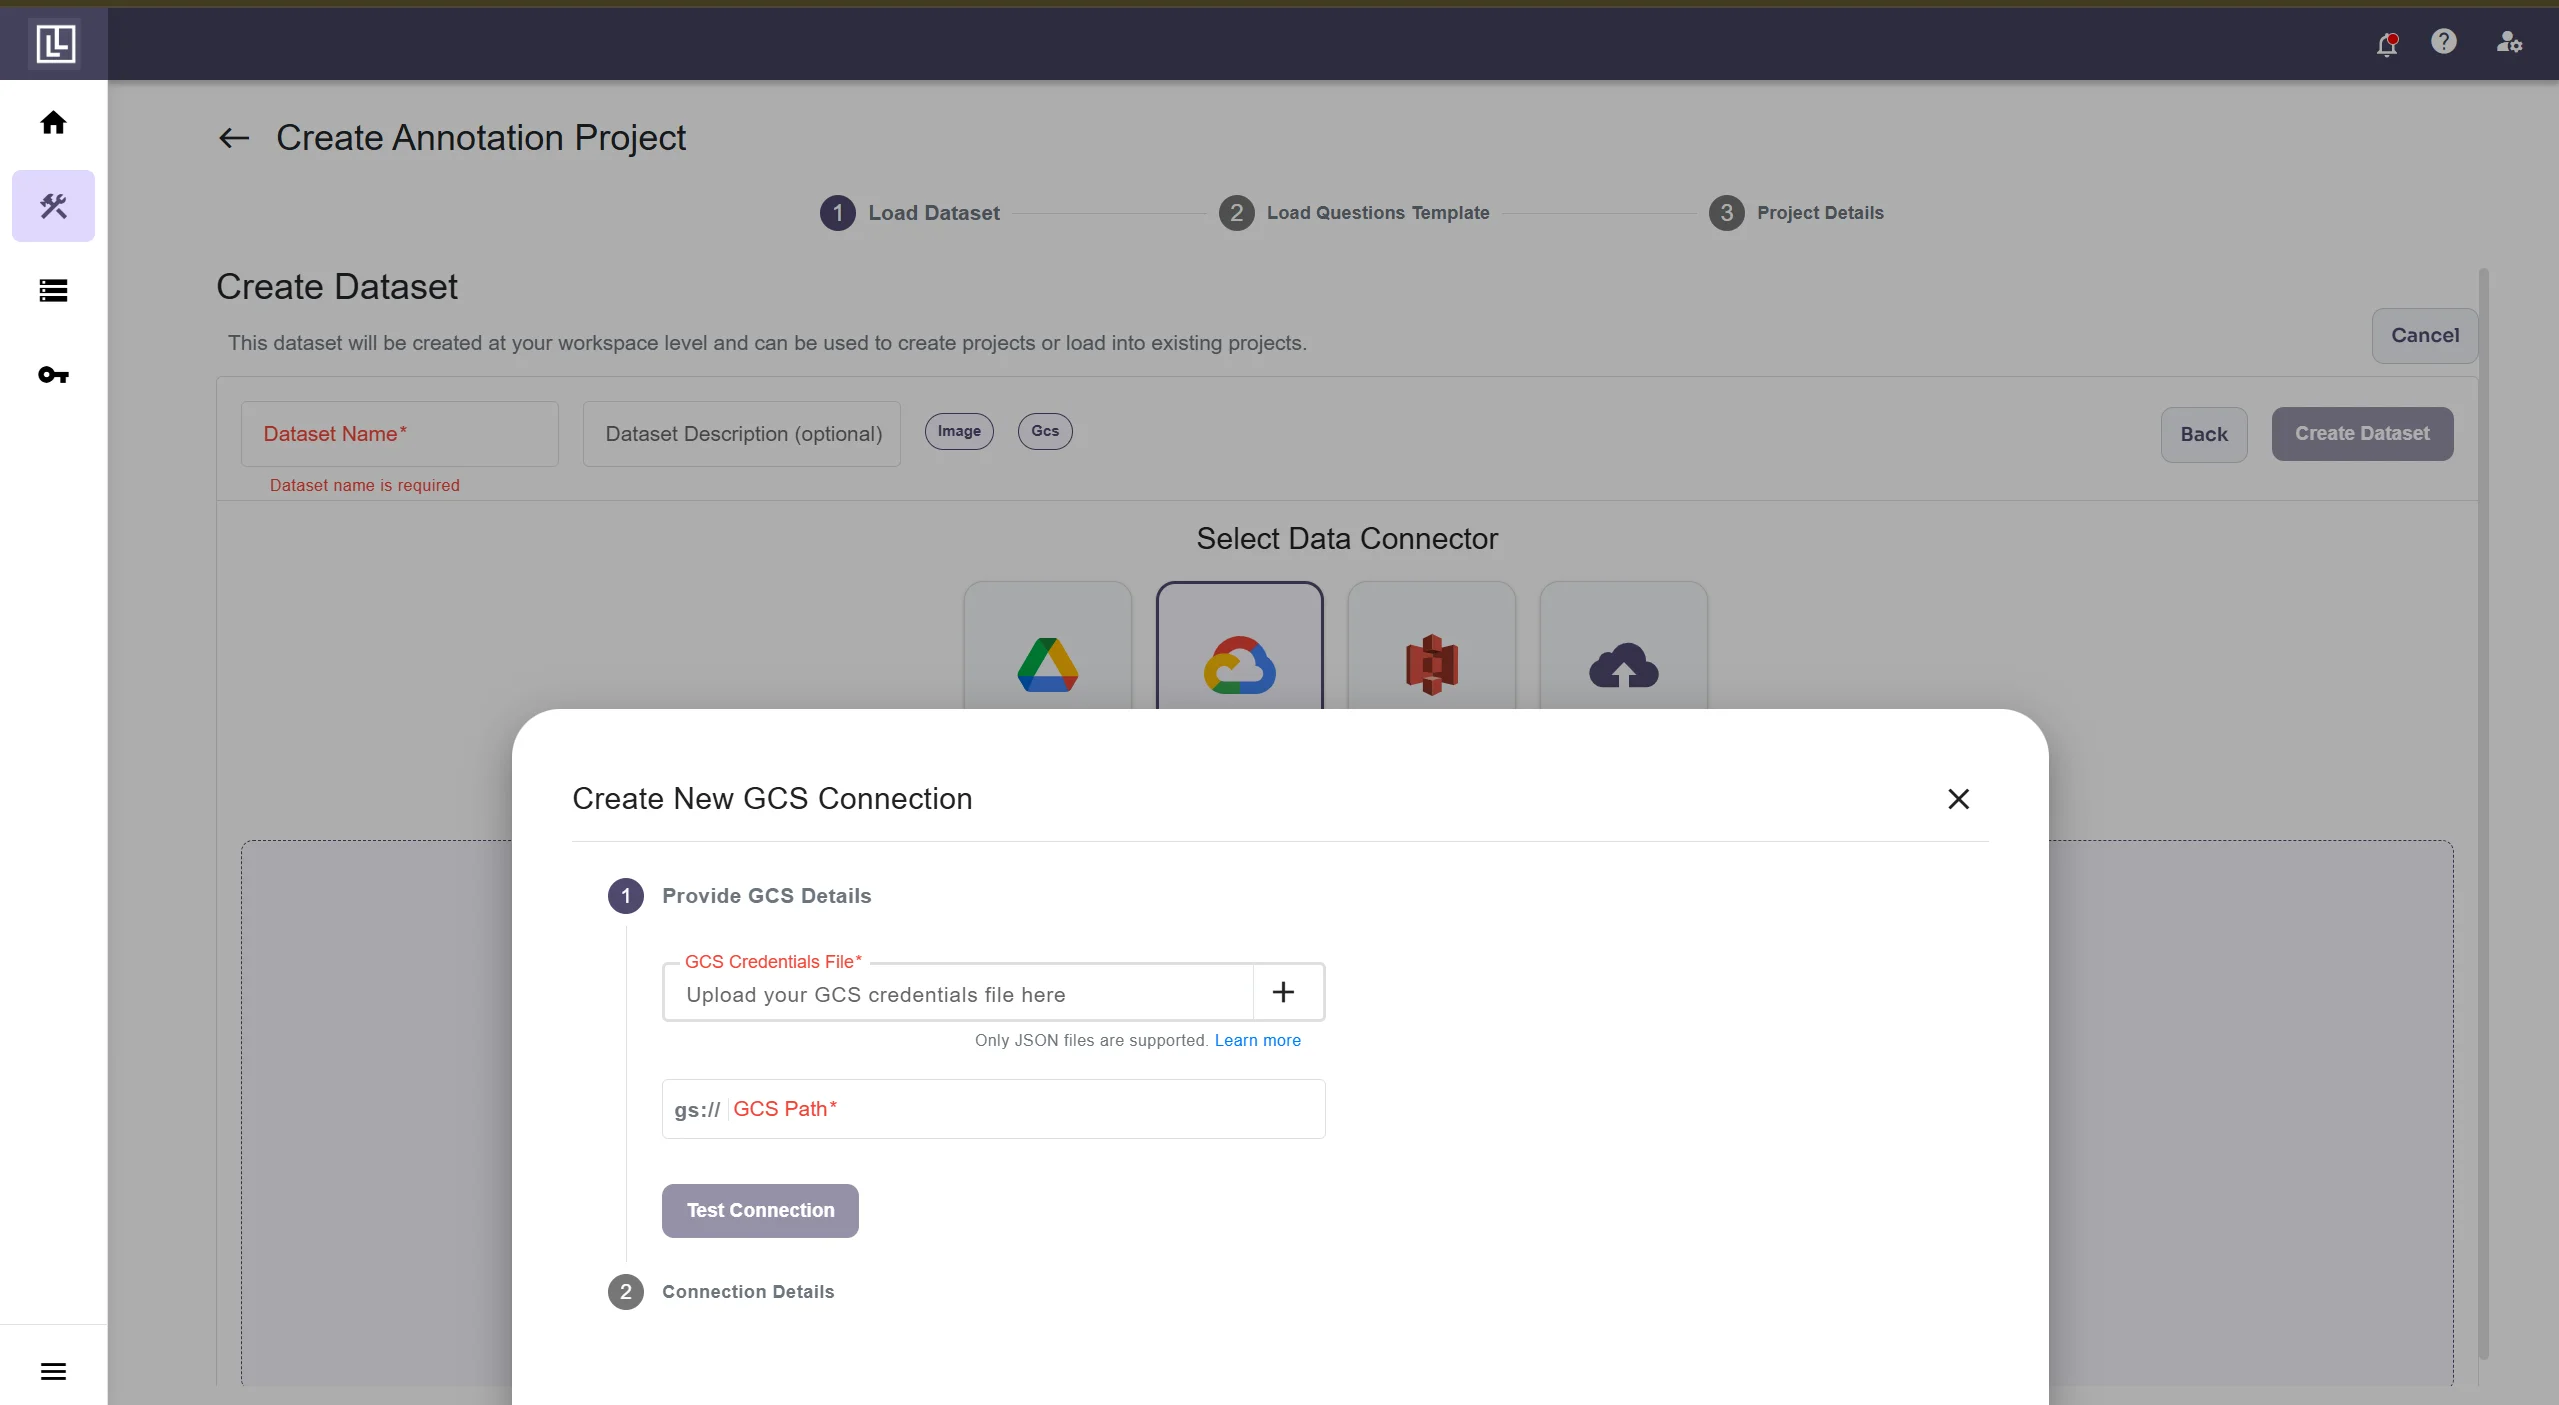 After filling the details successfully, click on **Test Connection**, if the details are correct, you should see this.
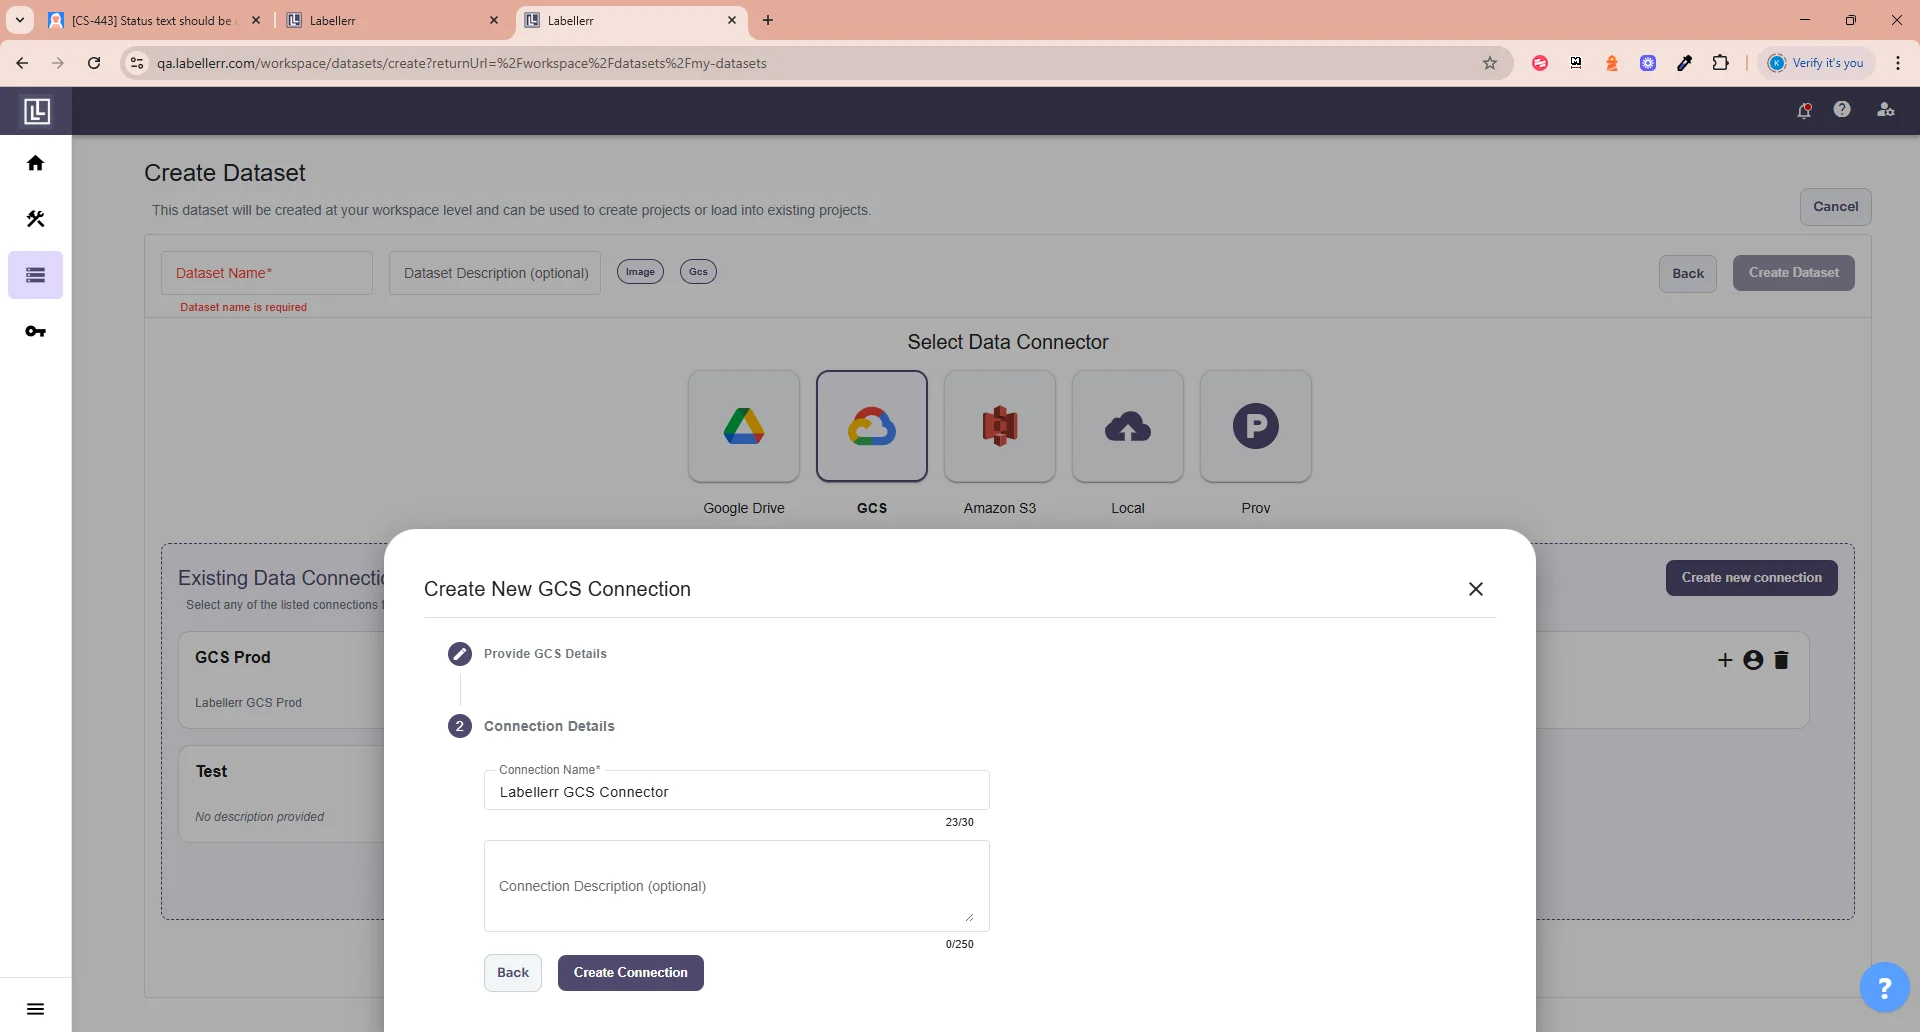 Else you will get this error.
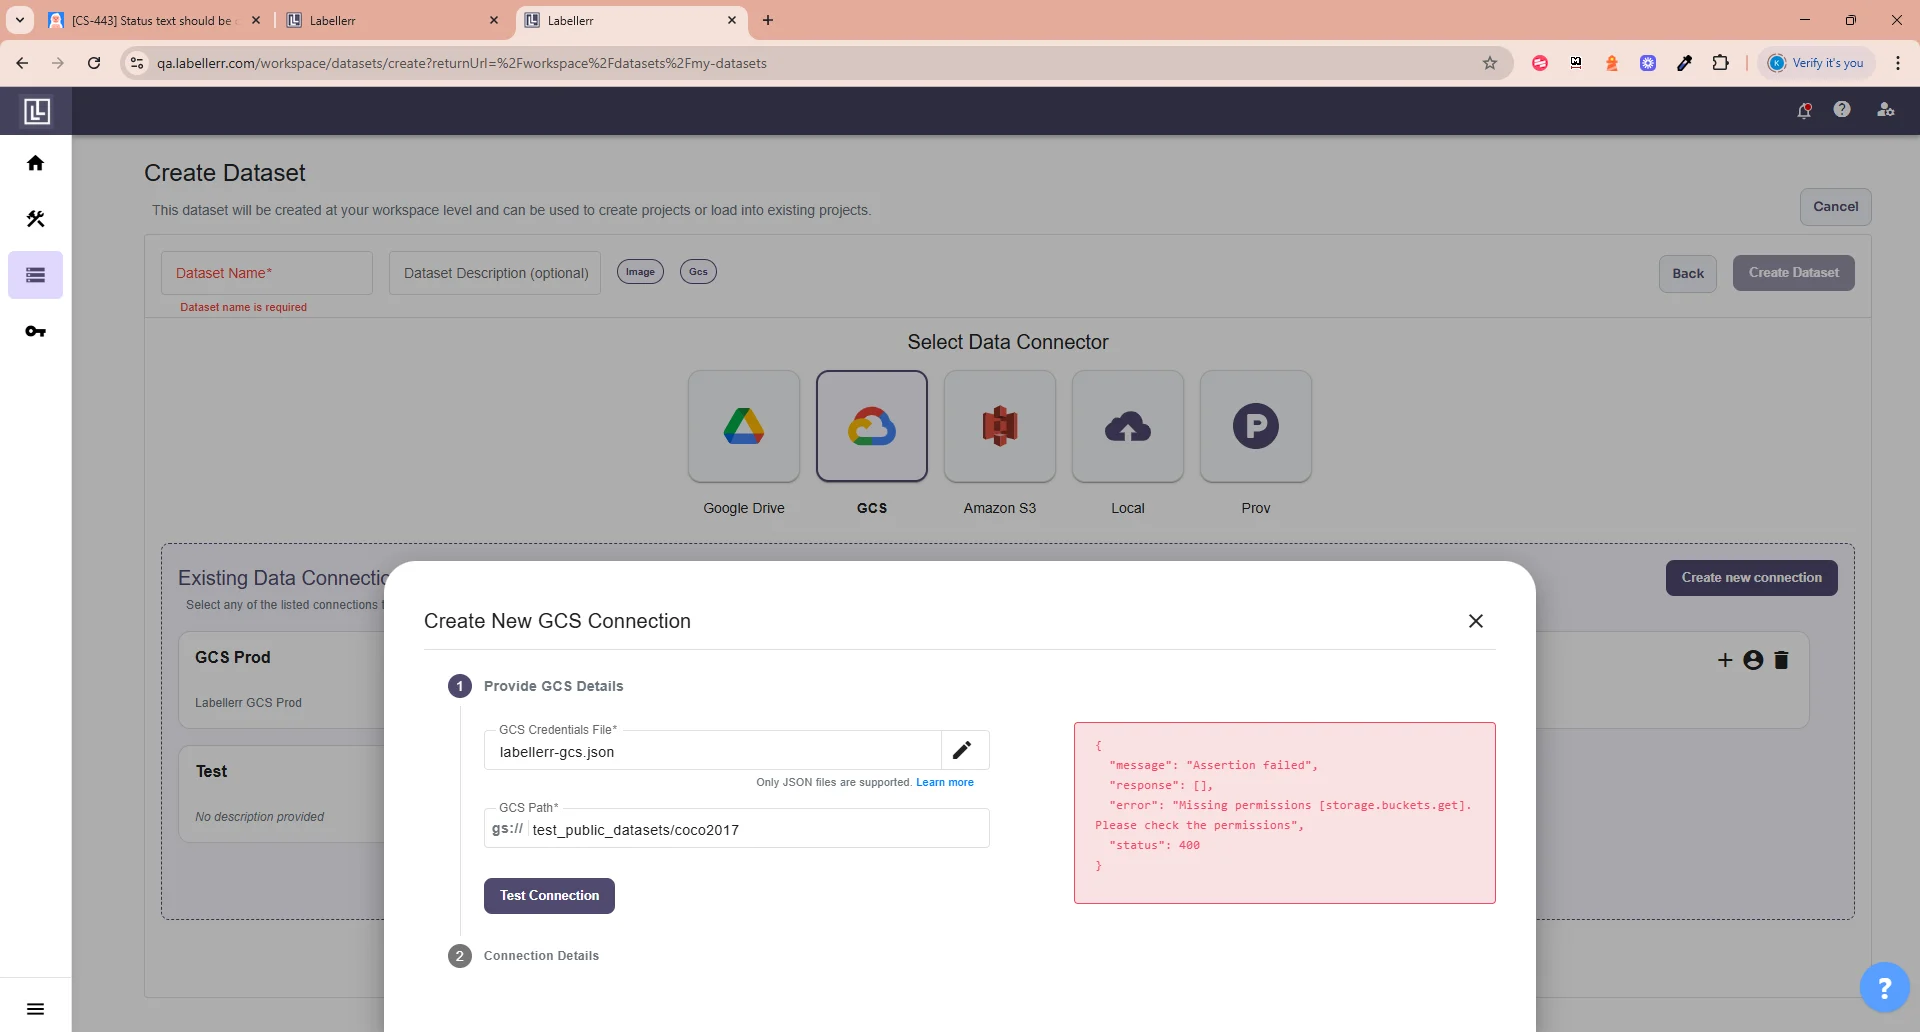 If successfully tested the connection and your files are recognized, you will need to fill the **Connection name** and **Description(Optional)**.
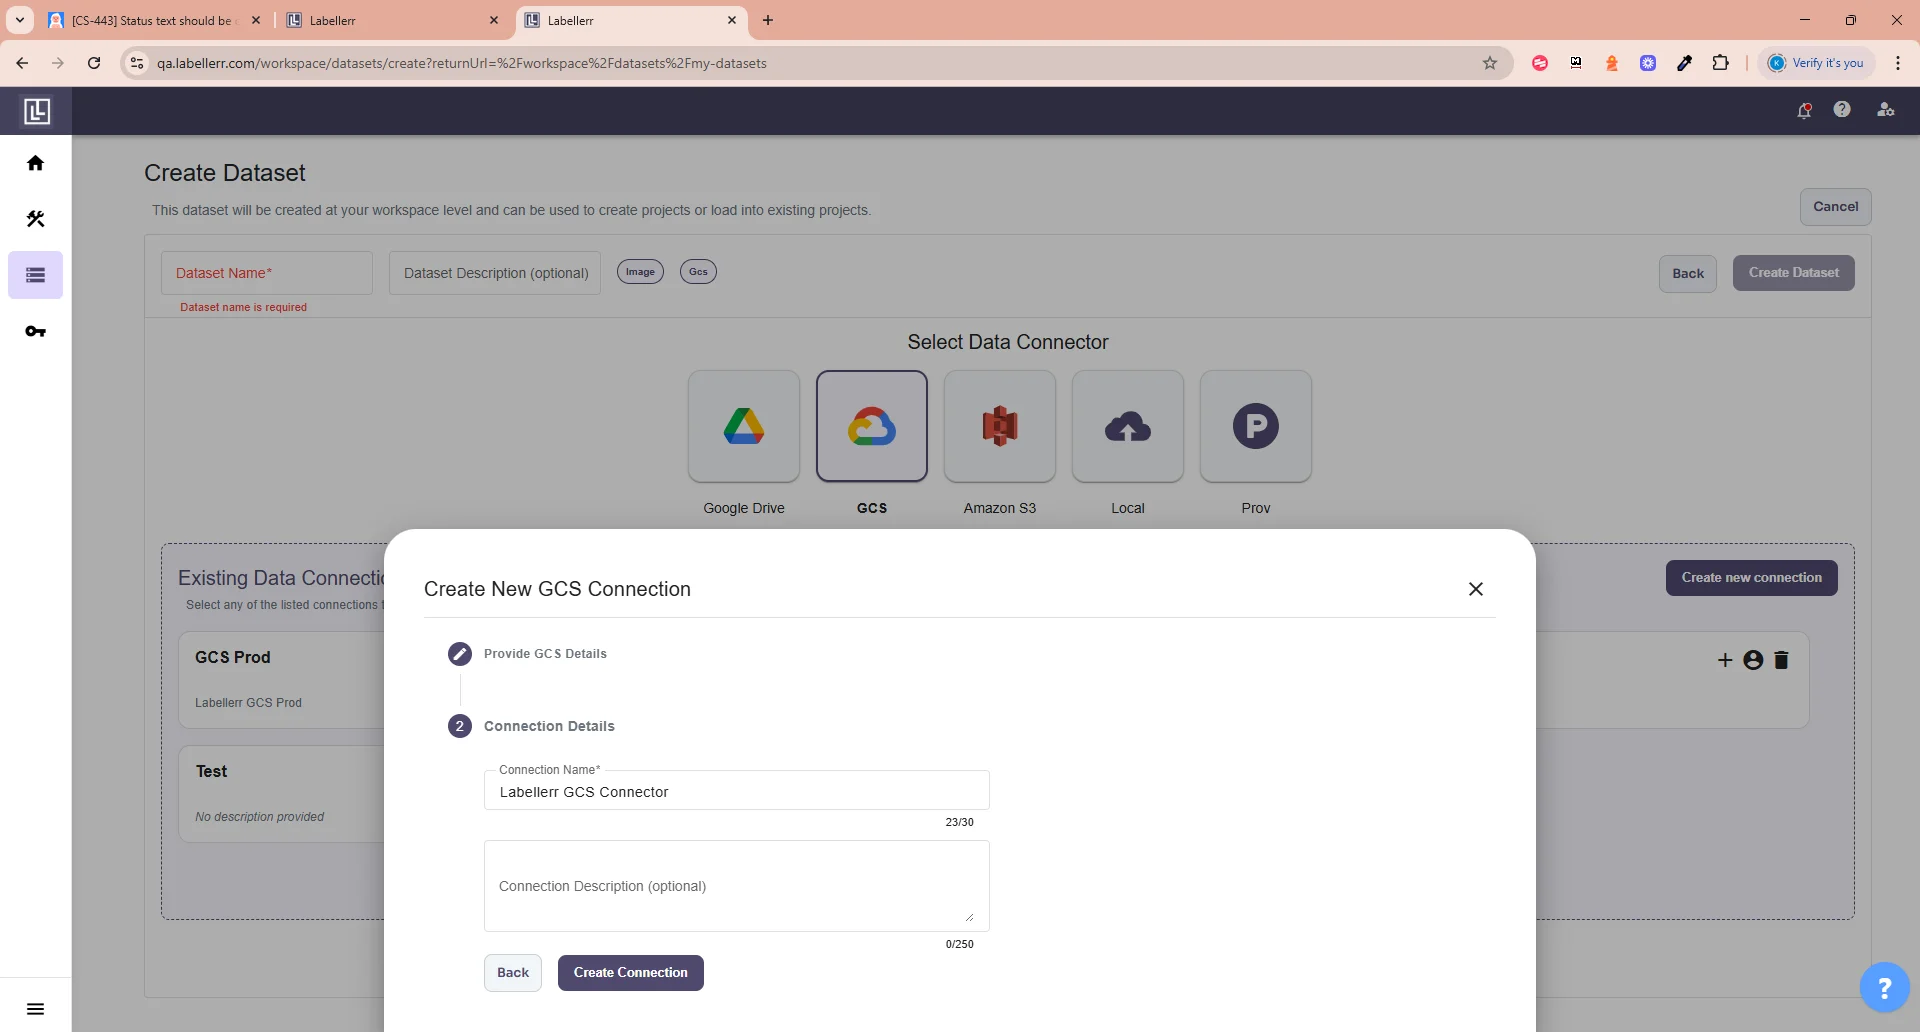 And you're done, this is how you can connect your GCS bucket with Labellerr.
## Troubleshooting
**Symptom:** Connection test fails with "invalid service account" error.
**Cause:** The JSON key file is corrupted, expired, or incorrectly formatted.
**Solution:**
1. Go to **IAM & Admin > Service Accounts** in Google Cloud Console
2. Select your service account
3. Click **Manage keys**
4. Delete the old key and create a new one
5. Download the new JSON key file and use it for the connection
**Symptom:** Connection test fails with "permission denied" or "403 Forbidden" error.
**Cause:** The service account doesn't have the required role assigned to the bucket.
**Solution:**
1. Go to **Cloud Storage > Buckets** in Google Cloud Console
2. Select your bucket and click **Permissions** tab
3. Click **ADD** and enter the service account email
4. Assign the custom role you created with the required permissions
5. Click **SAVE**
**Symptom:** Connection test fails with "bucket not found" error.
**Cause:** The bucket name in the path doesn't match the actual bucket name.
**Solution:**
1. Verify the gs\:// path matches your exact bucket name
2. Check for typos in the bucket name
3. Ensure the bucket exists in the same Google Cloud project
4. Path format should be: `gs://exact-bucket-name/folder/`
**Symptom:** Dataset appears to create successfully but then shows "Failed" status.
**Cause:** The service account doesn't have the required permissions to access the GCS bucket.
**Solution:**
1. Verify all required permissions are in the custom role
2. Ensure the role is assigned to the bucket (not just the project)
3. Test the connection before creating datasets:
```python theme={"dark"}
from labellerr.core.connectors import LabellerrConnection
from labellerr.core.schemas import ConnectionType, DatasetDataType
connection = LabellerrConnection(client=client, connection_id="your_connection_id")
test_result = connection.test(
path="gs://your-bucket/path/to/data/",
connection_type=ConnectionType._IMPORT,
data_type=DatasetDataType.image
)
```
**Symptom:** Export fails with "No files found with the given status" error.
**Cause:** Files have not been moved to the expected workflow stage.
**Solution:**
1. Ensure files have been annotated AND reviewed before exporting
2. Check the `statuses` parameter in your export configuration
3. Valid statuses for export: `review`, `client_review`, `accepted`
## Related Guides
Set up AWS S3 bucket connection with IAM user authentication
Learn how to create annotation projects with your connected data
And you're done, this is how you can connect your GCS bucket with Labellerr.
## Troubleshooting
**Symptom:** Connection test fails with "invalid service account" error.
**Cause:** The JSON key file is corrupted, expired, or incorrectly formatted.
**Solution:**
1. Go to **IAM & Admin > Service Accounts** in Google Cloud Console
2. Select your service account
3. Click **Manage keys**
4. Delete the old key and create a new one
5. Download the new JSON key file and use it for the connection
**Symptom:** Connection test fails with "permission denied" or "403 Forbidden" error.
**Cause:** The service account doesn't have the required role assigned to the bucket.
**Solution:**
1. Go to **Cloud Storage > Buckets** in Google Cloud Console
2. Select your bucket and click **Permissions** tab
3. Click **ADD** and enter the service account email
4. Assign the custom role you created with the required permissions
5. Click **SAVE**
**Symptom:** Connection test fails with "bucket not found" error.
**Cause:** The bucket name in the path doesn't match the actual bucket name.
**Solution:**
1. Verify the gs\:// path matches your exact bucket name
2. Check for typos in the bucket name
3. Ensure the bucket exists in the same Google Cloud project
4. Path format should be: `gs://exact-bucket-name/folder/`
**Symptom:** Dataset appears to create successfully but then shows "Failed" status.
**Cause:** The service account doesn't have the required permissions to access the GCS bucket.
**Solution:**
1. Verify all required permissions are in the custom role
2. Ensure the role is assigned to the bucket (not just the project)
3. Test the connection before creating datasets:
```python theme={"dark"}
from labellerr.core.connectors import LabellerrConnection
from labellerr.core.schemas import ConnectionType, DatasetDataType
connection = LabellerrConnection(client=client, connection_id="your_connection_id")
test_result = connection.test(
path="gs://your-bucket/path/to/data/",
connection_type=ConnectionType._IMPORT,
data_type=DatasetDataType.image
)
```
**Symptom:** Export fails with "No files found with the given status" error.
**Cause:** Files have not been moved to the expected workflow stage.
**Solution:**
1. Ensure files have been annotated AND reviewed before exporting
2. Check the `statuses` parameter in your export configuration
3. Valid statuses for export: `review`, `client_review`, `accepted`
## Related Guides
Set up AWS S3 bucket connection with IAM user authentication
Learn how to create annotation projects with your connected data