> ## Documentation Index
> Fetch the complete documentation index at: https://docs.labellerr.com/llms.txt
> Use this file to discover all available pages before exploring further.
# How to Create a New Project
> Learn how to create different types of projects including image, text, video, and audio annotation projects in Labellerr.
This tutorial would help address all issues regarding creation of a new project. What are the data types supported? How to Import data? & How to set Labelling parameters?
This guide covers creating different types of projects in Labellerr:
* **Image Projects** - For visual annotation tasks
* **Text Projects** - For text analysis and labeling
* **Video Projects** - For temporal annotation workflows
* **Audio Projects** - For sound analysis and segmentation
## How to Create an Image Project?
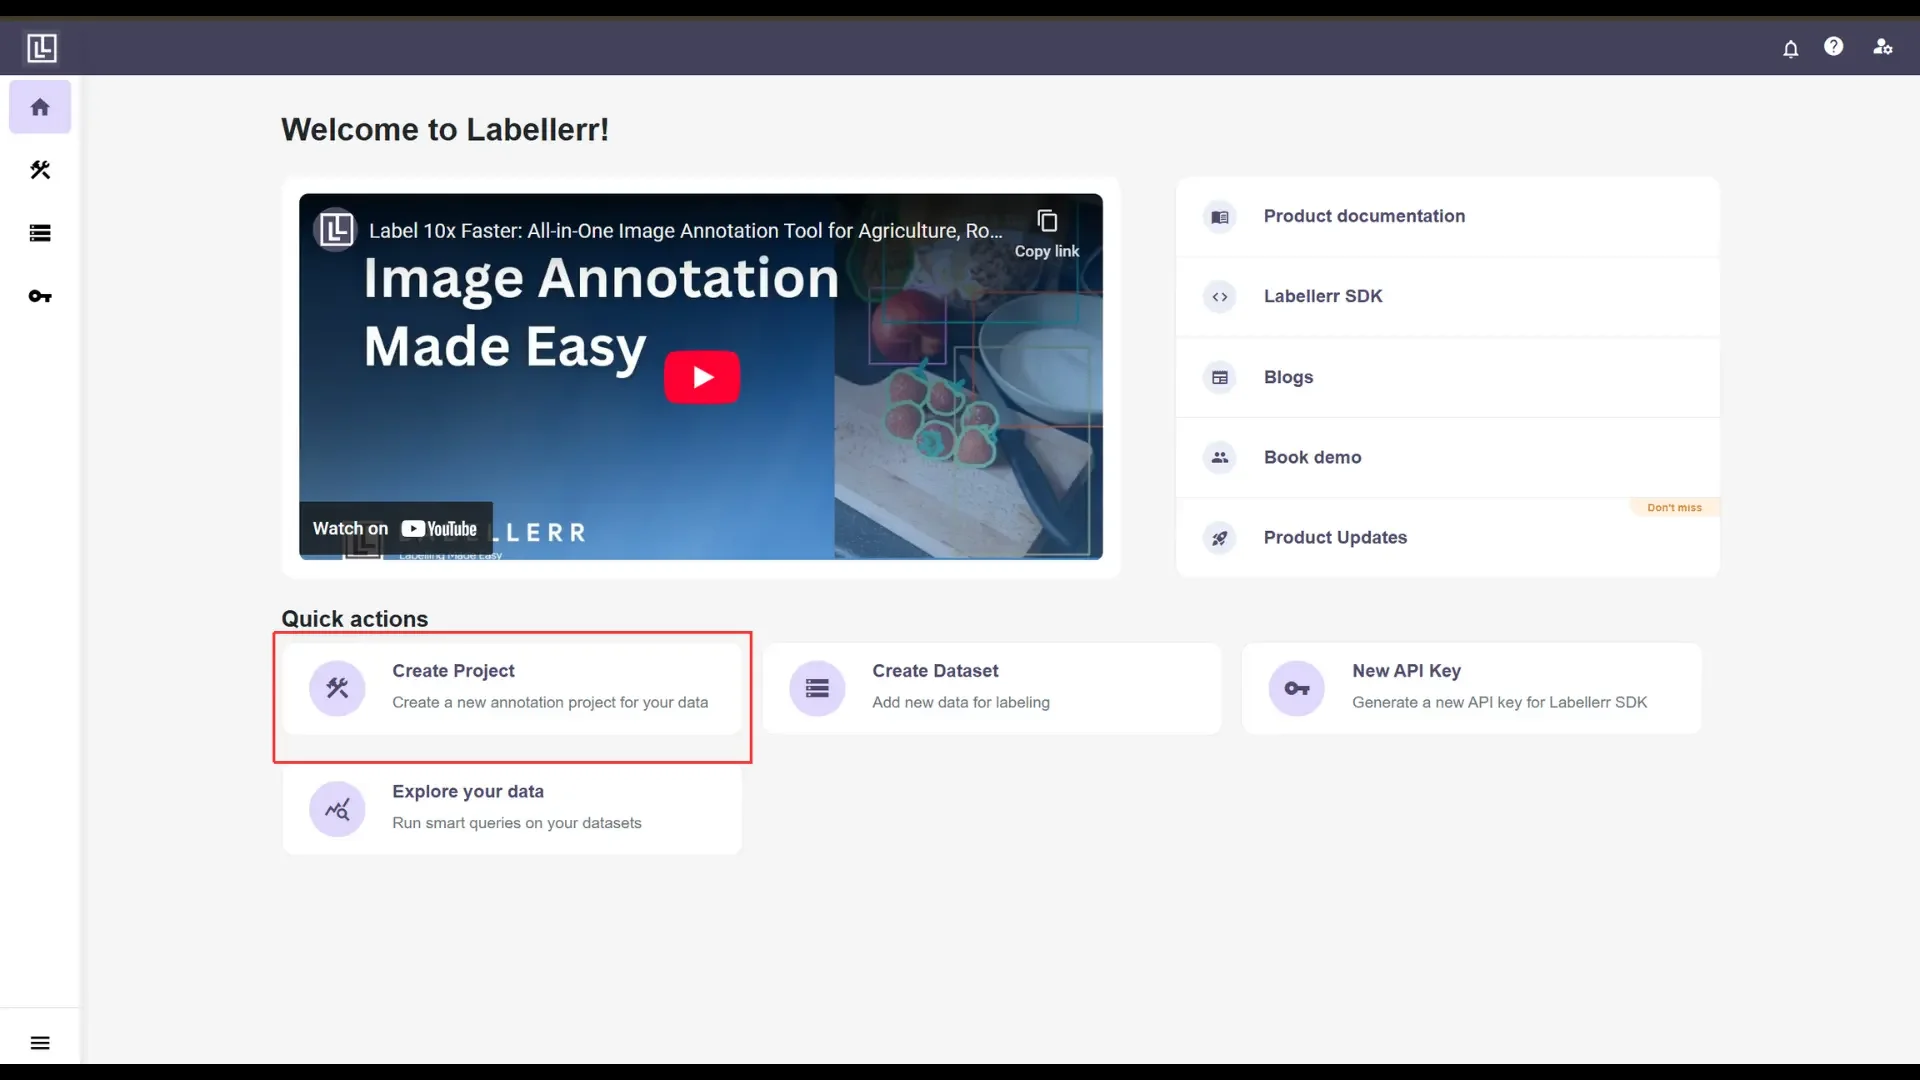
Once at the **Home** page, To create a new project, click on **'Create Project'** button to begin.
 **Only one data type can be selected per project.**
For more on **Text, Audio and Video** data types, Check out the following create Text, Video & Audio Guides:
* [How to create a Text Project?](/getting-started/create-text-project)
* [How to create a Video Project?](/getting-started/create-video-project)
* [How to create an Audio Project?](/getting-started/create-audio-project)
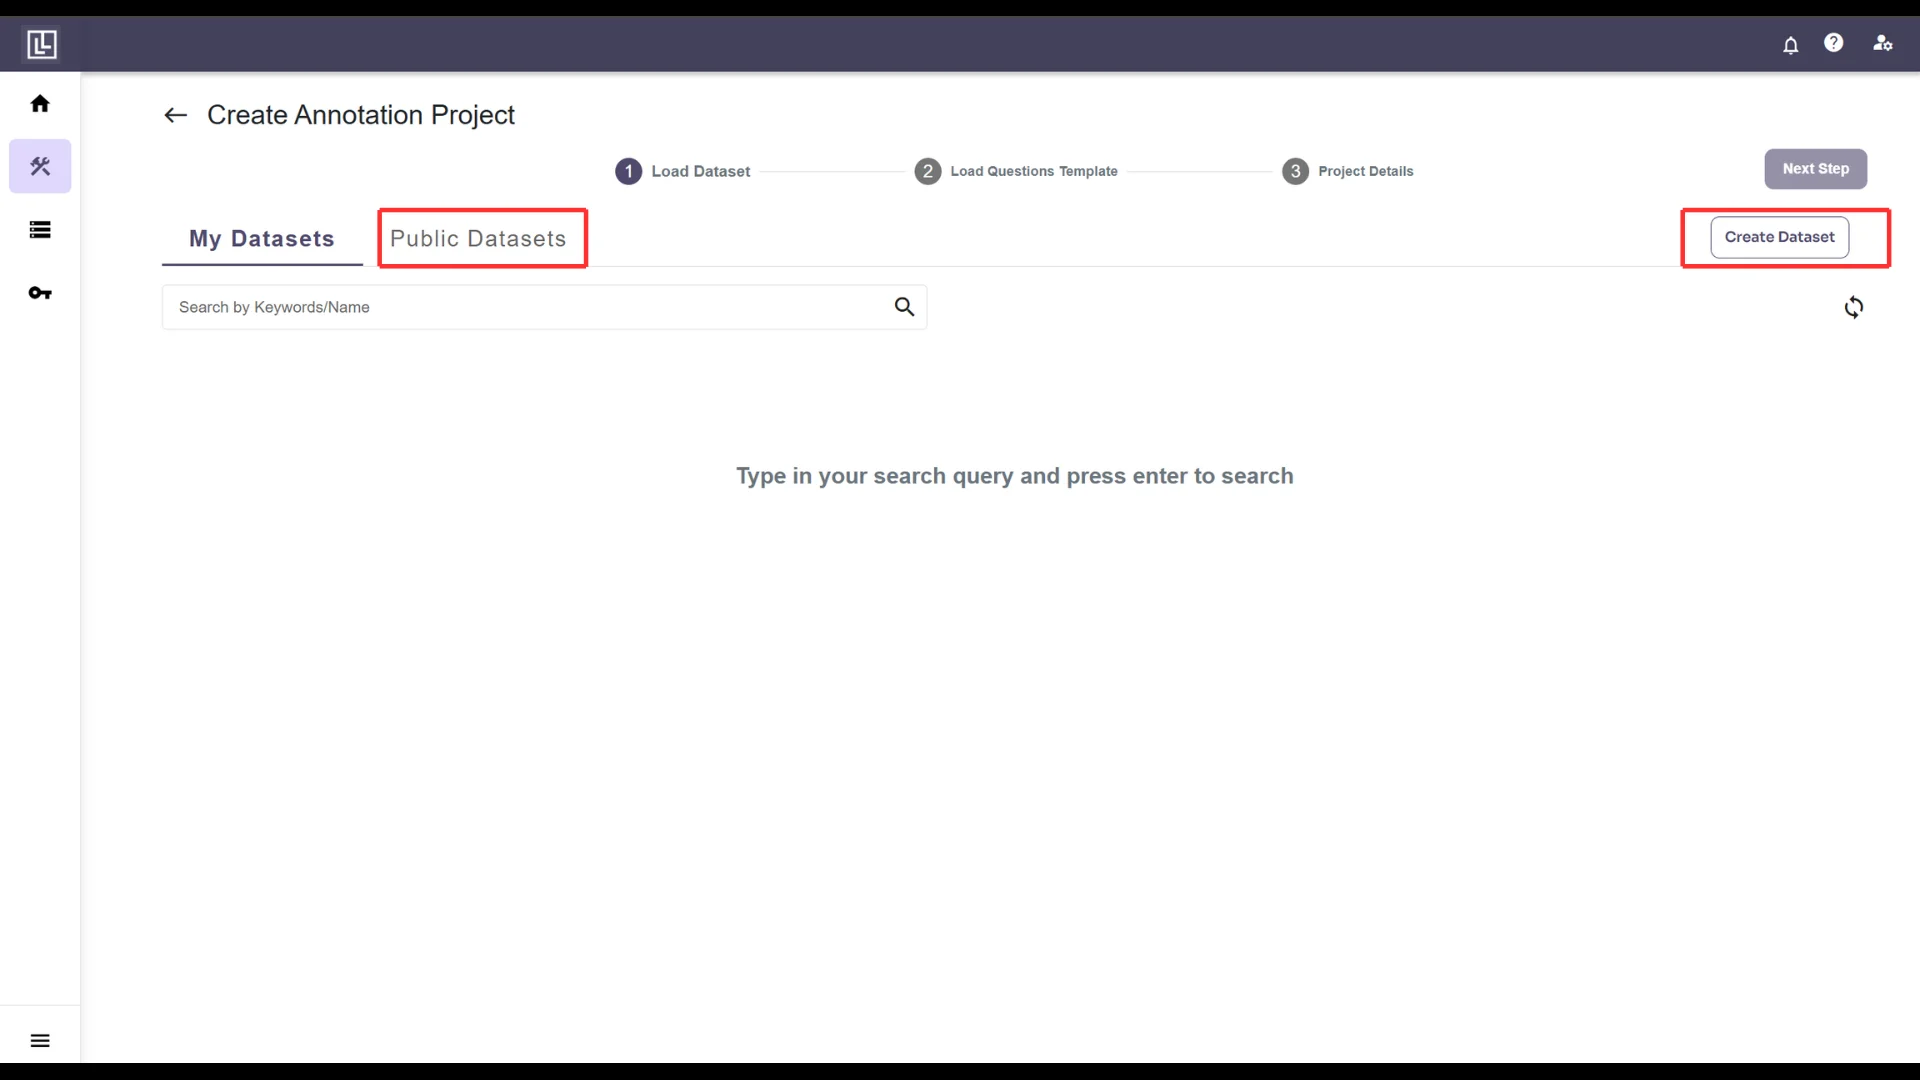
If a new dataset is to be created, Click on the "**Create Dataset**" button or you can select **Public datasets** for testing. To know more about how to test using Public Datasets you can visit the next tutorial.
**Only one data type can be selected per project.**
For more on **Text, Audio and Video** data types, Check out the following create Text, Video & Audio Guides:
* [How to create a Text Project?](/getting-started/create-text-project)
* [How to create a Video Project?](/getting-started/create-video-project)
* [How to create an Audio Project?](/getting-started/create-audio-project)
If a new dataset is to be created, Click on the "**Create Dataset**" button or you can select **Public datasets** for testing. To know more about how to test using Public Datasets you can visit the next tutorial.
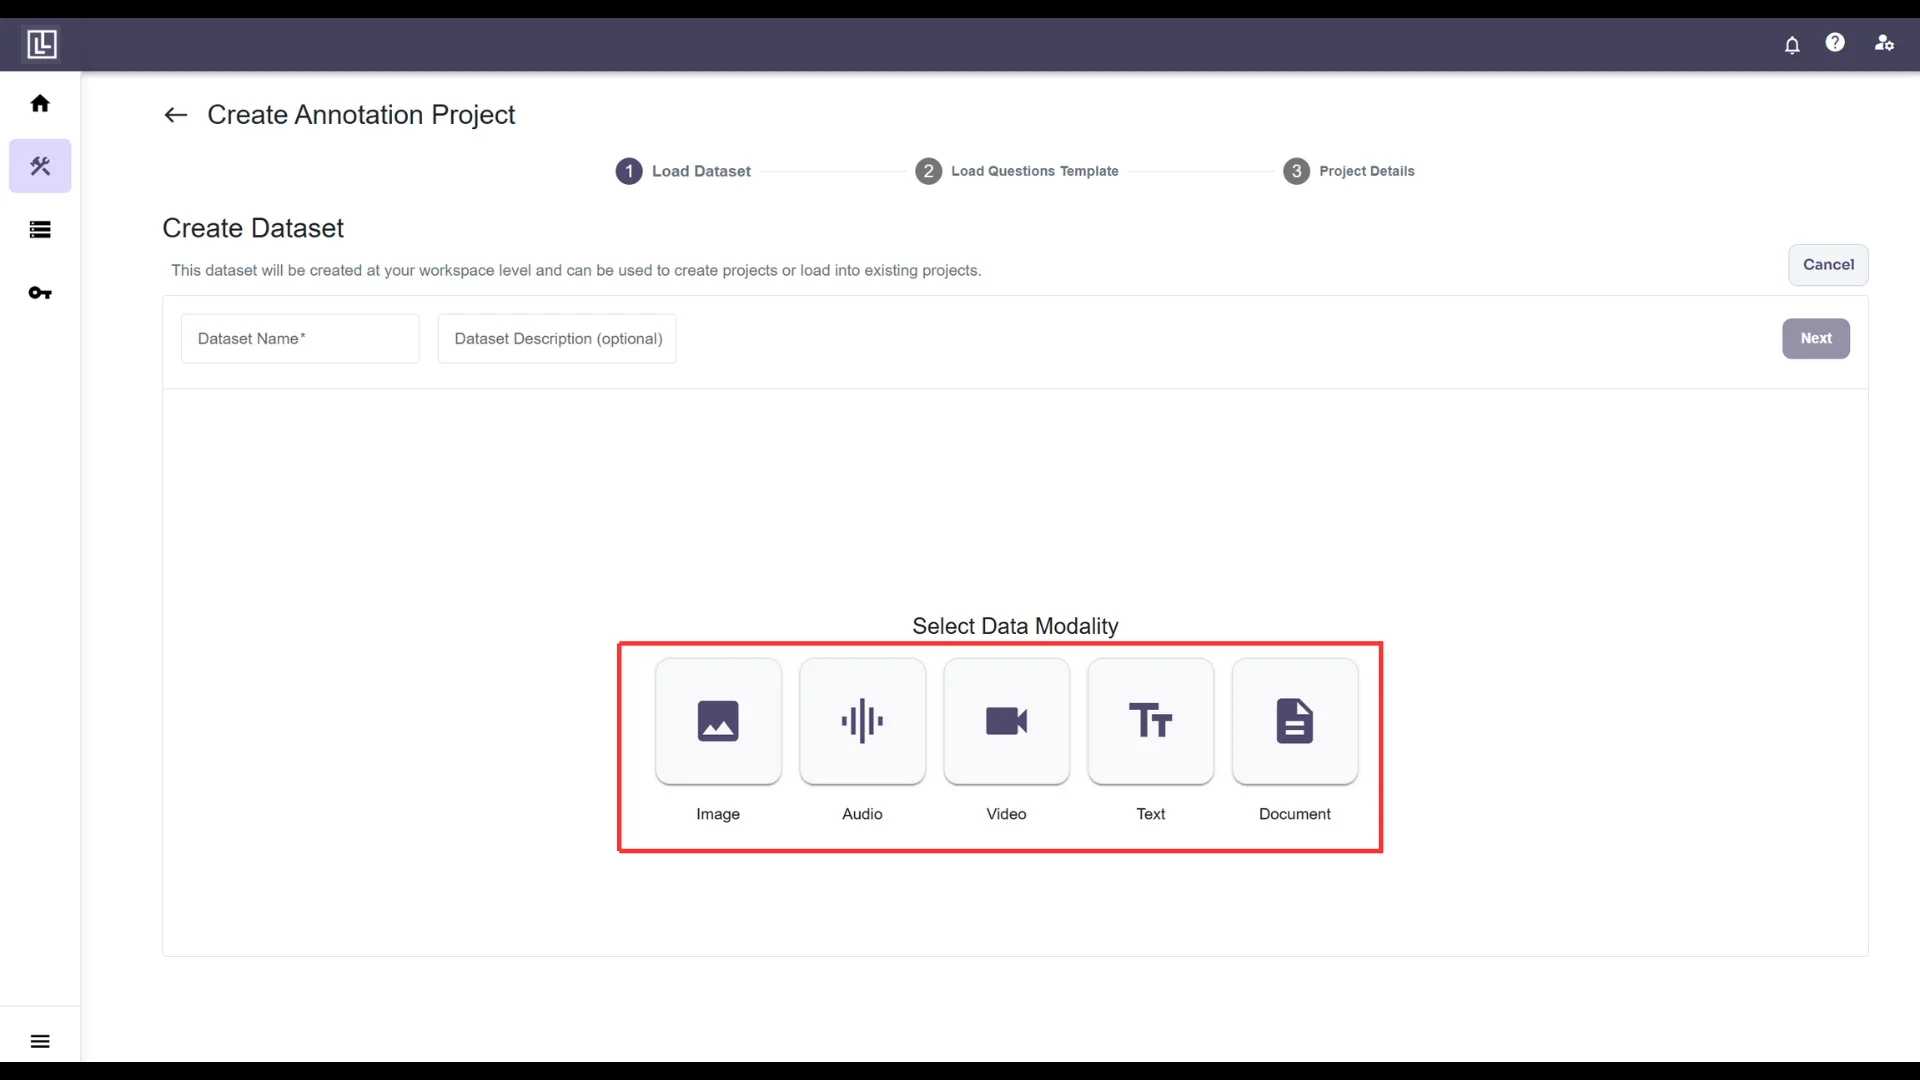
 Now choose a data modality to work with. The options are **Image, Video, Audio, Text, Document** and then click on **Next**.
 Now select a Data Connector. The available formats are Google Drive, Google Cloud, Amazon S3 & Local Upload.
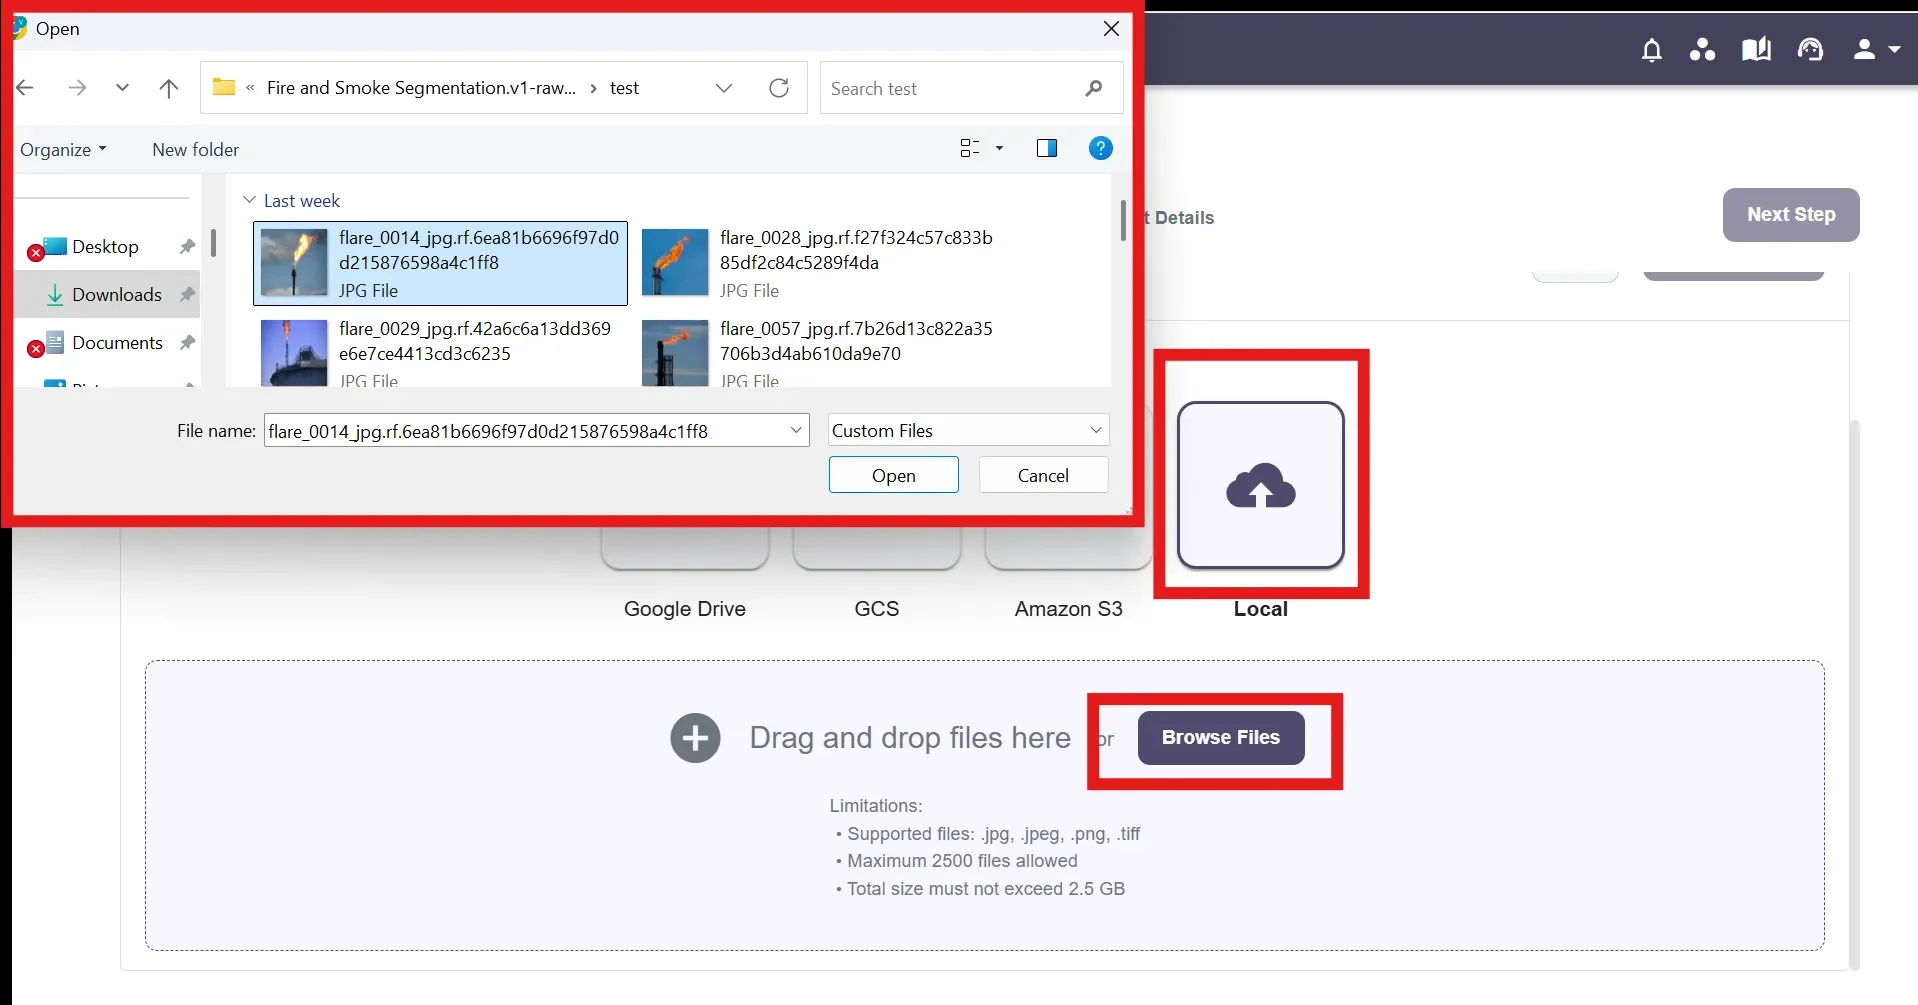 For more on how to upload files from different sources, check out [Datasets](/tutorials/datasets)
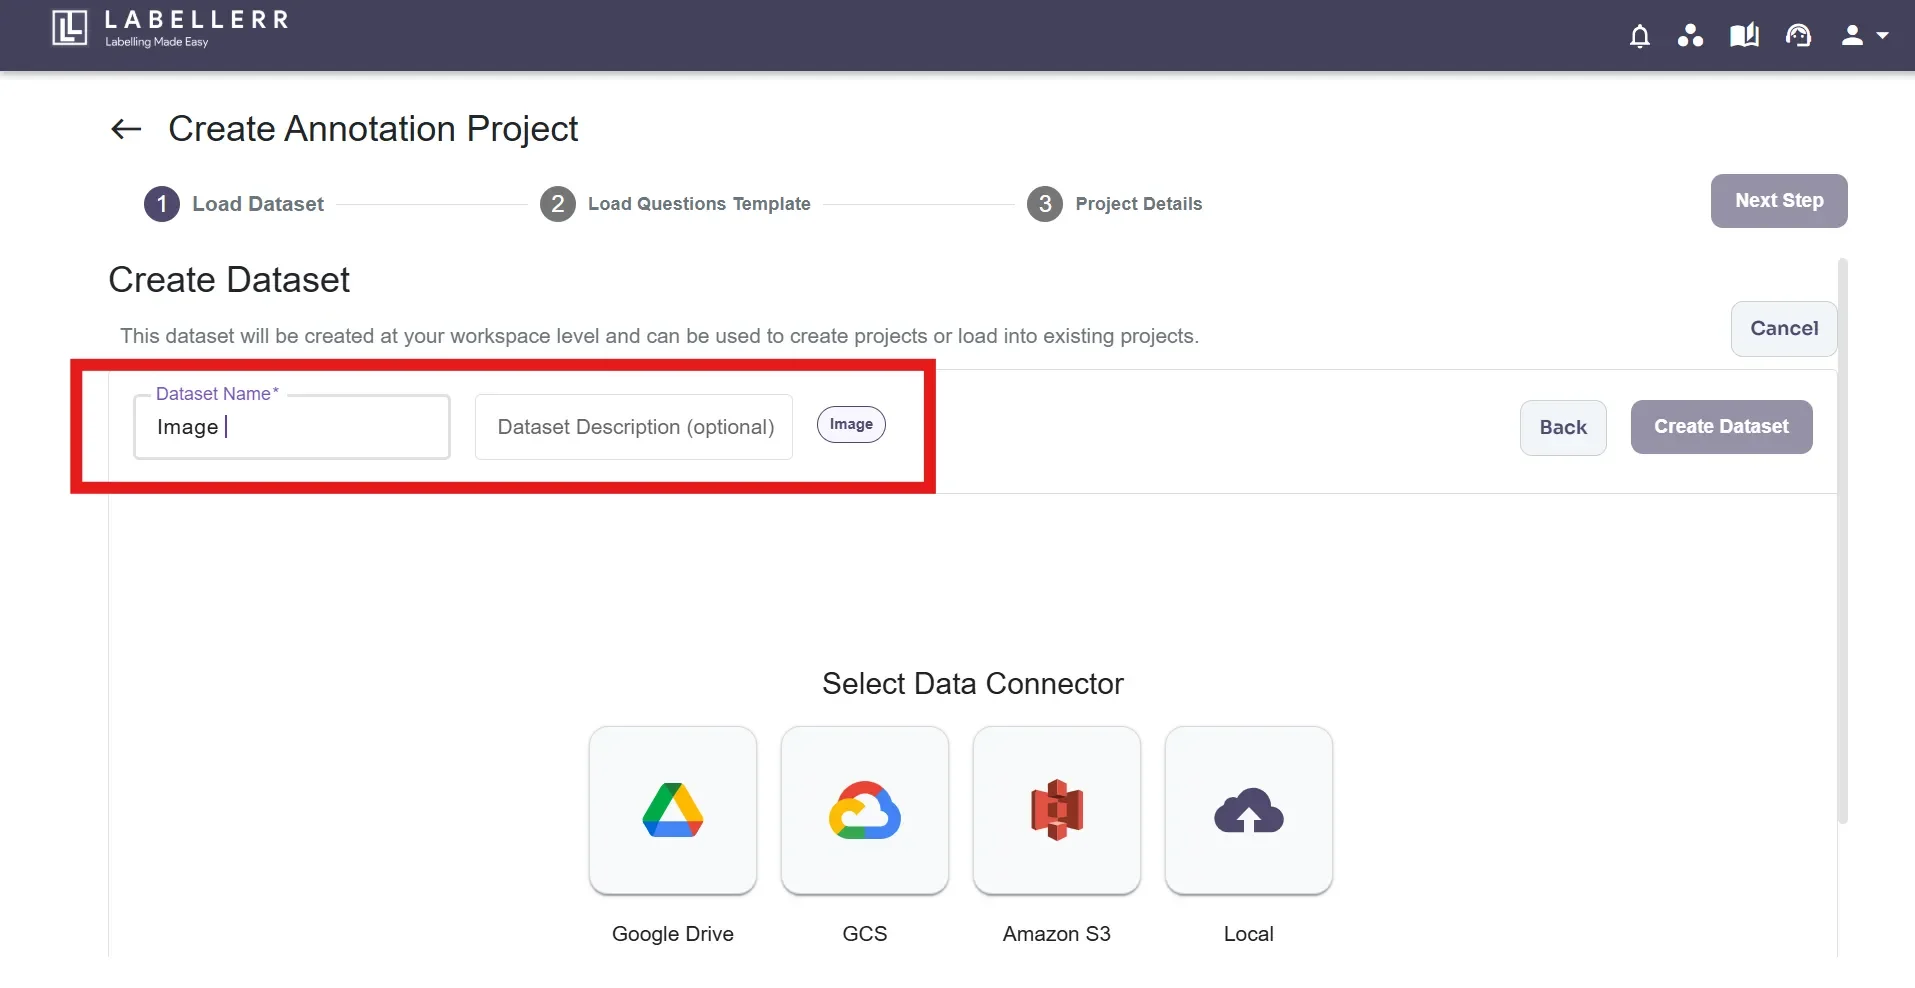
Next, fill in the new dataset details: Enter the Name (mandatory) and Description (optional), then click on 'Create Dataset'.
For more on how to upload files from different sources, check out [Datasets](/tutorials/datasets)
Next, fill in the new dataset details: Enter the Name (mandatory) and Description (optional), then click on 'Create Dataset'.
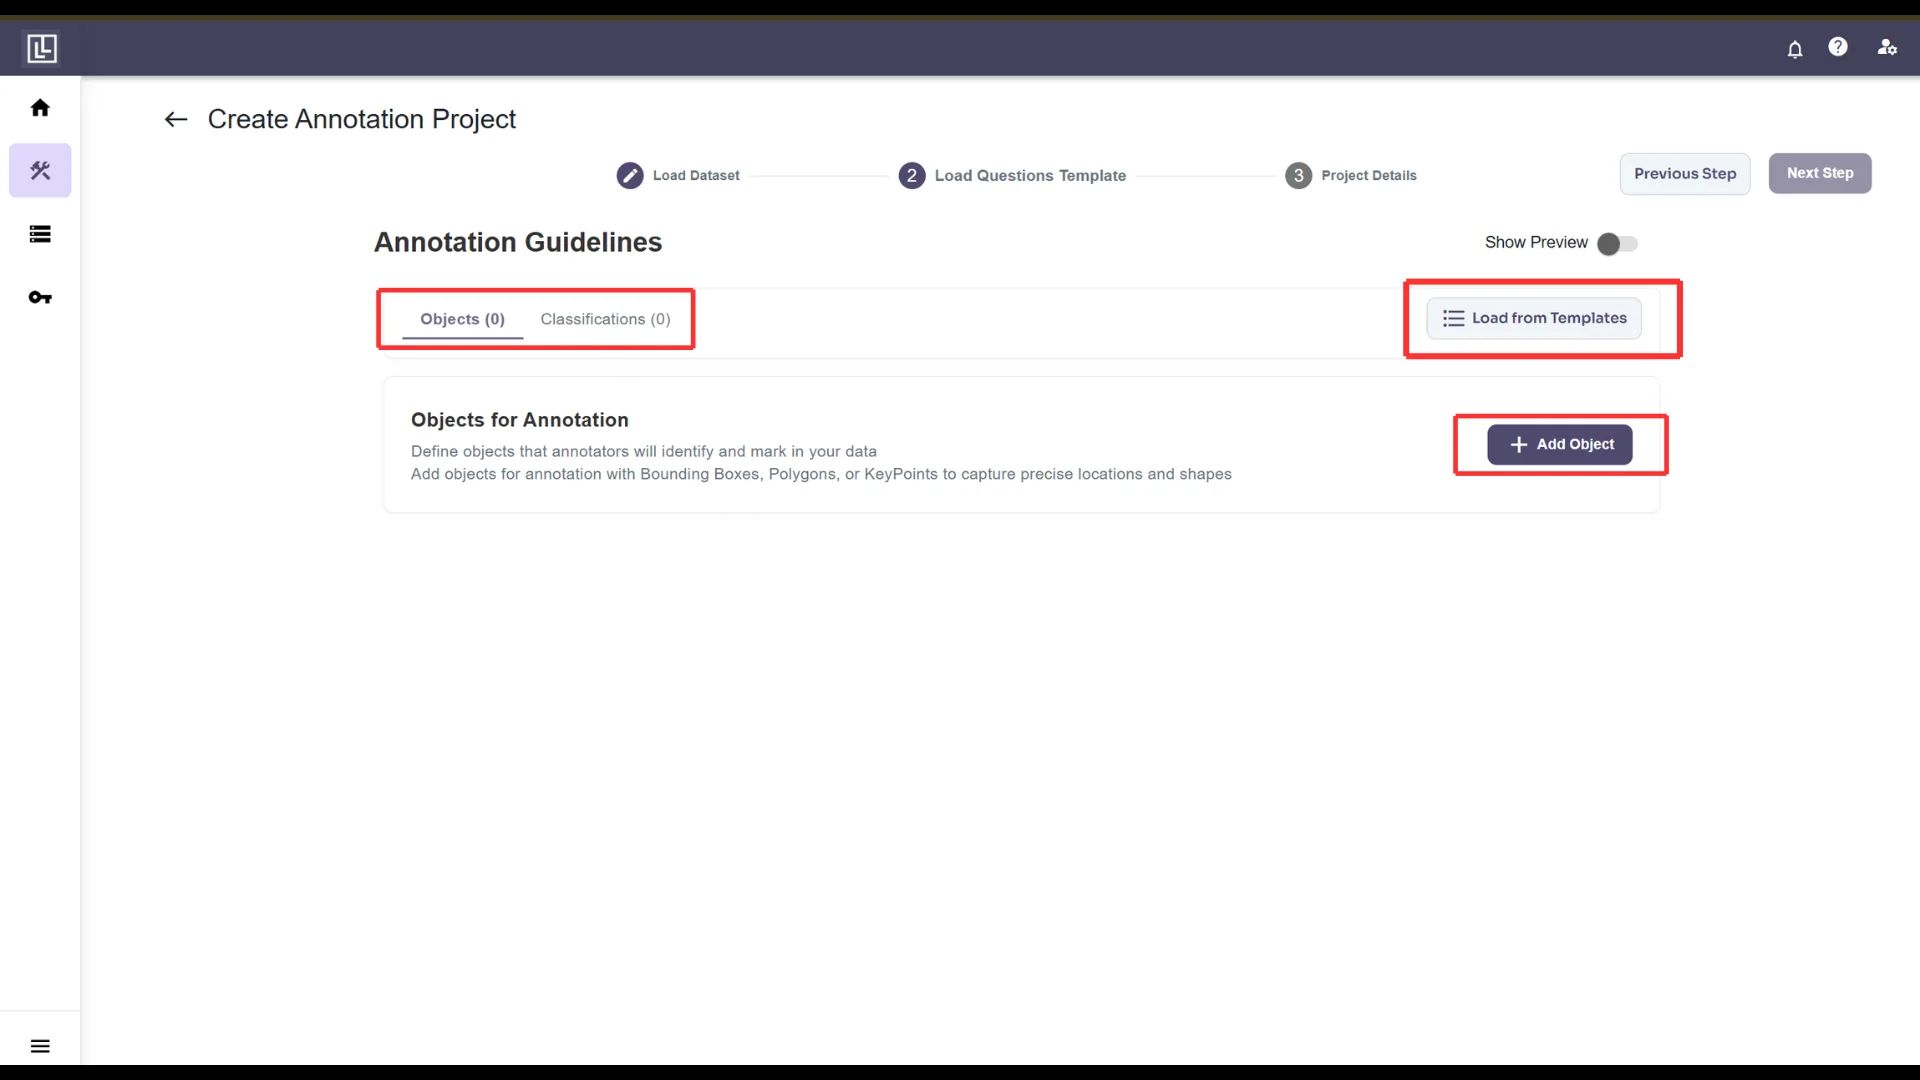
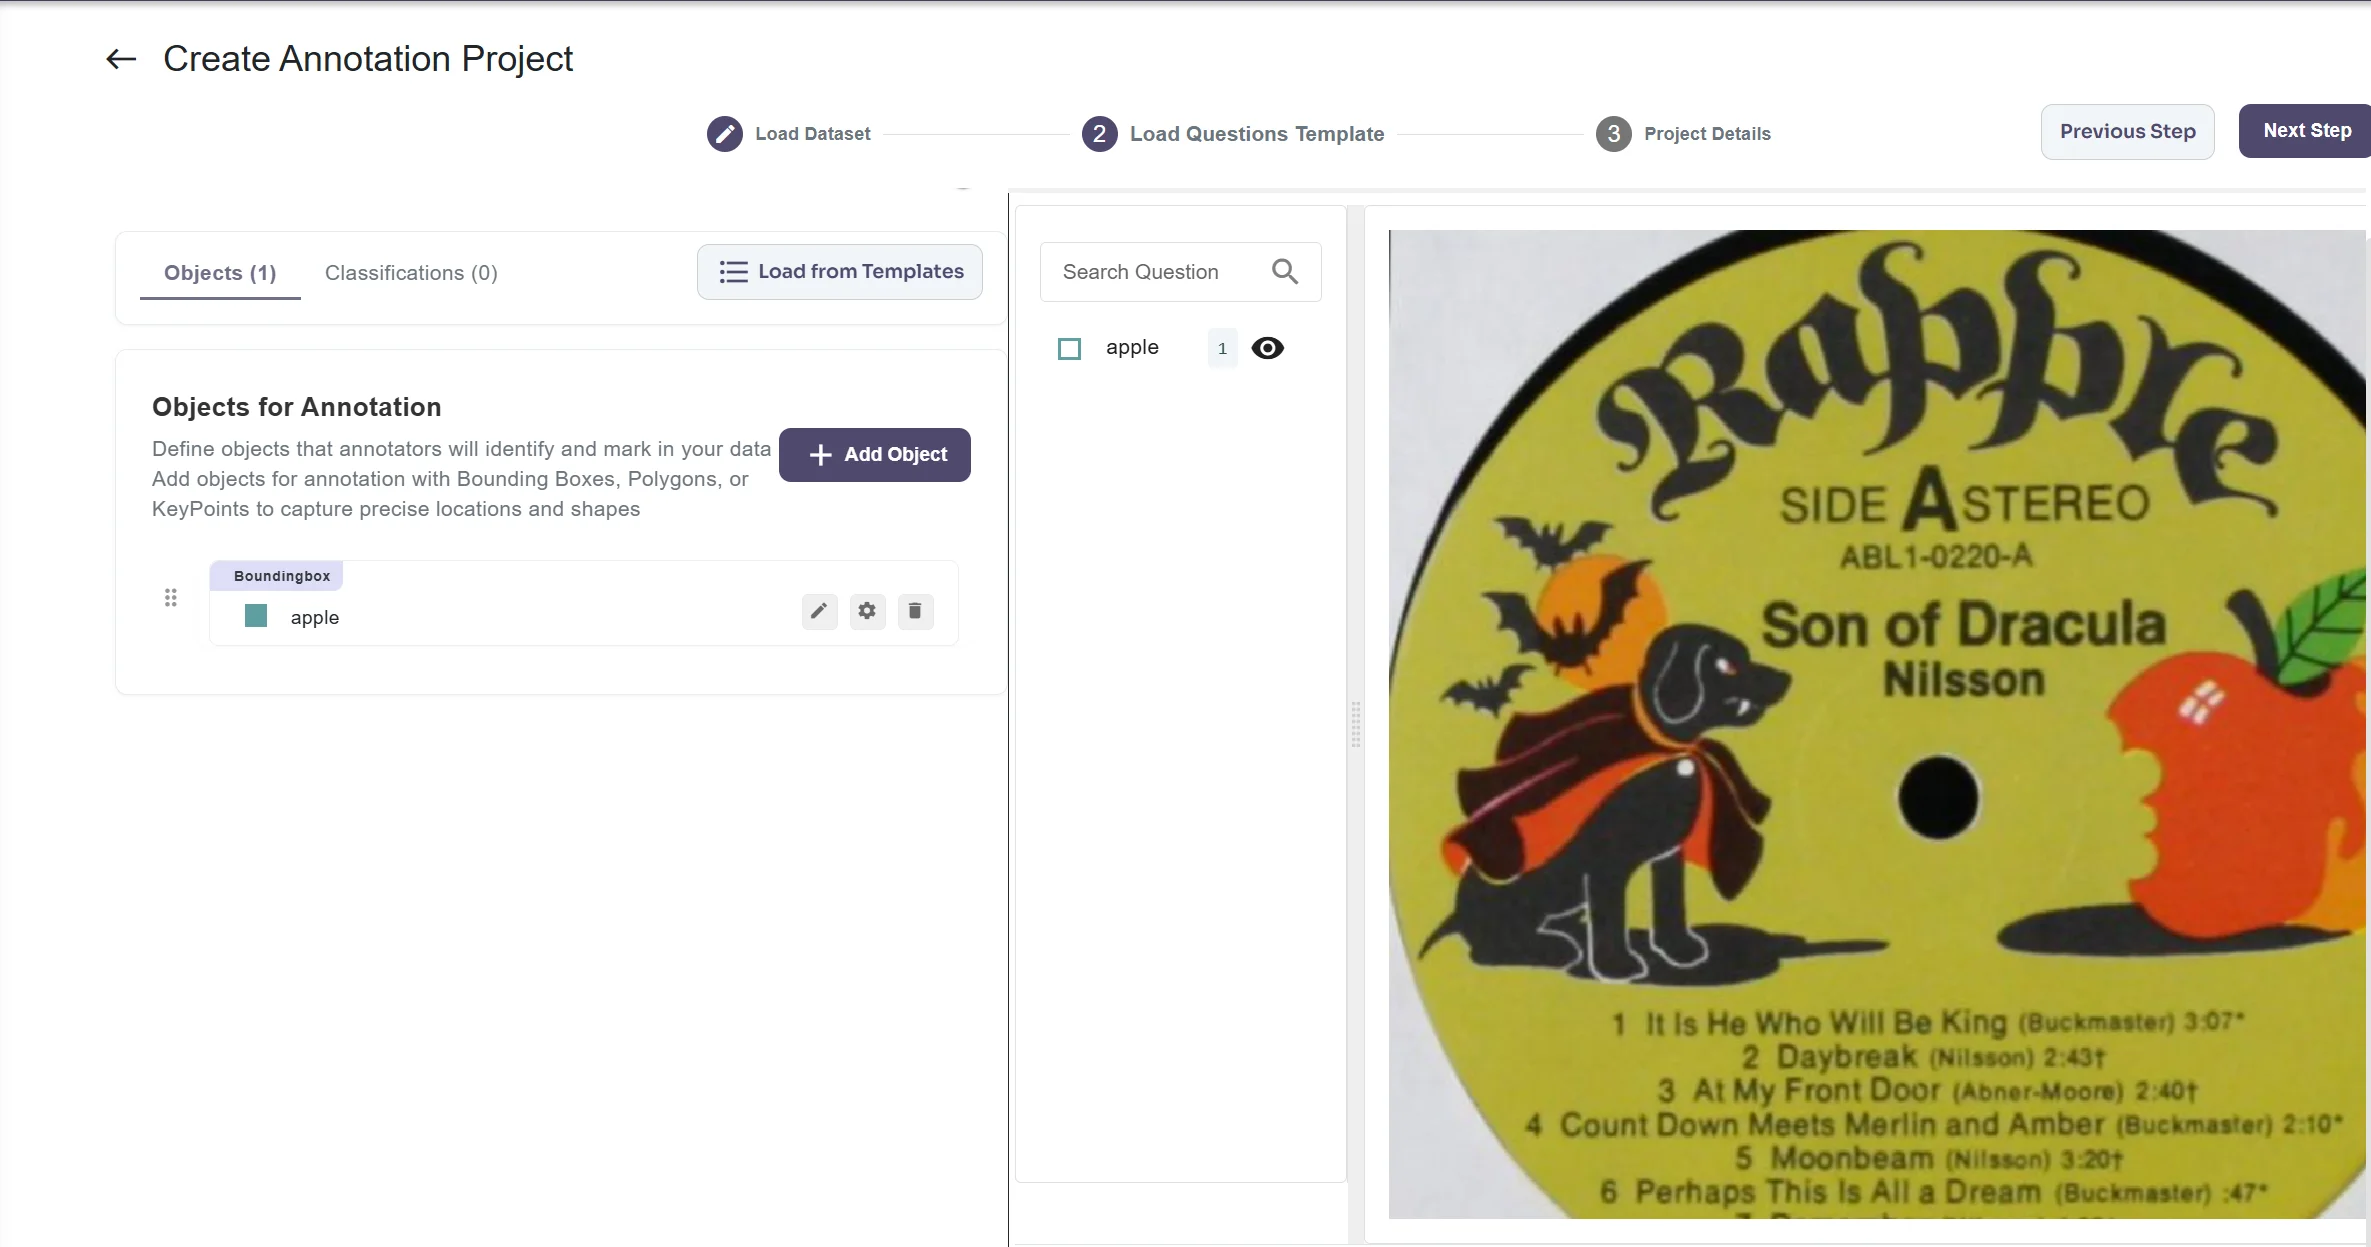
 Here, Objects and Classifications based on the labeling requirements are supposed to be created. You can create a new template from scratch using the various options available or select an existing template from previous work on clicking **'Existing Templates'** button.
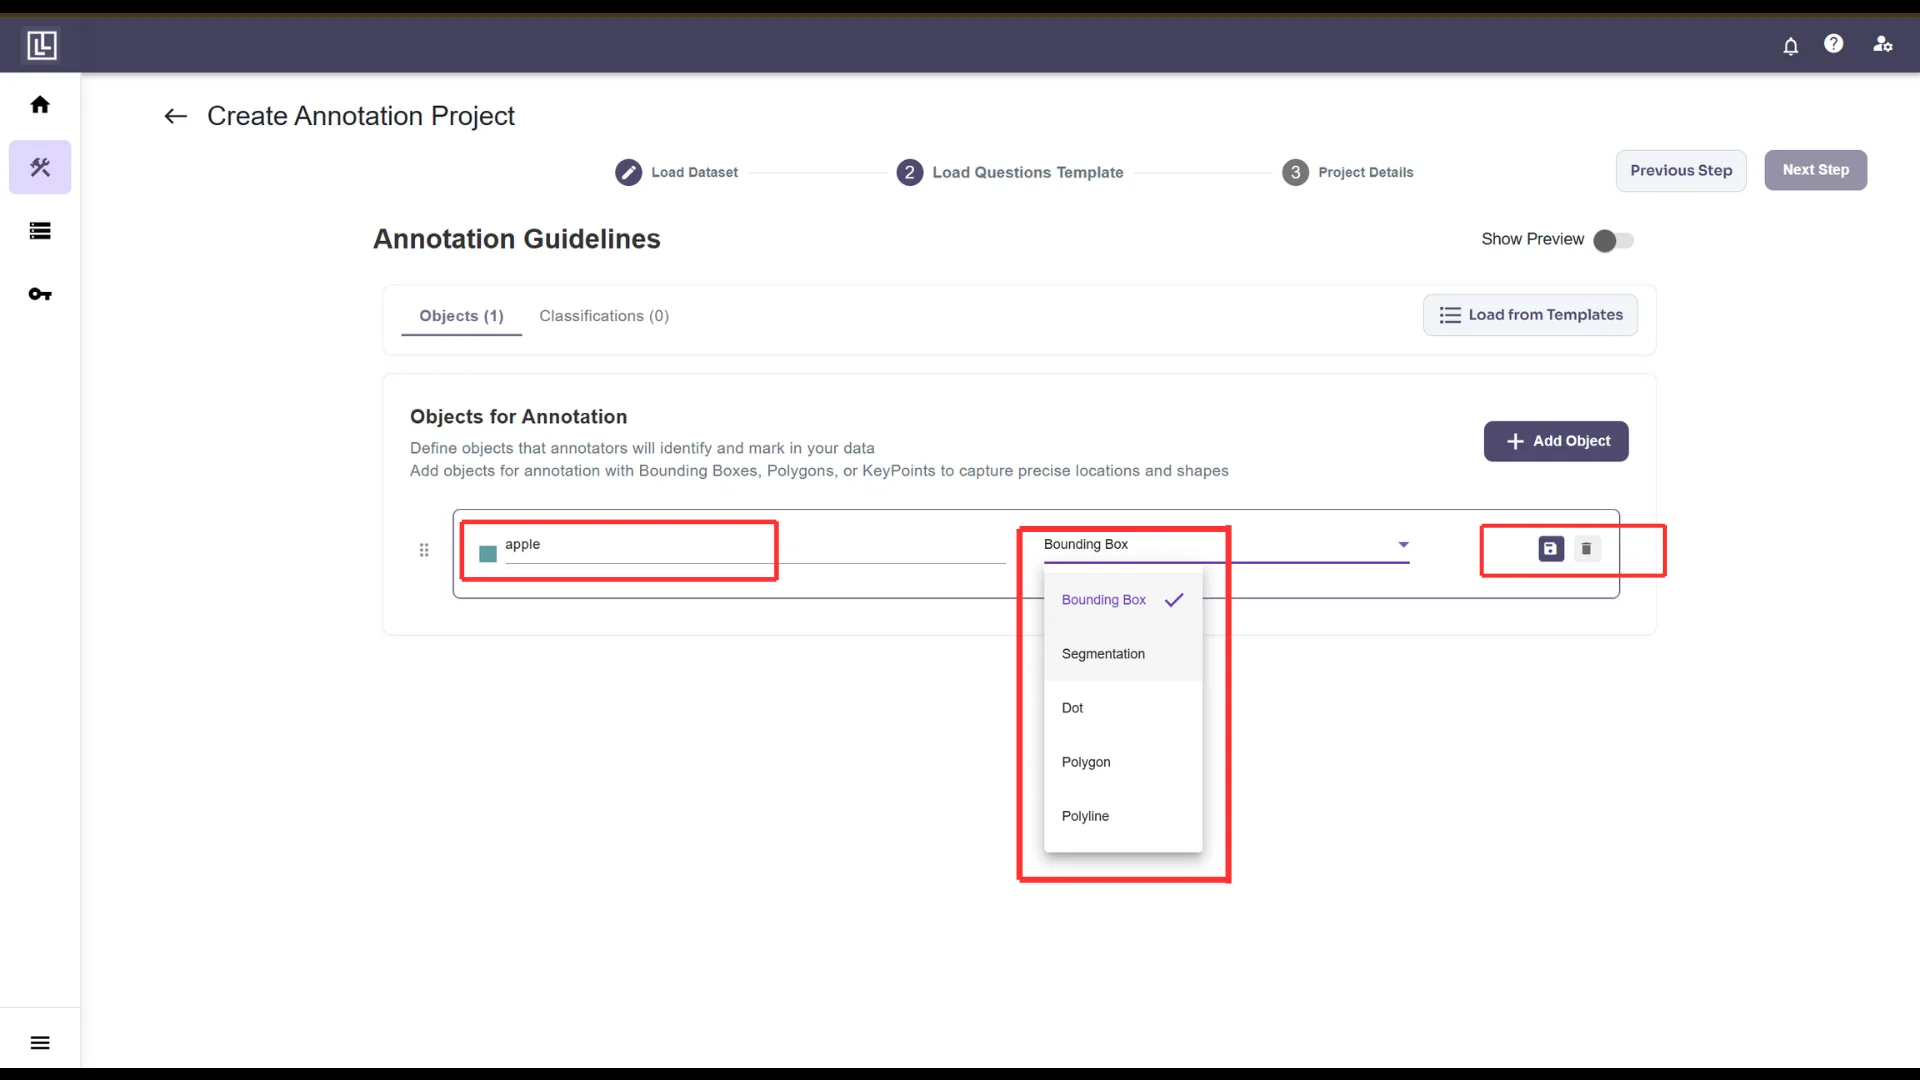
 There are different 'Object' & 'Classification' types. For objects, in **Objects** tab, Click on '**Add Object**'. Enter Object name and select object type. Click on 💾 button to add it.
 If you are confused to what object should be you can also view a sample image by clicking on show preview.
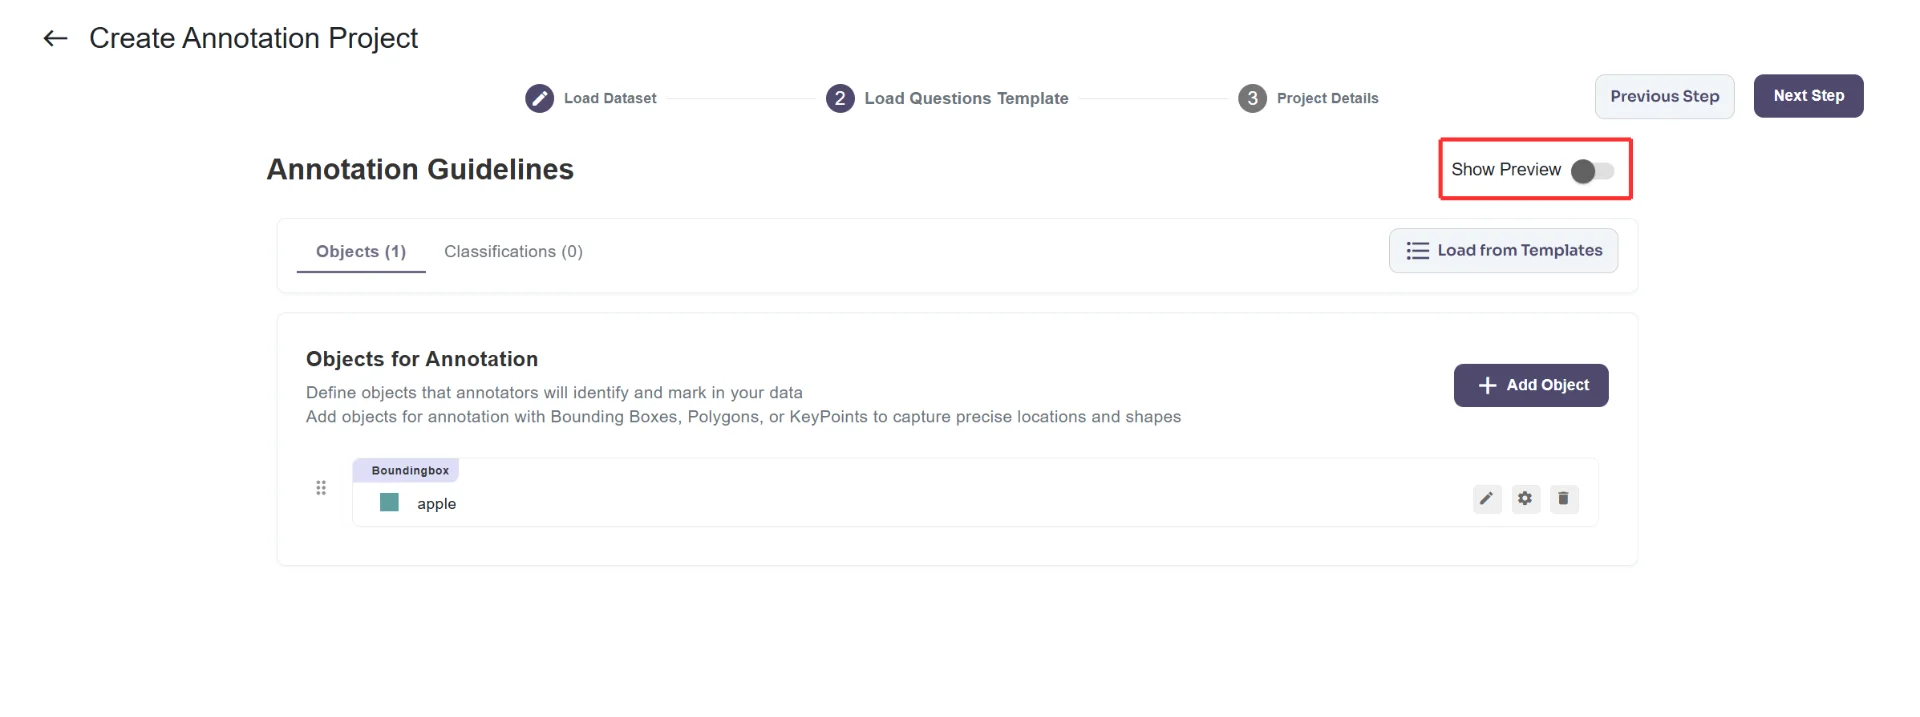 This will show you a preview of a random image from the dataset.
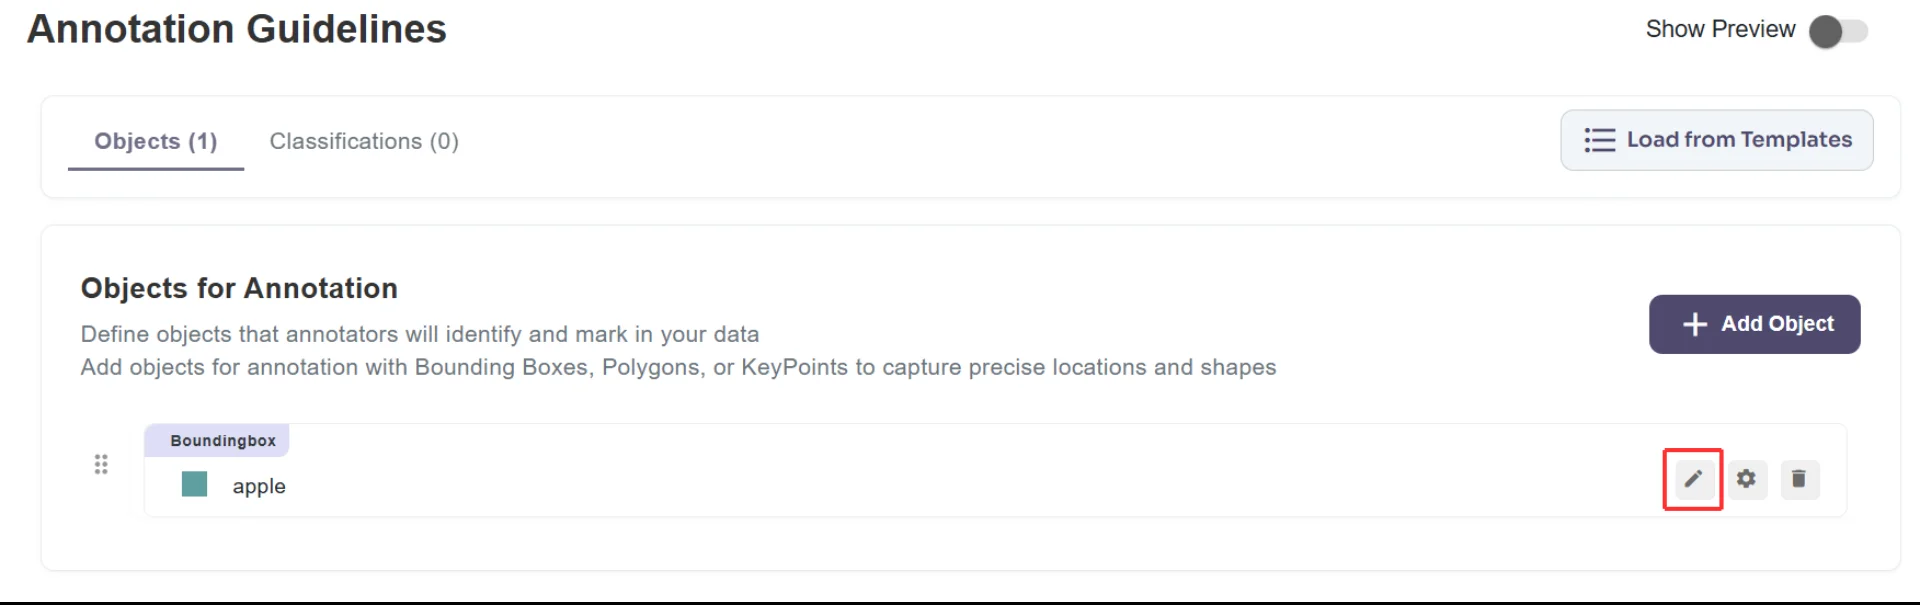
 To add attributes of an object or to edit the type/name of object, click on pen icon in parallel to object name. Click on 'Add Attribute'. Enter name of the Attribute and click on 'Add Options' to enter the values of attribute.
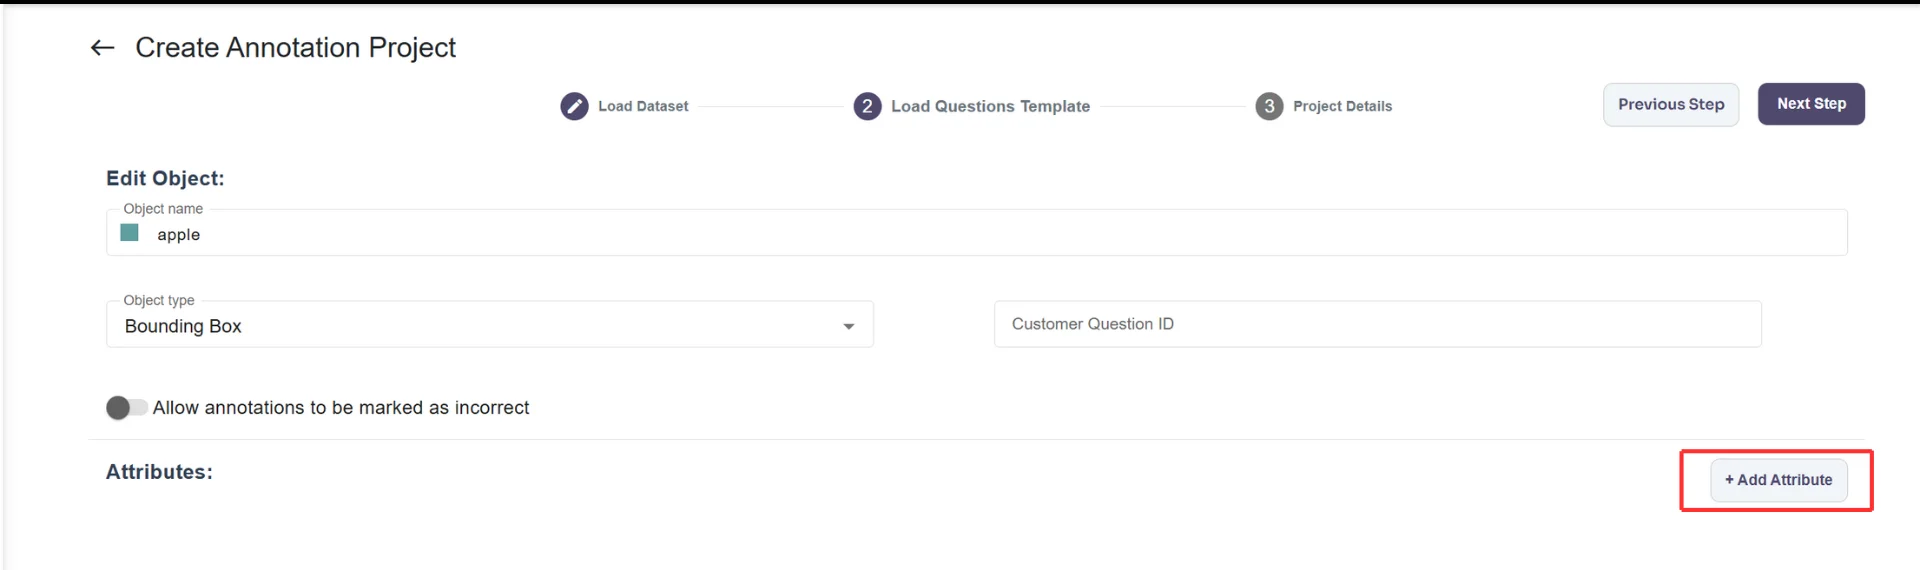 **Additional options are also available:**
* **Required** - Indicates that the attribute must be completed.
* **Sort options** - Allows sorting the values of the attribute.
* **Not sure remarks** - Enables adding remarks when unsure about an answer.
**Additional options are also available:**
* **Required** - Indicates that the attribute must be completed.
* **Sort options** - Allows sorting the values of the attribute.
* **Not sure remarks** - Enables adding remarks when unsure about an answer.
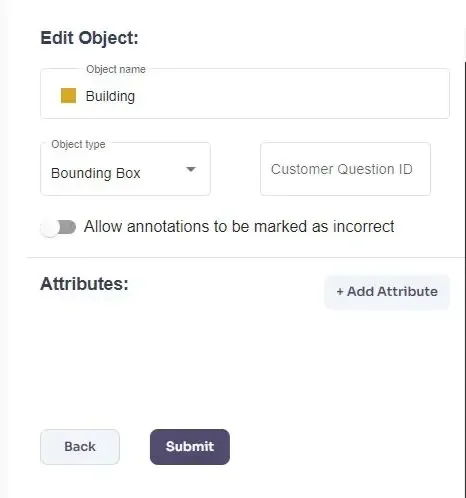
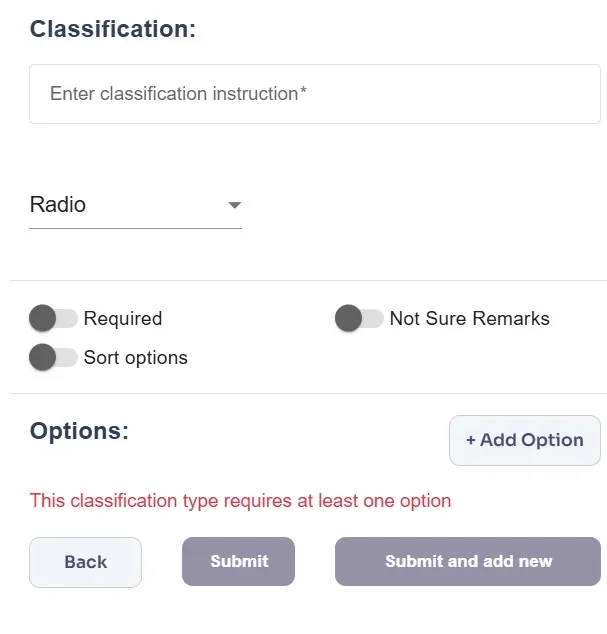
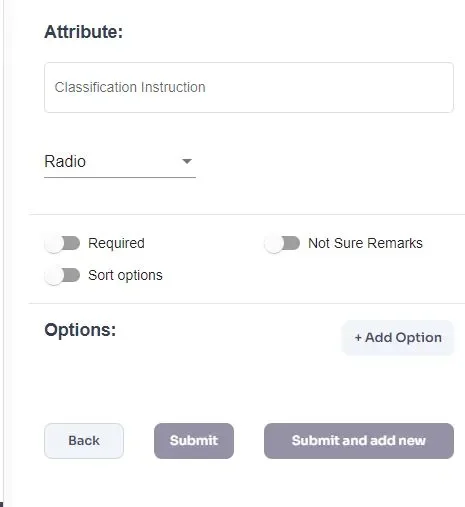 Similarly, for classification, navigate to the 'Classifications' tab. Click on 'Add Classification', then enter the classification name/question. Select the classification type from the dropdown options, and click on 'Add option' to enter values for dropdown, radio, or multiselect options.
 For more on Image editing icons, check out the [Image Editing Icons Guide](/tutorials/image-editing-icons).
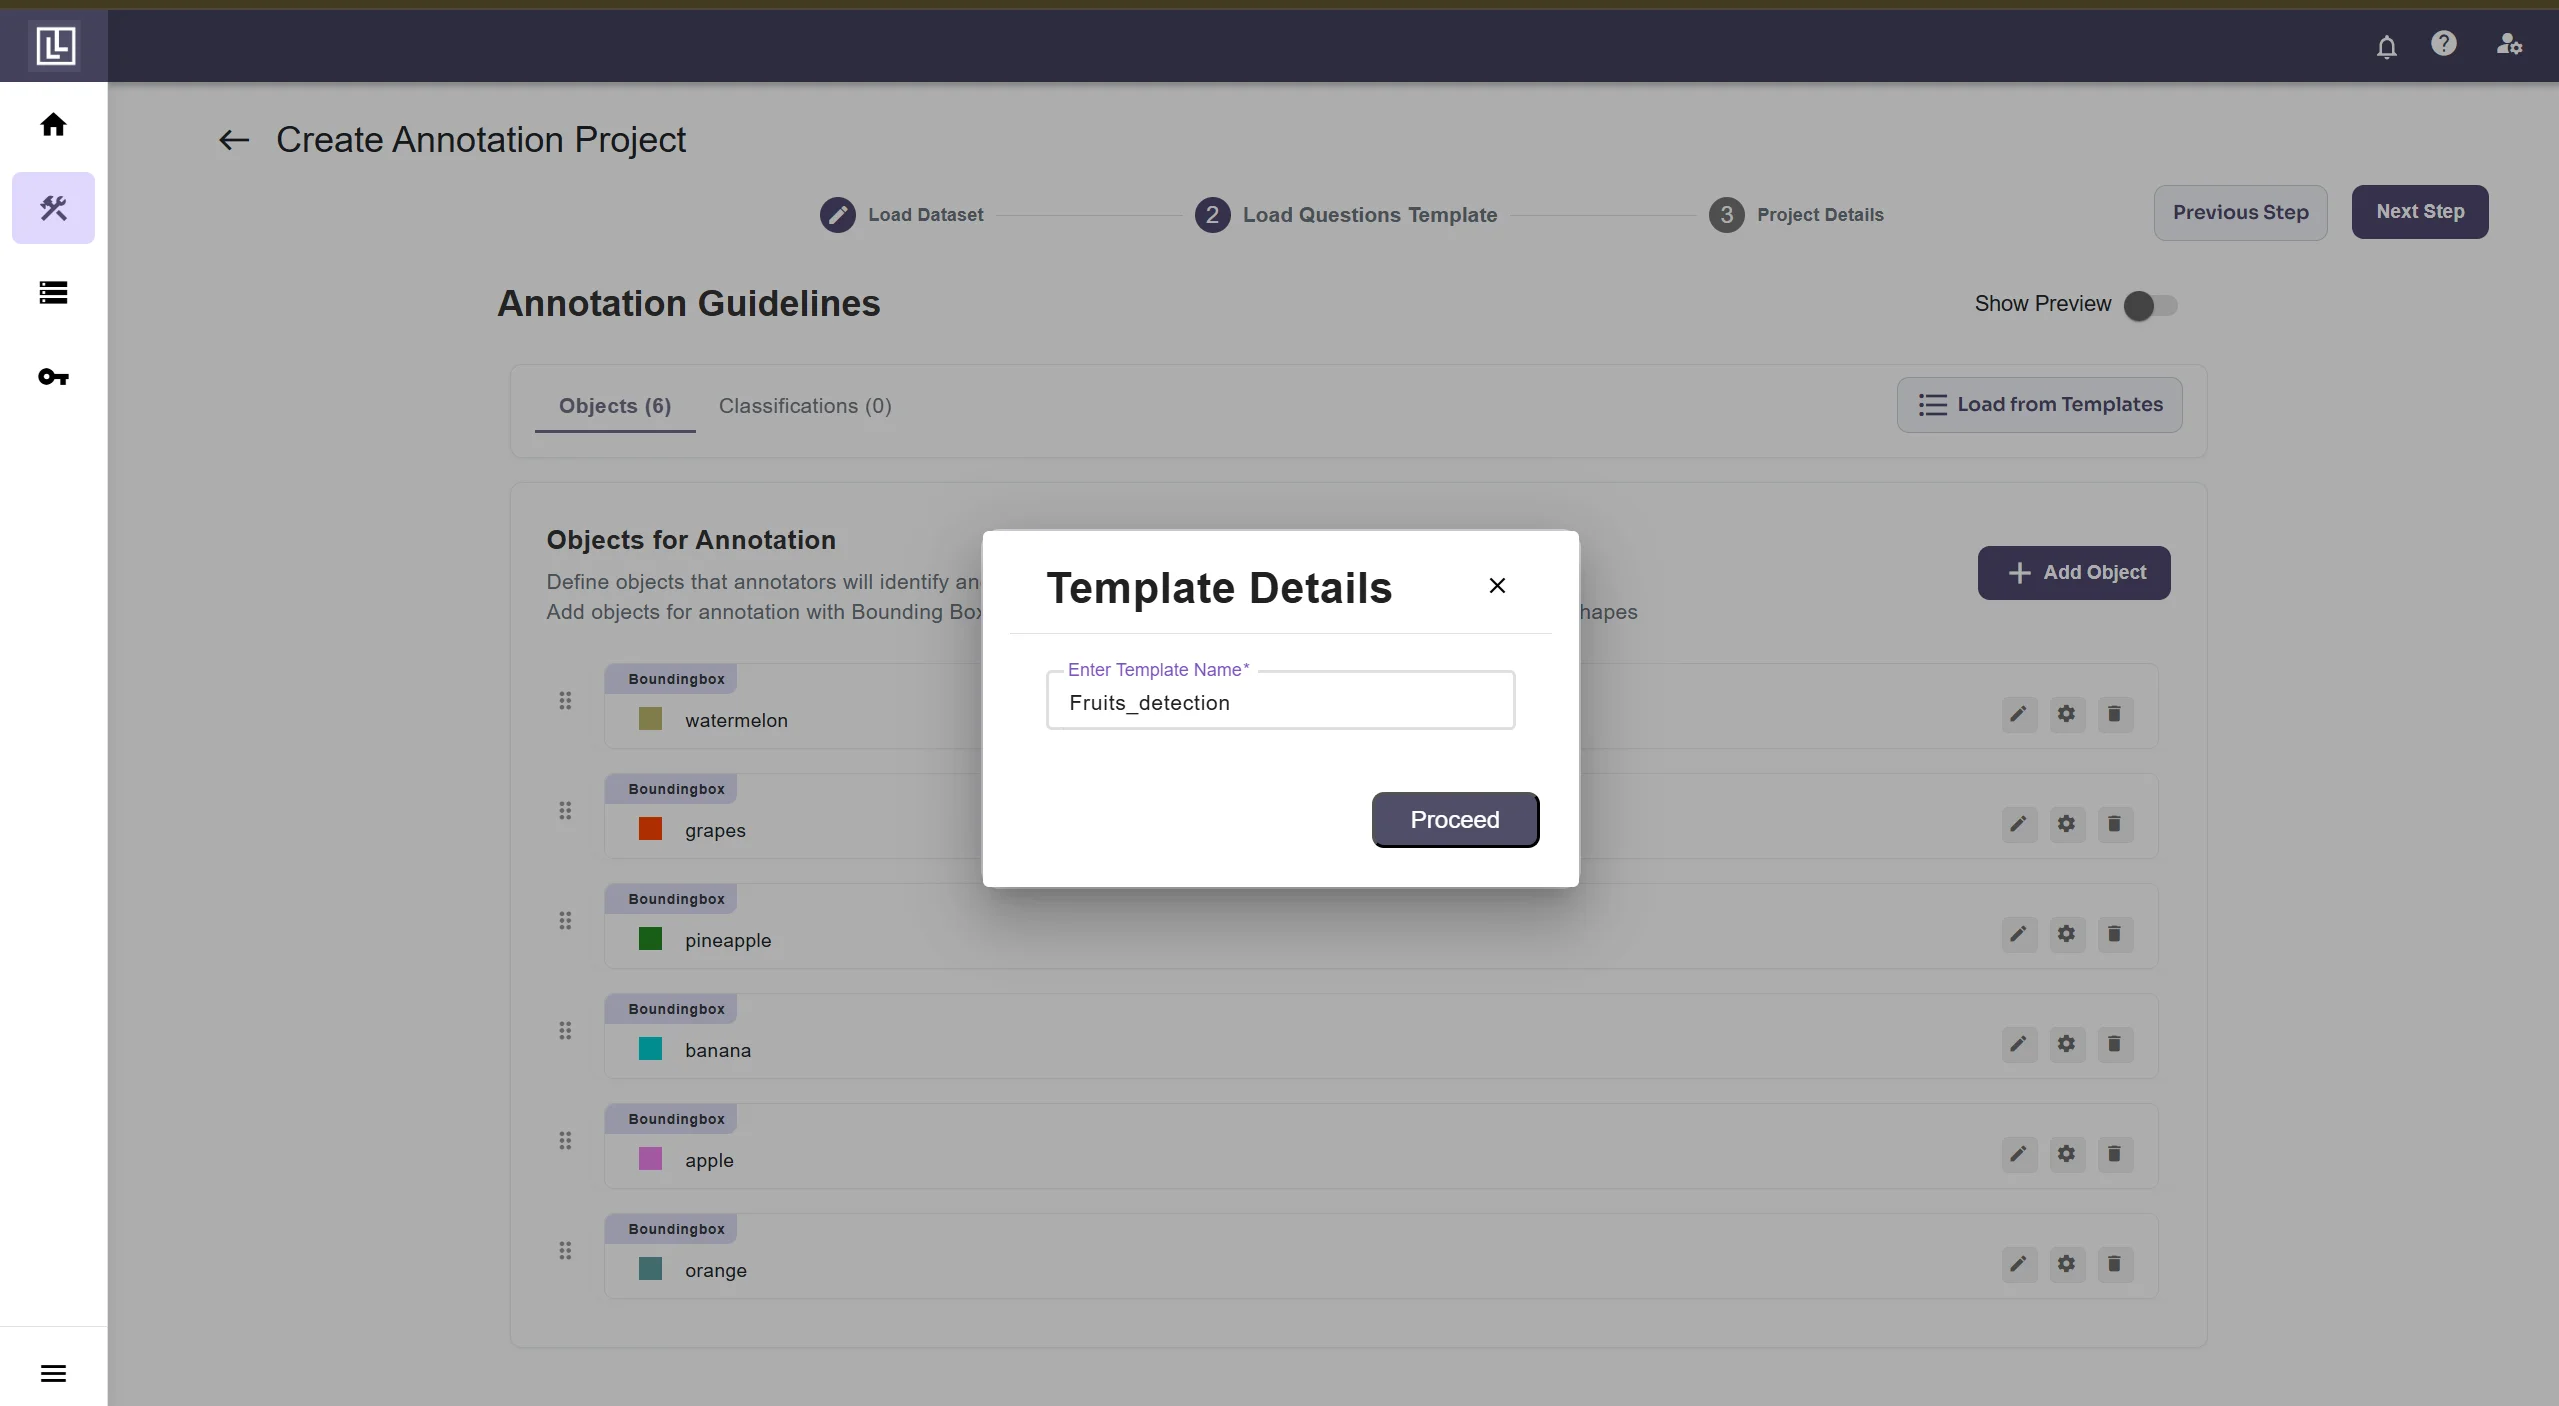
After you've finished, click on the "**Next Step**" button. Then, fill your new "**Template Details**" details and click on "**Proceed**" to continue so you can use the same template in future projects.
For more on Image editing icons, check out the [Image Editing Icons Guide](/tutorials/image-editing-icons).
After you've finished, click on the "**Next Step**" button. Then, fill your new "**Template Details**" details and click on "**Proceed**" to continue so you can use the same template in future projects.
 Write the project name.
Select your review process by enabling or disabling the toggle button, Enable review cycle (if **Review Process** is needed) & Enable client review cycle (if **Client Review Process** is needed).
Write the project name.
Select your review process by enabling or disabling the toggle button, Enable review cycle (if **Review Process** is needed) & Enable client review cycle (if **Client Review Process** is needed).
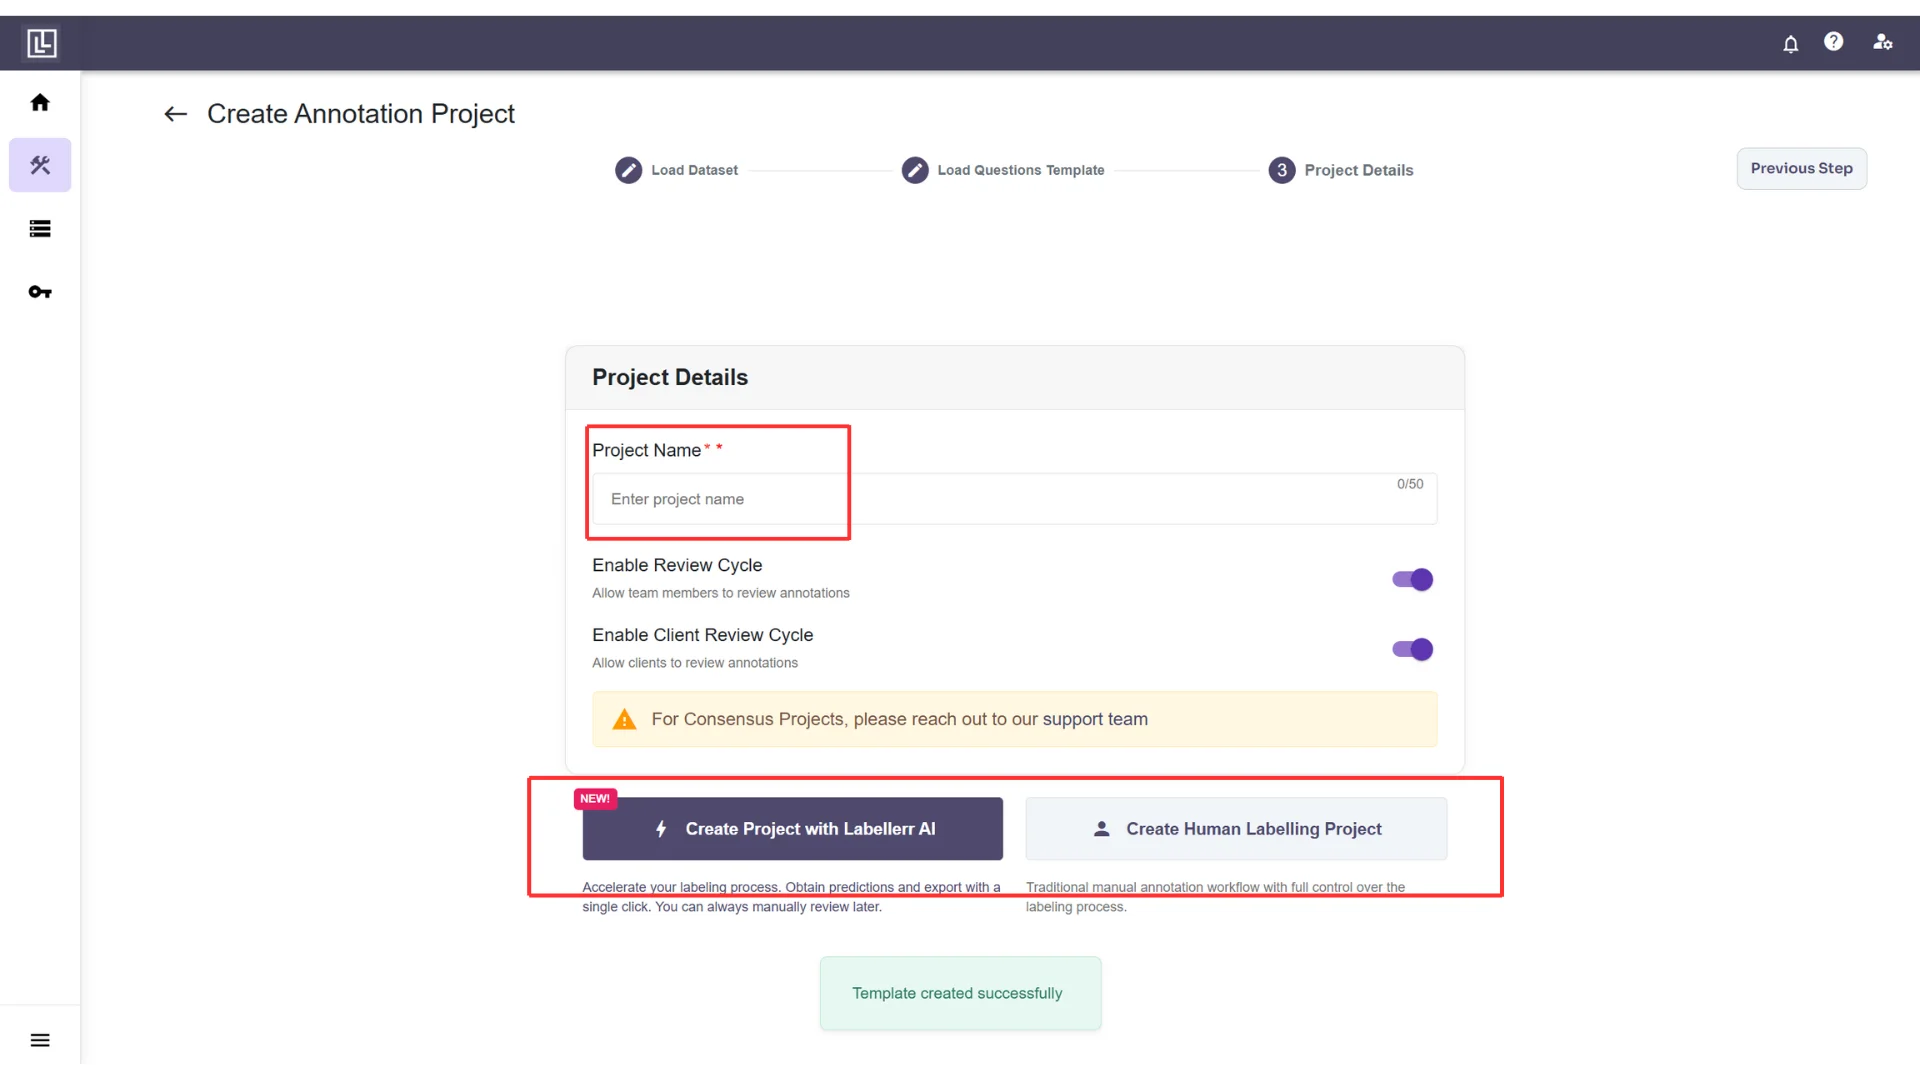 Click the **'Create Project with Labellerr AI'** button to create your project with AI Data Labeling and you will have to just review.
If selected Human Labeling project it will allow you to annotate manually. Once created, it will appear in the list along with your previously created projects. To view a project, simply click the '**View button**'.
Click the **'Create Project with Labellerr AI'** button to create your project with AI Data Labeling and you will have to just review.
If selected Human Labeling project it will allow you to annotate manually. Once created, it will appear in the list along with your previously created projects. To view a project, simply click the '**View button**'.
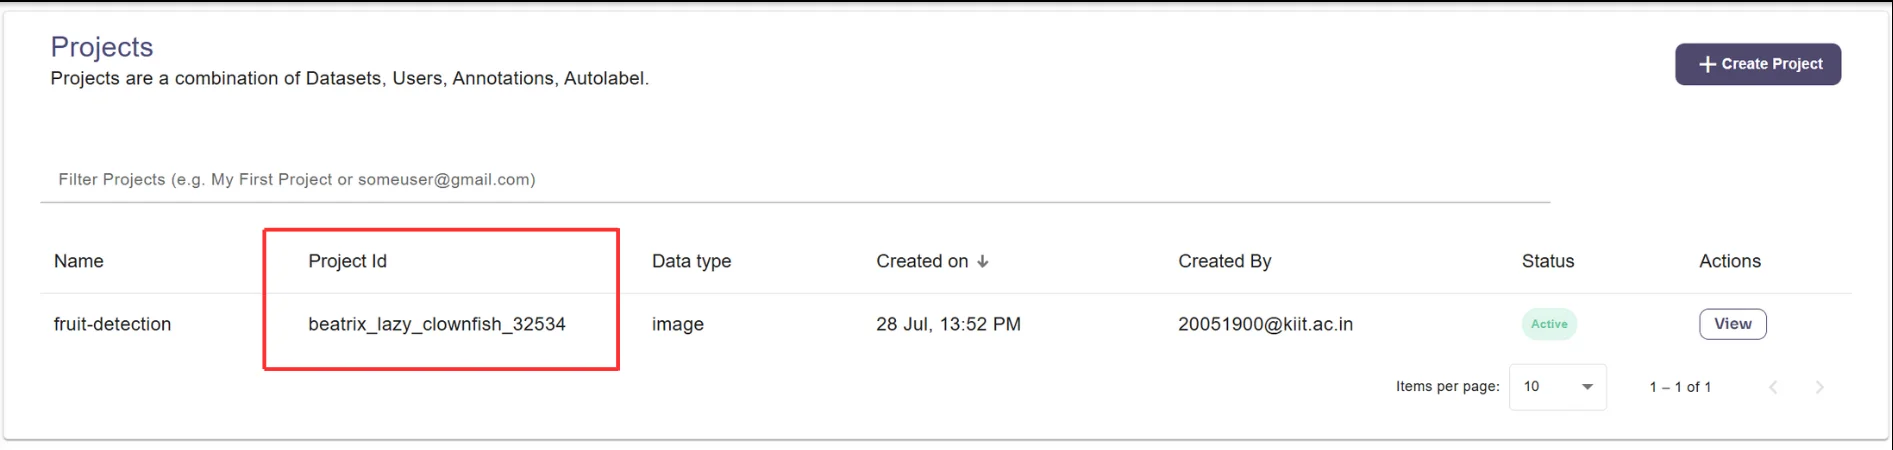
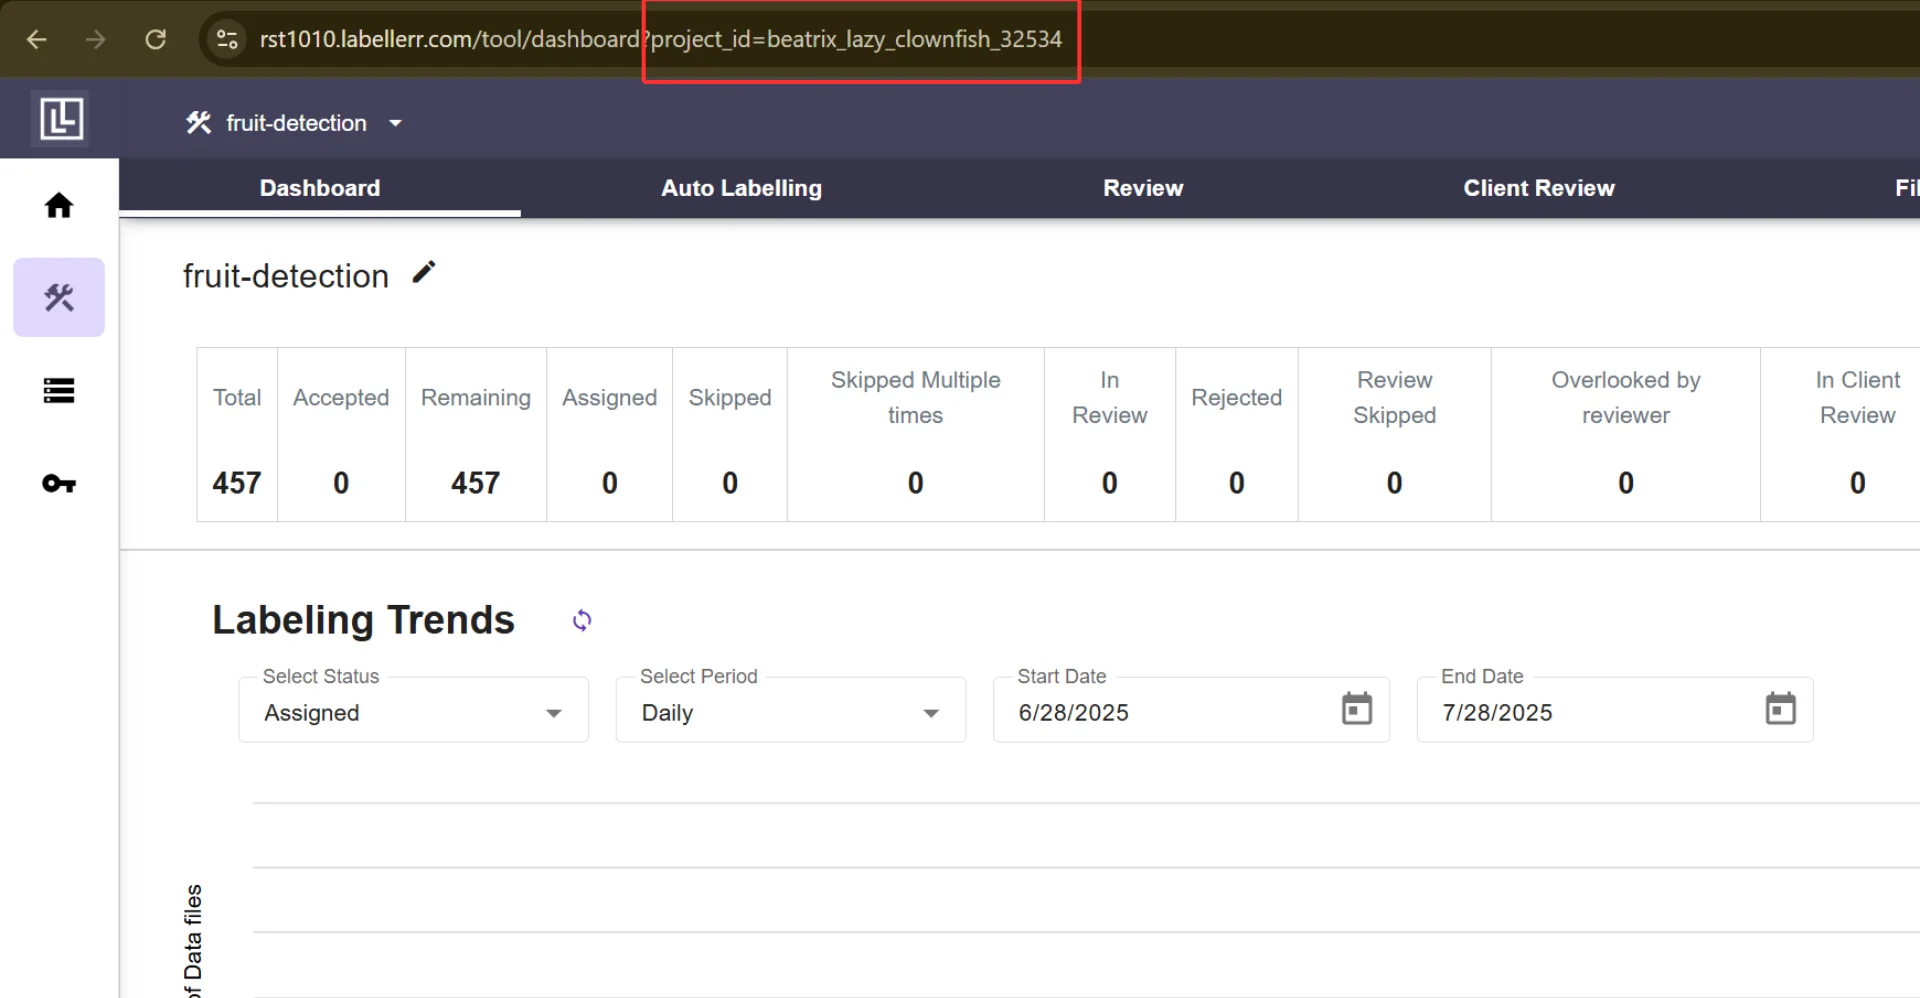
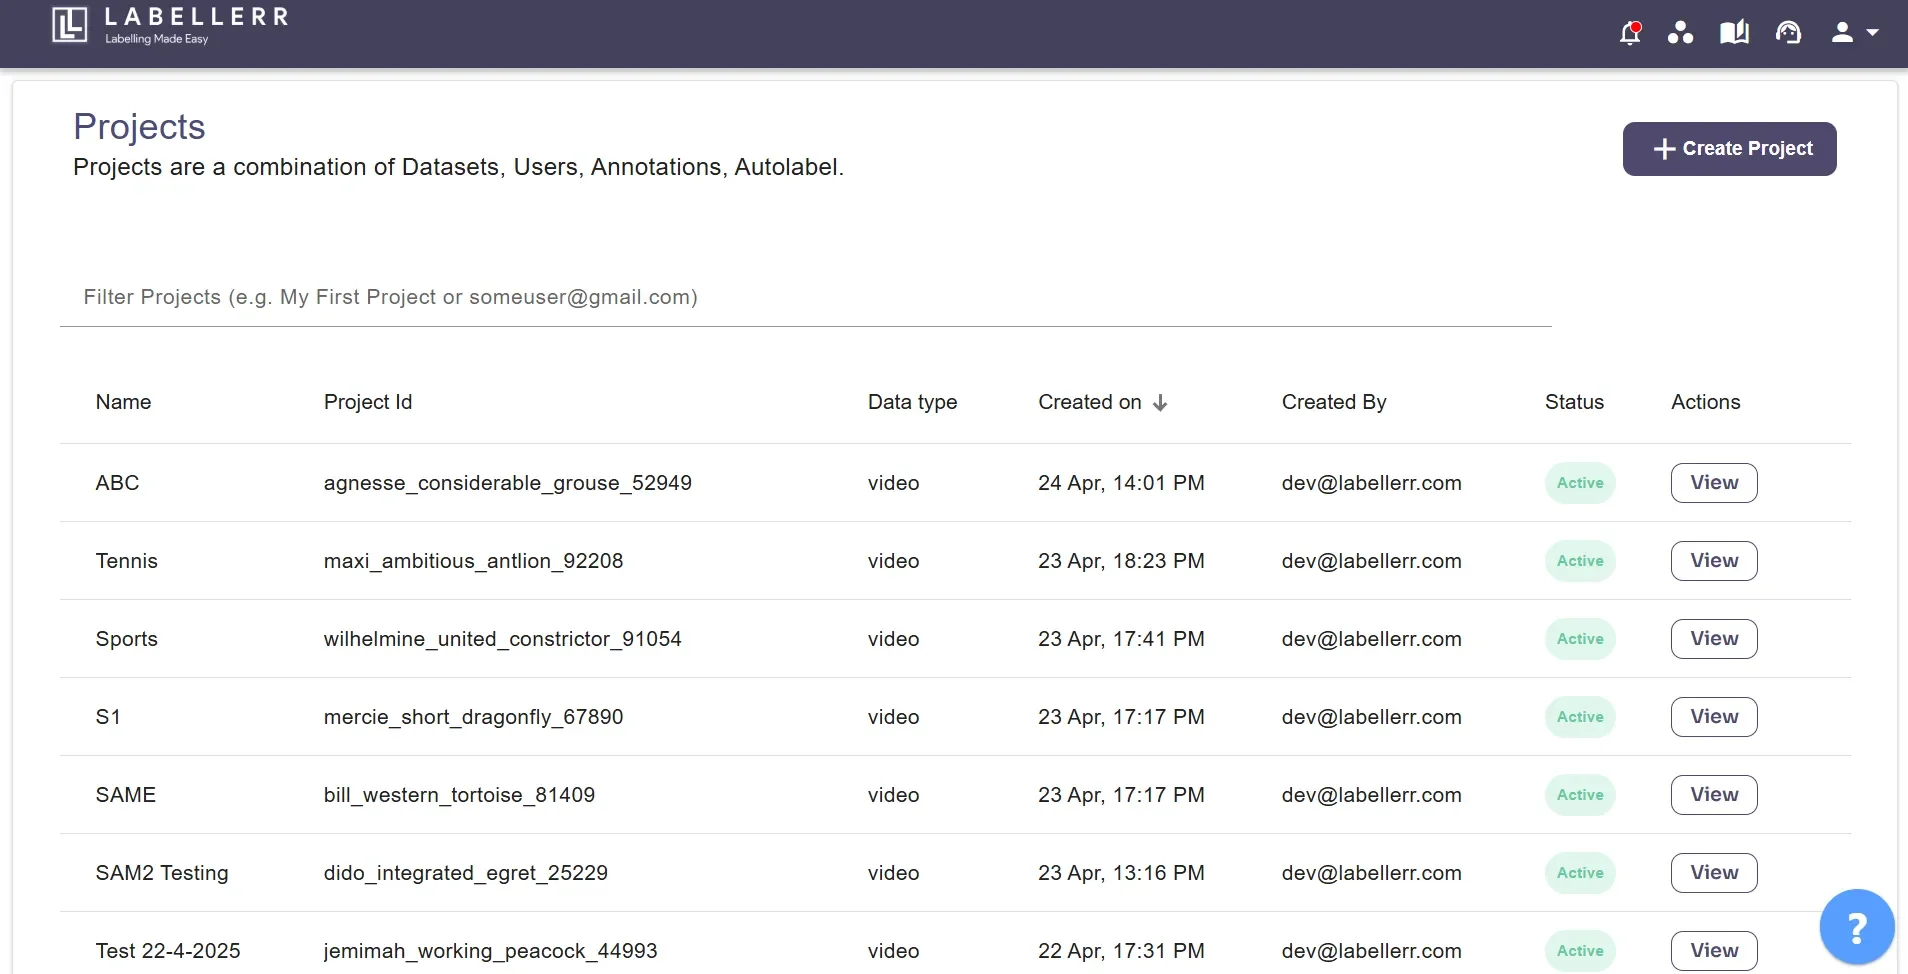 To find the project ID, check the URL in the web link of the project's dashboard, labeling, review/client review screens, or navigate to the project's page and find it under that particular project as a column.
 For further assistance contact [support@tensormatics.com](mailto:support@tensormatics.com)